Your First Transaction
Hello, Developer! Welcome to your first transaction on Algorand!
This guide shows how to send your first ALGO and ASA (Algorand Standard Asset) transactions using AlgoKit. You will then learn how to combine transactions into an atomic transaction group.
By the end, you will:
- Send a payment transaction
- Opt in to an ASA
- Transfer an ASA
- Build an atomic transaction group
If you want to learn more about opt-in or atomic transaction groups, see these docs:
When you’re ready, let’s dive in!
Build a Transaction Group
Section titled “Build a Transaction Group”-
Follow the steps in Getting Ready To Build to start LocalNet
-
Follow the steps in Using LORA (Live Onchain Resource Analyzer) to connect a test wallet funded with Algo.
When selecting the
unencrypted-default-walletoption, LORA will actually give you 3 funded test wallets to easily switch between. This will come in handy for this tutorial. -
Follow the steps in Your First Asset to create the asset that we’ll transfer.
-
Navigate to the Txn Wizard and click
Add Transaction, and we will begin building the Atomic Transaction Group.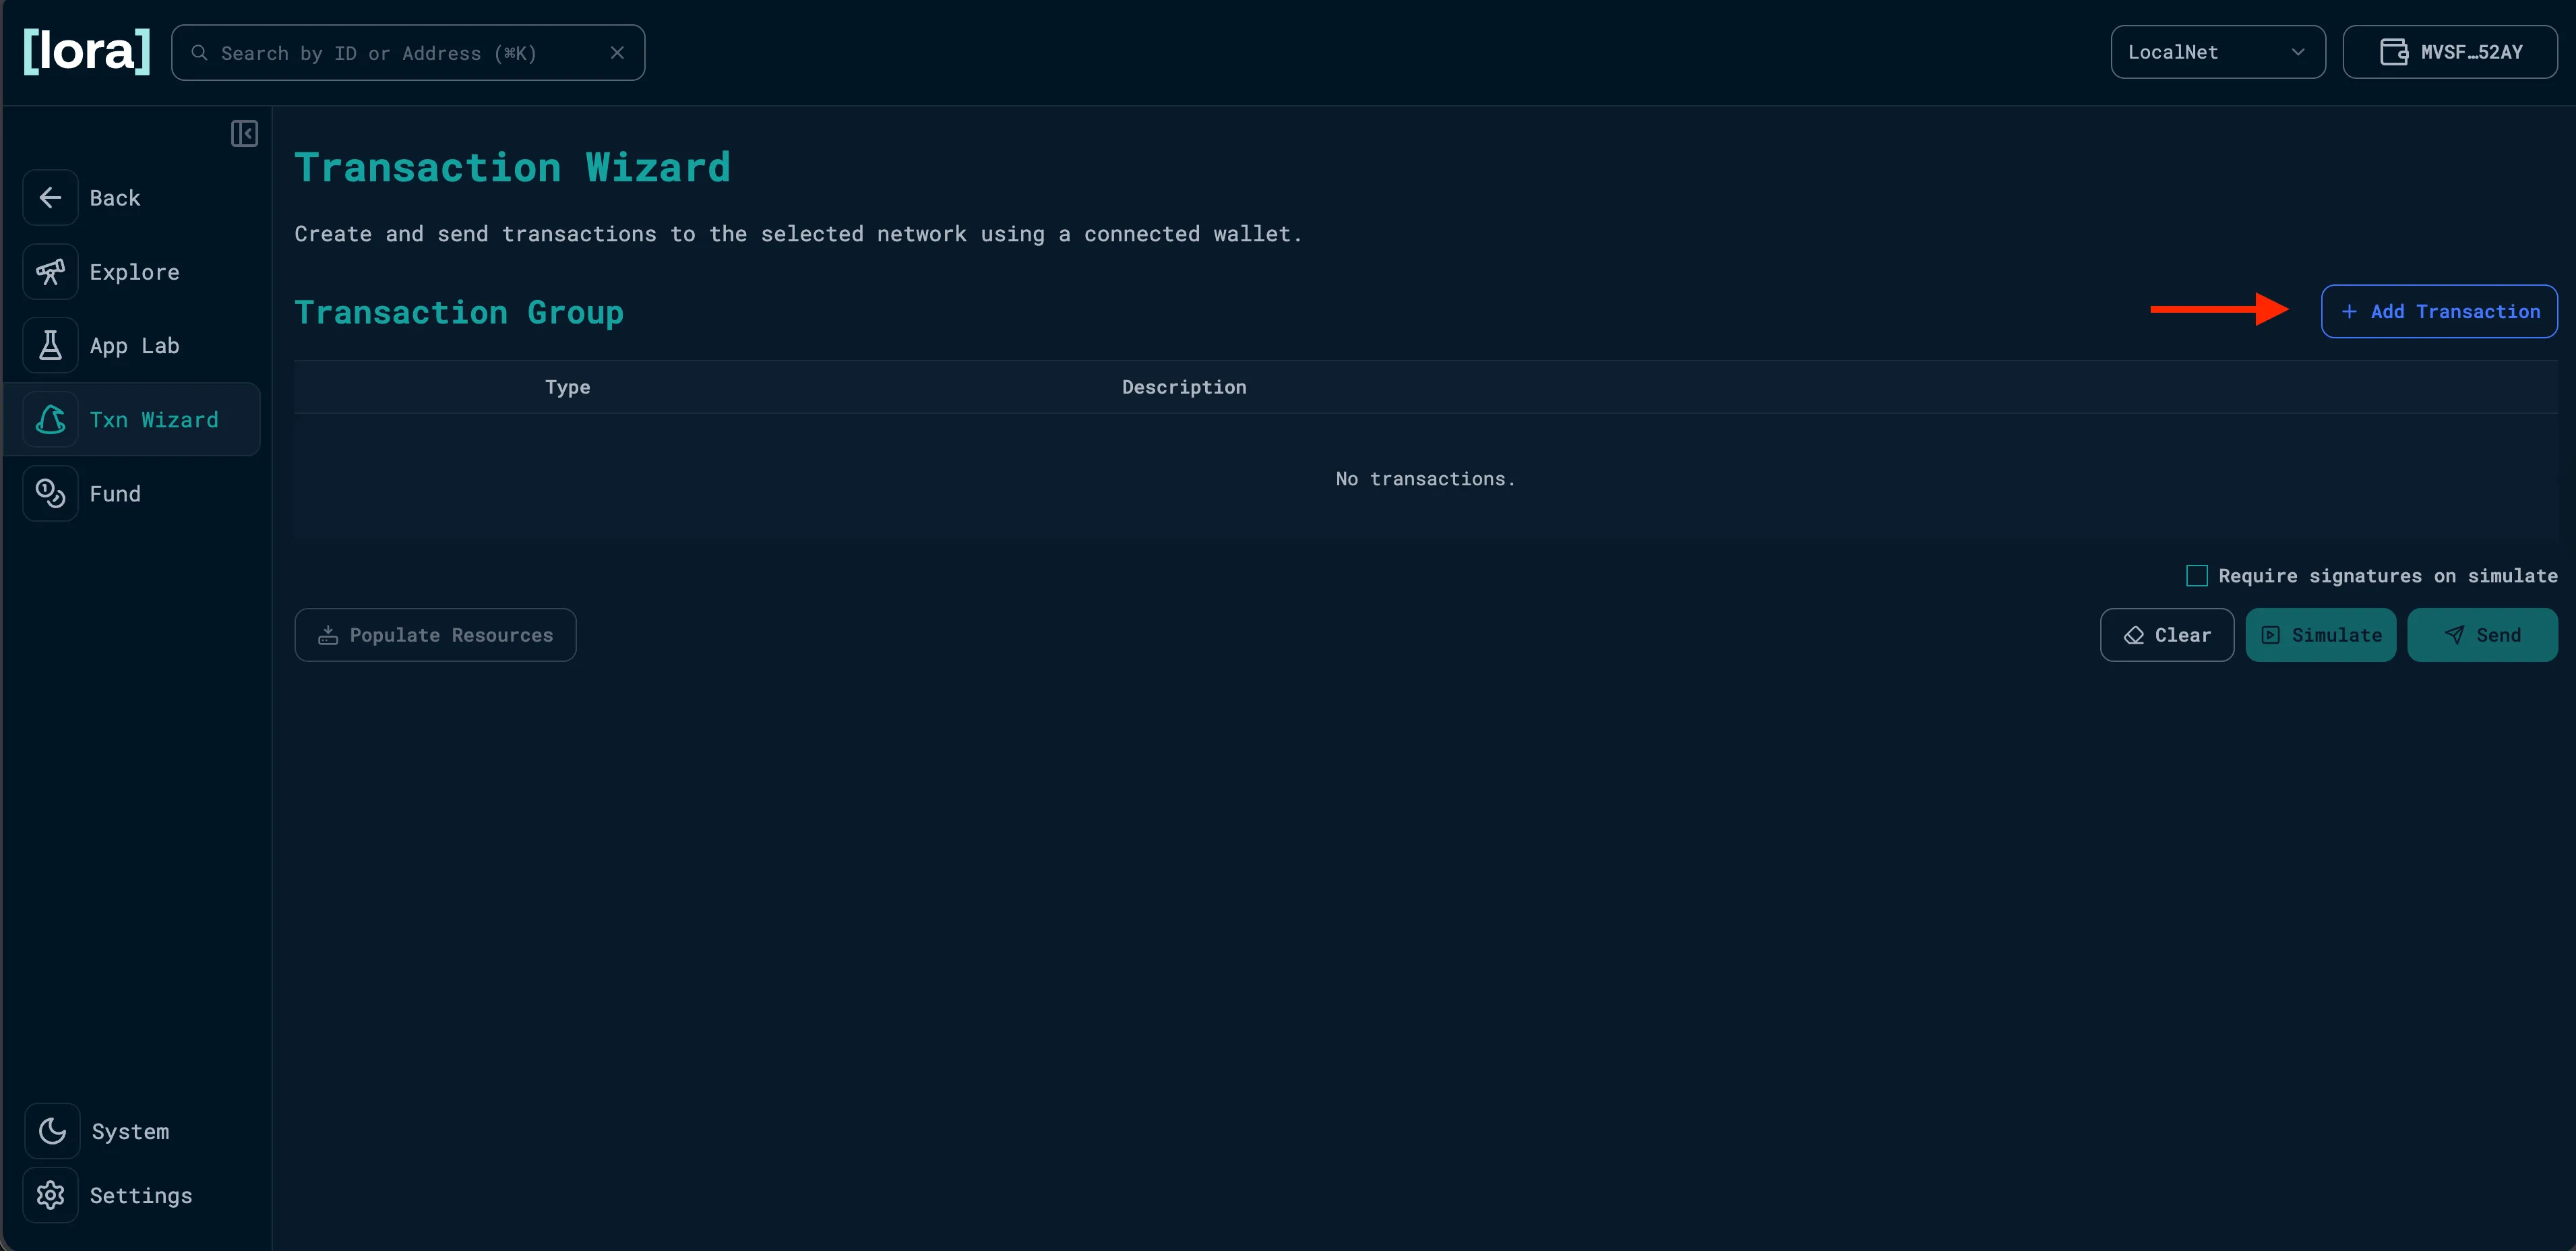
Add Transaction a. Fund the receiving account with 1 Algo.
The recieving account (Bob) must opt-in to the asset before receiving it. Since opting in requires a transaction, Bob needs ALGO to pay the fee.
The first transaction sends 1 ALGO from the asset creator account (Alice) to Bob to cover this. Here’s what that looks like:
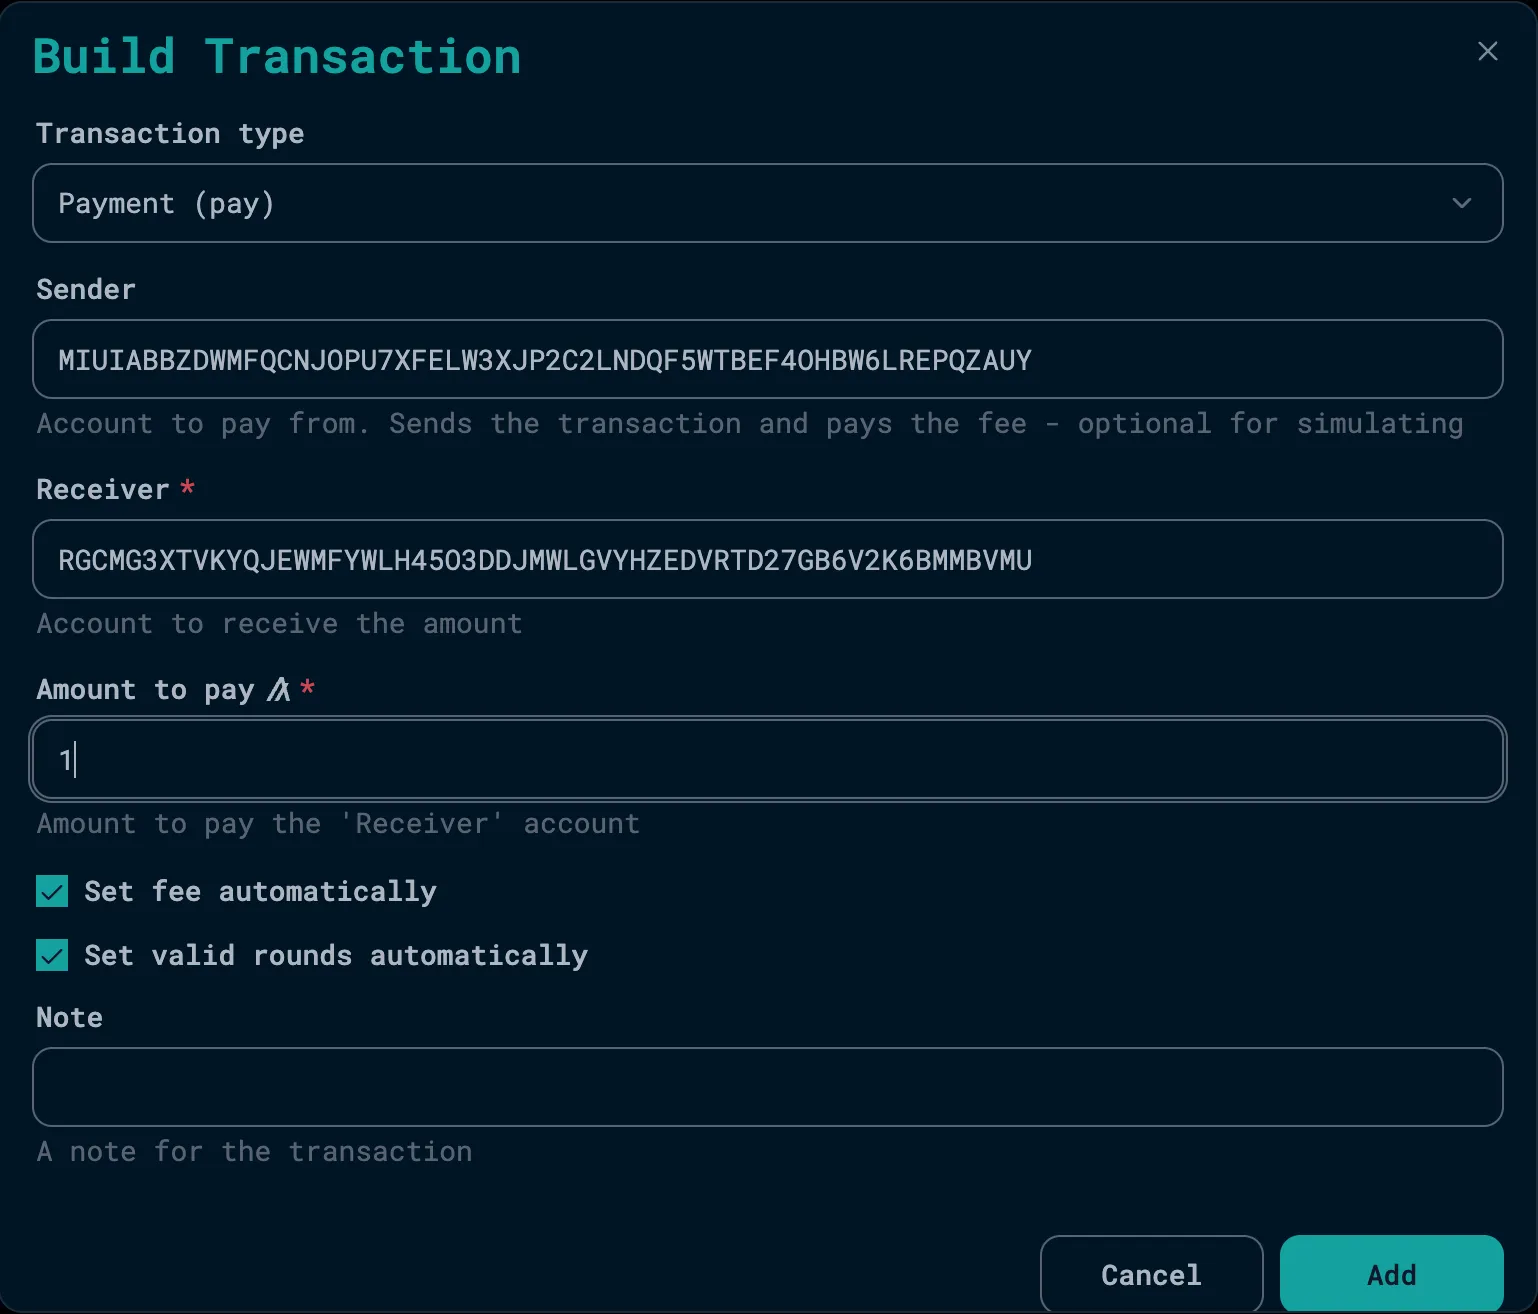
Alice Funds Bob's Account To get Bob’s address, select it from the account dropdown and click the copy symbol beside it. You can then paste it into the transaction builder under
Receiver. Remember to switch back to Alice’s account because she will be the mainSenderof the transactions in this group.Click
Addand it will be added to the group.b. Add Bob’s Opt-in Transaction.
Now that Bob has the Algo to pay for transactions, he can opt in to receive MFA. Here’s what that looks like:
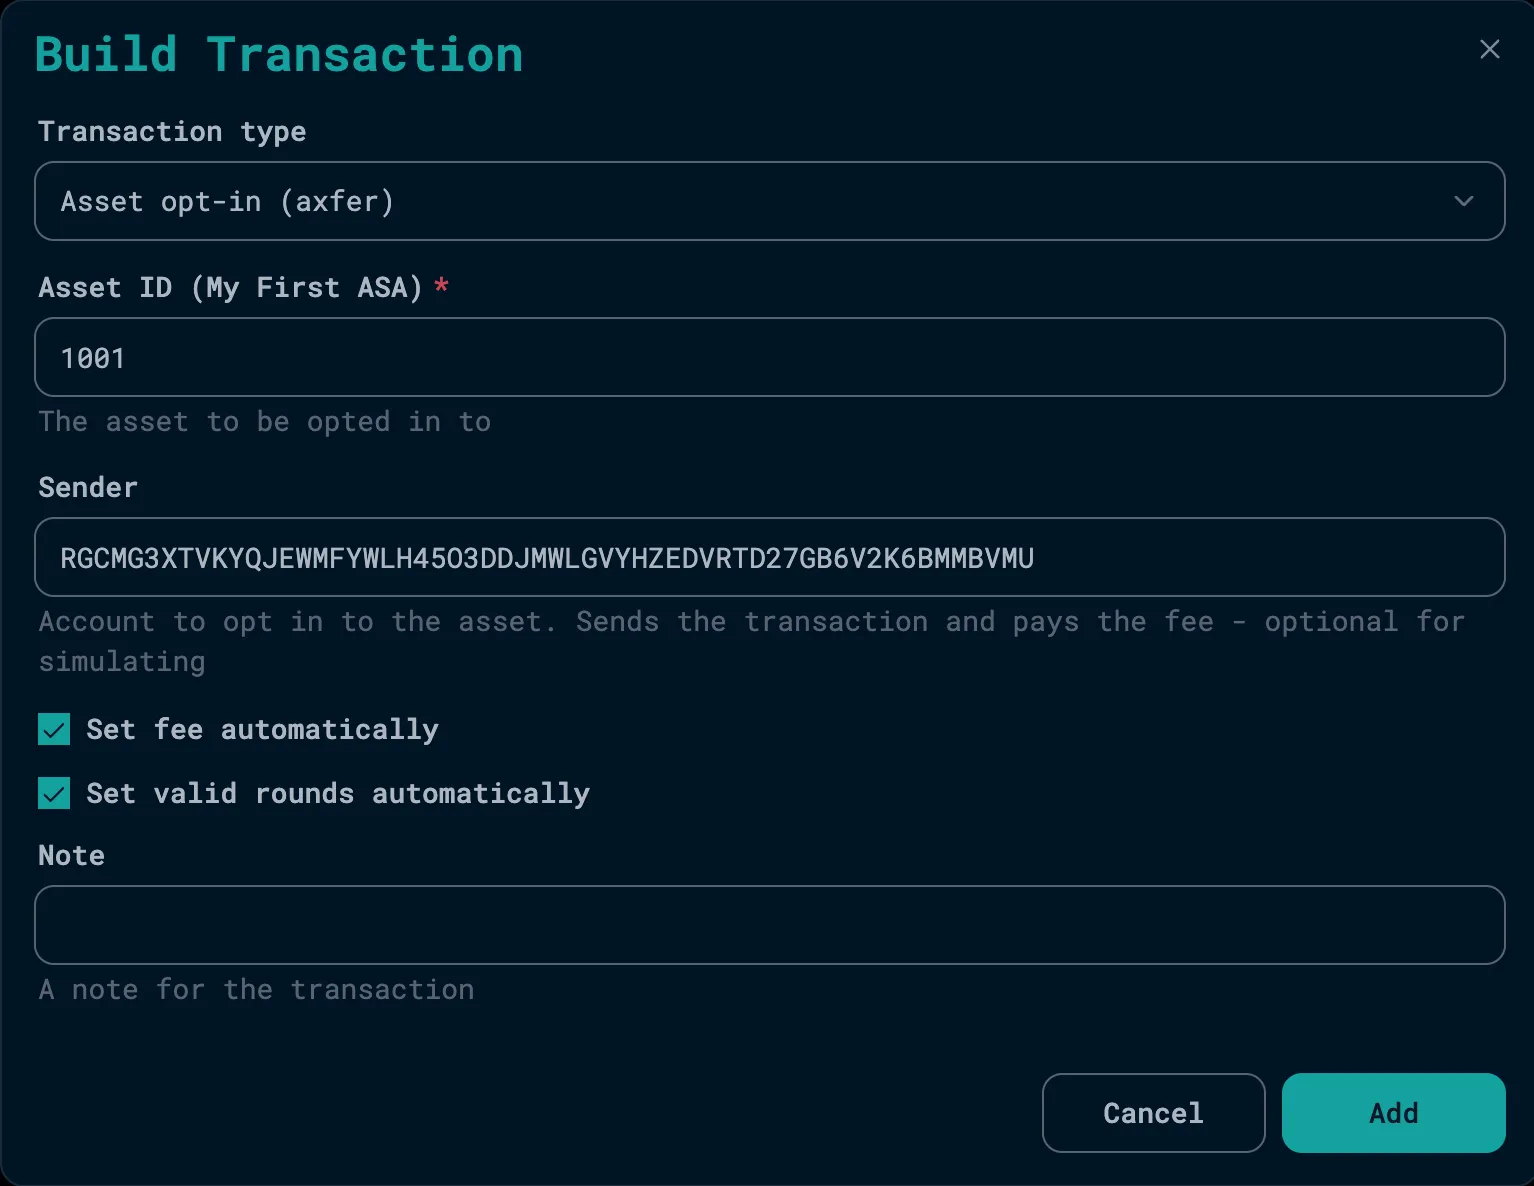
Bob Opts in Make sure you are inputting the correct ID for the asset you created in the previous steps. You’ll notice that an opt-in transaction is Bob sending a zero amount of an asset to his own address.
c. Add MFA transfer Transaction.
Now that Bob has opted in to receiving MFA, we can add a transaction that sends MFA from Alice to Bob. Here’s what that looks like:
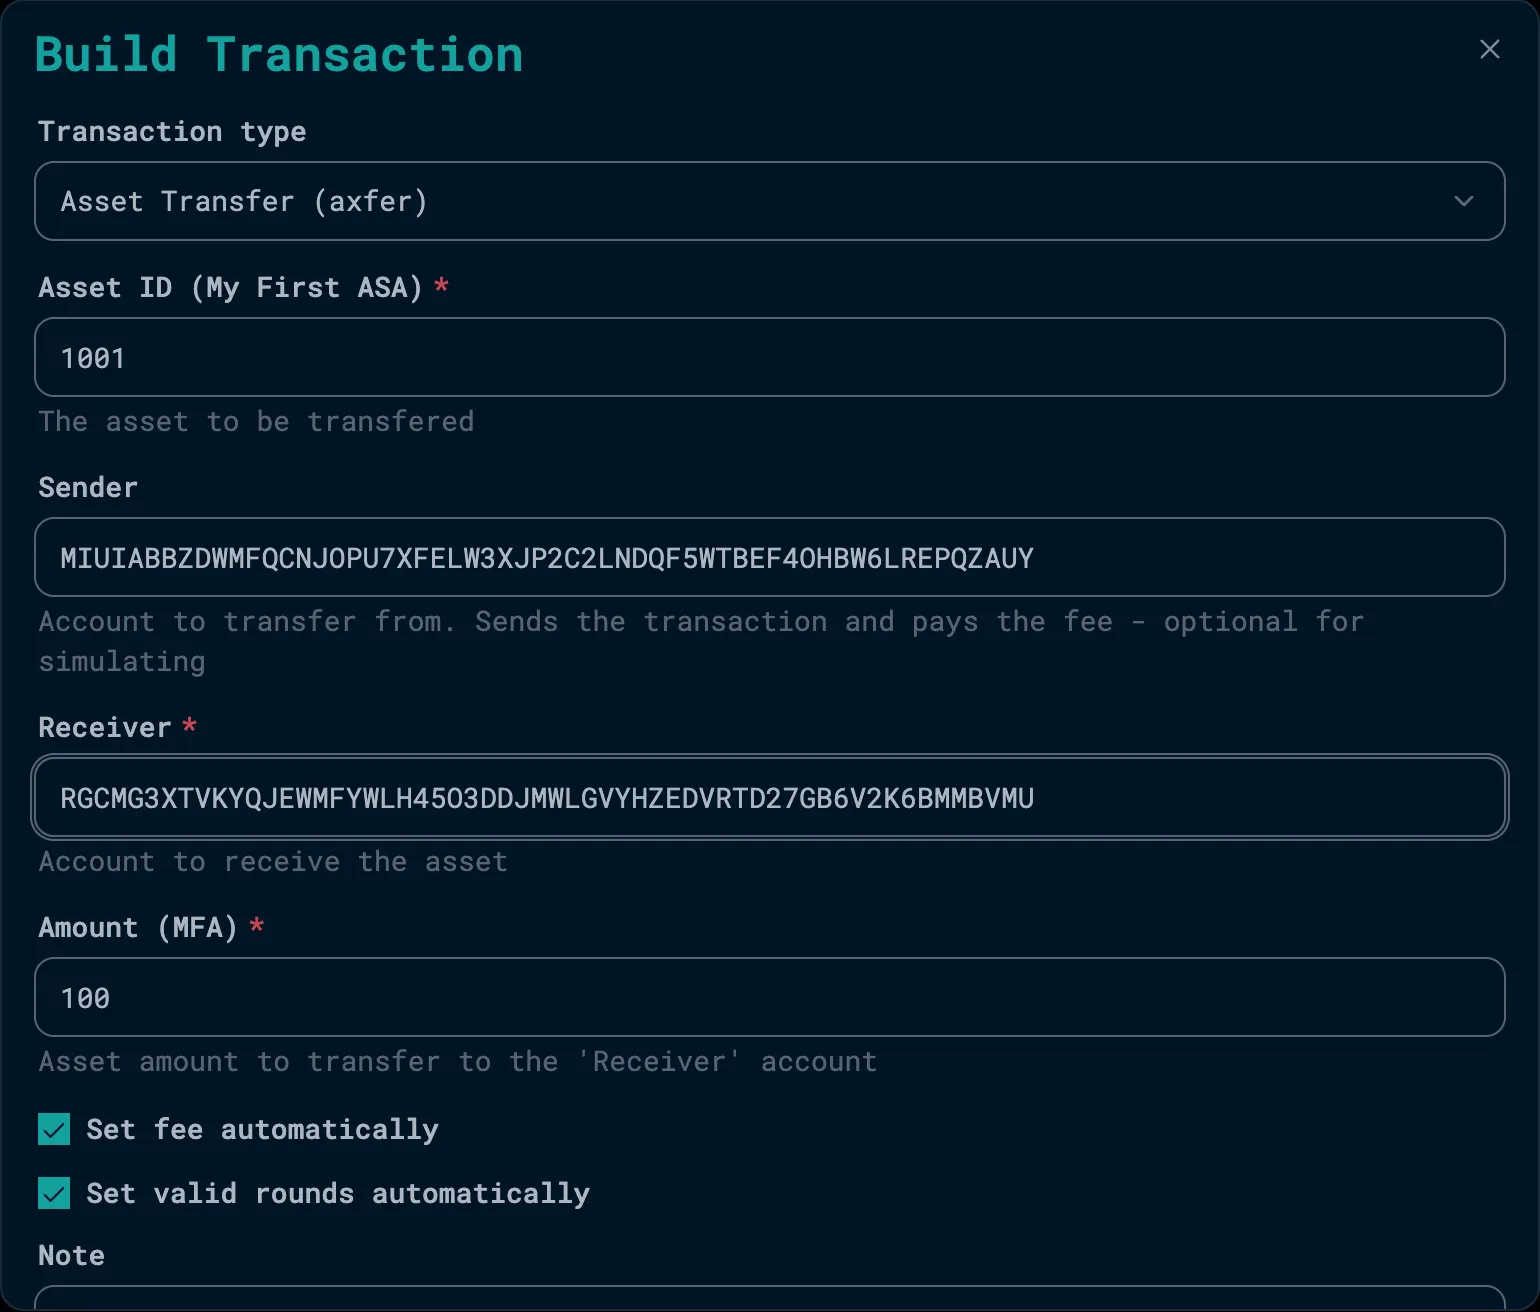
Send MFA d. Review Transaction Group.
Look over the transaction group to make sure all the parameters are correct. Here’s what it should look like:
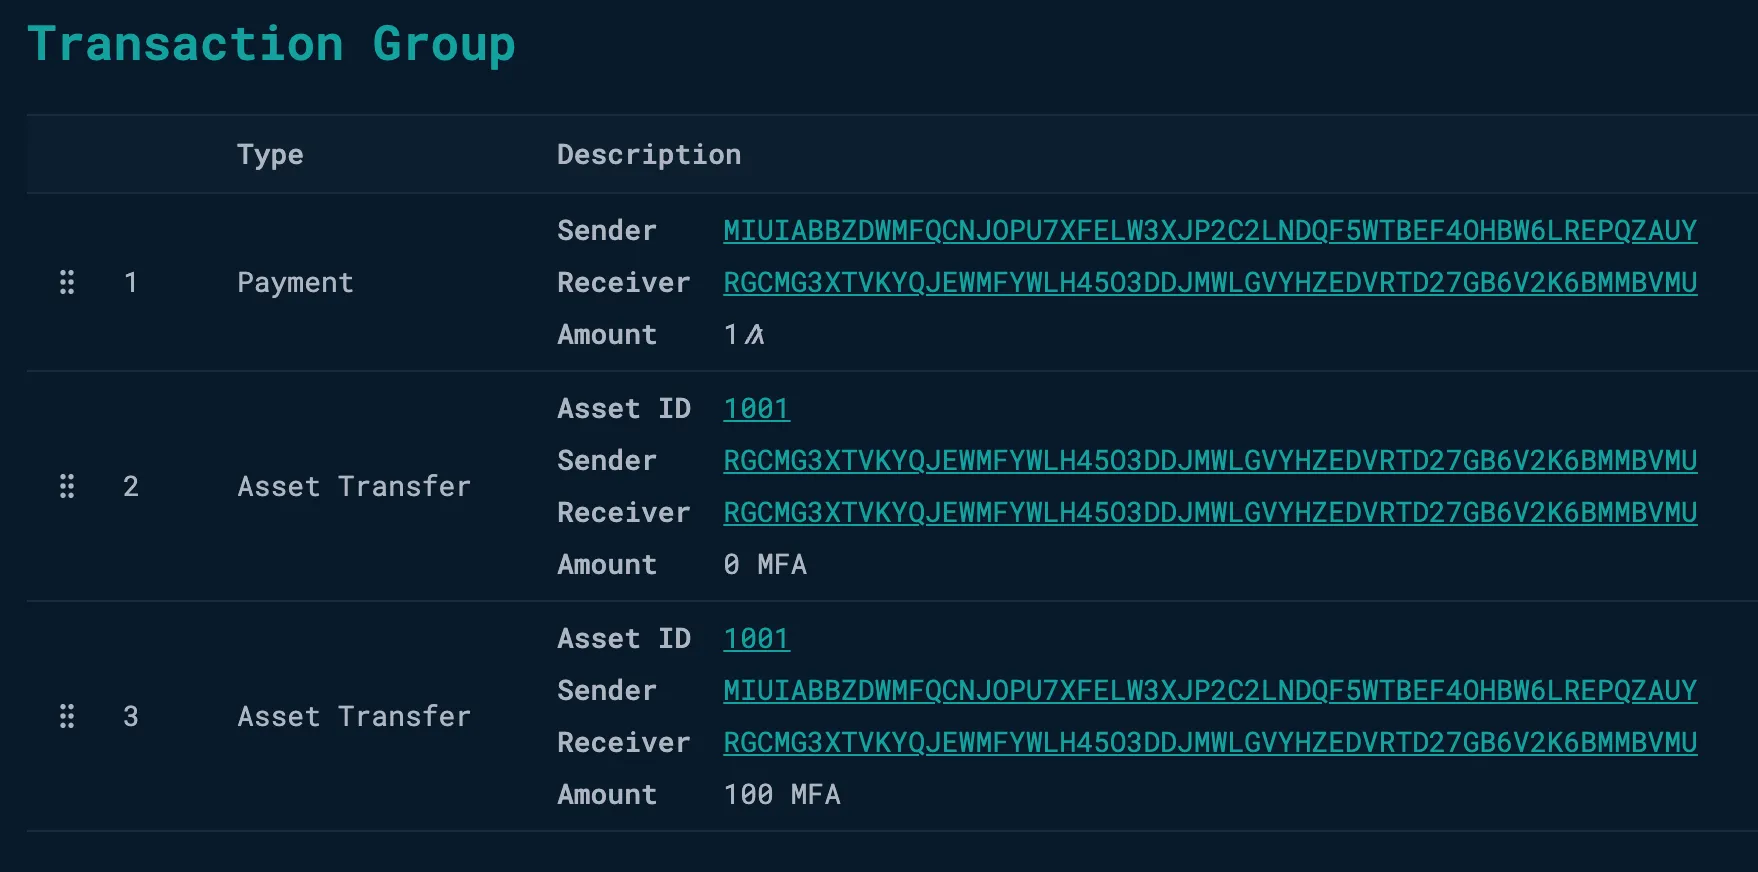
Complete Transaction Group e. Submit the Group Transaction.
Click the
Submitbutton to execute the Transaction Group. You should see a visualization of the sequence of events that looks something like this:
Transaction Visualizatoin
-
Follow the steps in Getting Ready To Build to start LocalNet
-
Create a new file where you will write the script that will create the transaction group. You can create it wherever you’d like, but in this example, we’ve created it in the root directory and called it
first-transaction.ts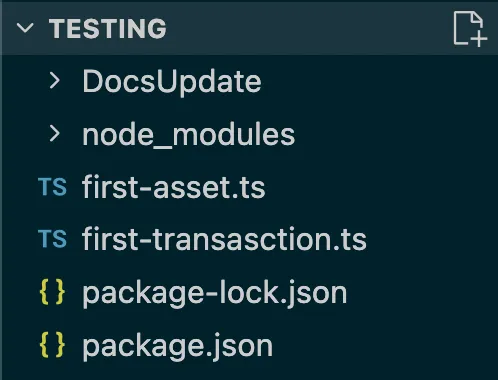
File Structure -
Write the script that will build and send your transaction group.
Each of the following sub-sections will add code to the file you just created:
a. Initialize the Algorand client
import { AlgorandClient, algo } from "@algorandfoundation/algokit-utils";async function main(): Promise<void> {const assetId = 1002n; // Input your Asset ID from the previous Tutorialconsole.log("👋 Starting your first transaction...");const algorand = AlgorandClient.defaultLocalNet(); // Create a client connected to LocalNetb. Create test accounts
const alice = await algorand.account.fromEnvironment('ALICE'); // Should already be funded from the previous tutorialconst bob = await algorand.account.fromEnvironment('BOB', algo(0)); // Create Bob without funding so we can demonstrate funding him in the groupconsole.log(`Alice's address: ${alice.addr}`);console.log(`Bob's address: ${bob.addr}`);c. Create an atomic transaction group
//Build Atomic Transaction Groupconst groupResult = await algorand.send.newGroup().addPayment({ // Alice sends 1 ALGO to Bob. Try removing this transaction and you'll see that the entire group will fail.sender: alice.addr,receiver: bob.addr,amount: algo(1),}).addAssetOptIn({ // Bob opts into the assetsender: bob.addr,assetId: assetId,}).addAssetTransfer({ // Alice transfers 100 MFA to Bobsender: alice.addr,receiver: bob.addr,assetId: assetId,amount: 100_000_000n,}).send()console.log(`Atomic group confirmed with TxnID: ${groupResult.txIds[0]}`);}d. Call the main function
main().catch(console.error);d. The final script should look like this:
import { AlgorandClient, algo } from '@algorandfoundation/algokit-utils';async function main(): Promise<void> {const assetId = 1002n;console.log('👋 Starting your first transaction...');const algorand = AlgorandClient.defaultLocalNet();const alice = await algorand.account.fromEnvironment('ALICE');const bob = await algorand.account.fromEnvironment('BOB', algo(0));console.log(`Alice's address: ${alice.addr}`);console.log(`Bob's address: ${bob.addr}`);//Build Atomic Transaction Groupconst groupResult = await algorand.send.newGroup().addPayment({// Alice sends 1 ALGO to Bob. Try removing this transaction and you'll see that the entire group will fail.sender: alice.addr,receiver: bob.addr,amount: algo(1),}).addAssetOptIn({// Bob opts into the assetsender: bob.addr,assetId: assetId,}).addAssetTransfer({// Alice transfers 100 MFA to Bobsender: alice.addr,receiver: bob.addr,assetId: assetId,amount: 100_000_000n,}).send();console.log(`Atomic group confirmed with TxnID: ${groupResult.txIds[0]}`);}main().catch(console.error); -
Run the script:
npx tsx first-transaction.ts -
Your console log should look something like this:

Transaction logs -
You’ve successfully created and sent an Atomic Transaction Group programmatically! To view it on the blockchain, you can use LORA (Live Onchain Resource Analyzer). In your terminal, type the following command to open it in the browser:
algokit explore
-
Follow the steps in Getting Ready To Build to start LocalNet
-
Create a new file where you will write the script that will create the transaction group. You can create it wherever you’d like, but in this example, we’ve created it in the root directory and called it
first_transaction.py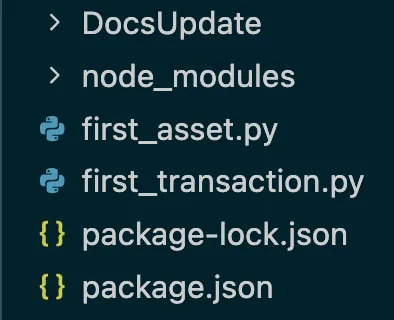
File Structure -
Write the script that will build and send your transaction group.
Set
asset_idto the ID of the asset you created in Your First Asset.Each of the following sub-sections will add code to the file you just created:
a. Initialize the Algorand client
from algokit_utils import AlgorandClient, PaymentParams, AssetOptInParams, AssetTransferParamsfrom algokit_utils.models.amount import AlgoAmountdef main() -> None:asset_id = 1002 # Input your Asset ID from the previous tutorialprint("👋 Starting your first transaction...")algorand = AlgorandClient.default_localnet()b. Create test accounts
alice = algorand.account.from_environment("ALICE")bob = algorand.account.from_environment("BOB", AlgoAmount(algo=0))print(f"Alice's address: {alice.addr}")print(f"Bob's address: {bob.addr}")c. Create an atomic transaction group
# Build Atomic Transaction Groupgroup_result = (algorand.new_group().add_payment( # Alice sends 1 ALGO to Bob. Try removing this transaction and you'll see that the entire group will fail.PaymentParams(sender=alice.addr,receiver=bob.addr,amount=AlgoAmount(algo=1),)).add_asset_opt_in( # Bob opts into the assetAssetOptInParams(sender=bob.addr,asset_id=asset_id,)).add_asset_transfer( # Alice transfers 100 MFA to BobAssetTransferParams(sender=alice.addr,receiver=bob.addr,asset_id=asset_id,amount=100_000_000,)).send())print(f"Atomic group confirmed with TxnID: {group_result.tx_ids[0]}")d. Call the main function
if __name__ == "__main__":main()e. The final script should look like this:
from algokit_utils import AlgorandClient, PaymentParams, AssetOptInParams, AssetTransferParamsfrom algokit_utils.models.amount import AlgoAmountdef main() -> None:asset_id = 1002print("👋 Starting your first transaction...")algorand = AlgorandClient.default_localnet()alice = algorand.account.from_environment("ALICE")bob = algorand.account.from_environment("BOB", AlgoAmount(algo=0))print(f"Alice's address: {alice.addr}")print(f"Bob's address: {bob.addr}")# Build Atomic Transaction Groupgroup_result = (algorand.new_group().add_payment( # Alice sends 1 ALGO to Bob. Try removing this transaction and you'll see that the entire group will fail.PaymentParams(sender=alice.addr,receiver=bob.addr,amount=AlgoAmount(algo=1),)).add_asset_opt_in( # Bob opts into the assetAssetOptInParams(sender=bob.addr,asset_id=asset_id,)).add_asset_transfer( # Alice transfers 100 MFA to BobAssetTransferParams(sender=alice.addr,receiver=bob.addr,asset_id=asset_id,amount=100_000_000,)).send())print(f"Atomic group confirmed with TxnID: {group_result.tx_ids[0]}")if __name__ == "__main__":main() -
Run the script:
python first_transaction.py -
Your console log should look something like this:

Transaction logs -
You’ve successfully created and sent an Atomic Transaction Group programmatically! To view it on the blockchain, you can use LORA (Live Onchain Resource Analyzer). In your terminal, type the following command to open it in the browser:
algokit explore
Inspect Transactions Onchain
Section titled “Inspect Transactions Onchain”Go to the Explore tab to see all the blocks and transactions produced by your script. You should see a block containing your atomic transaction group:
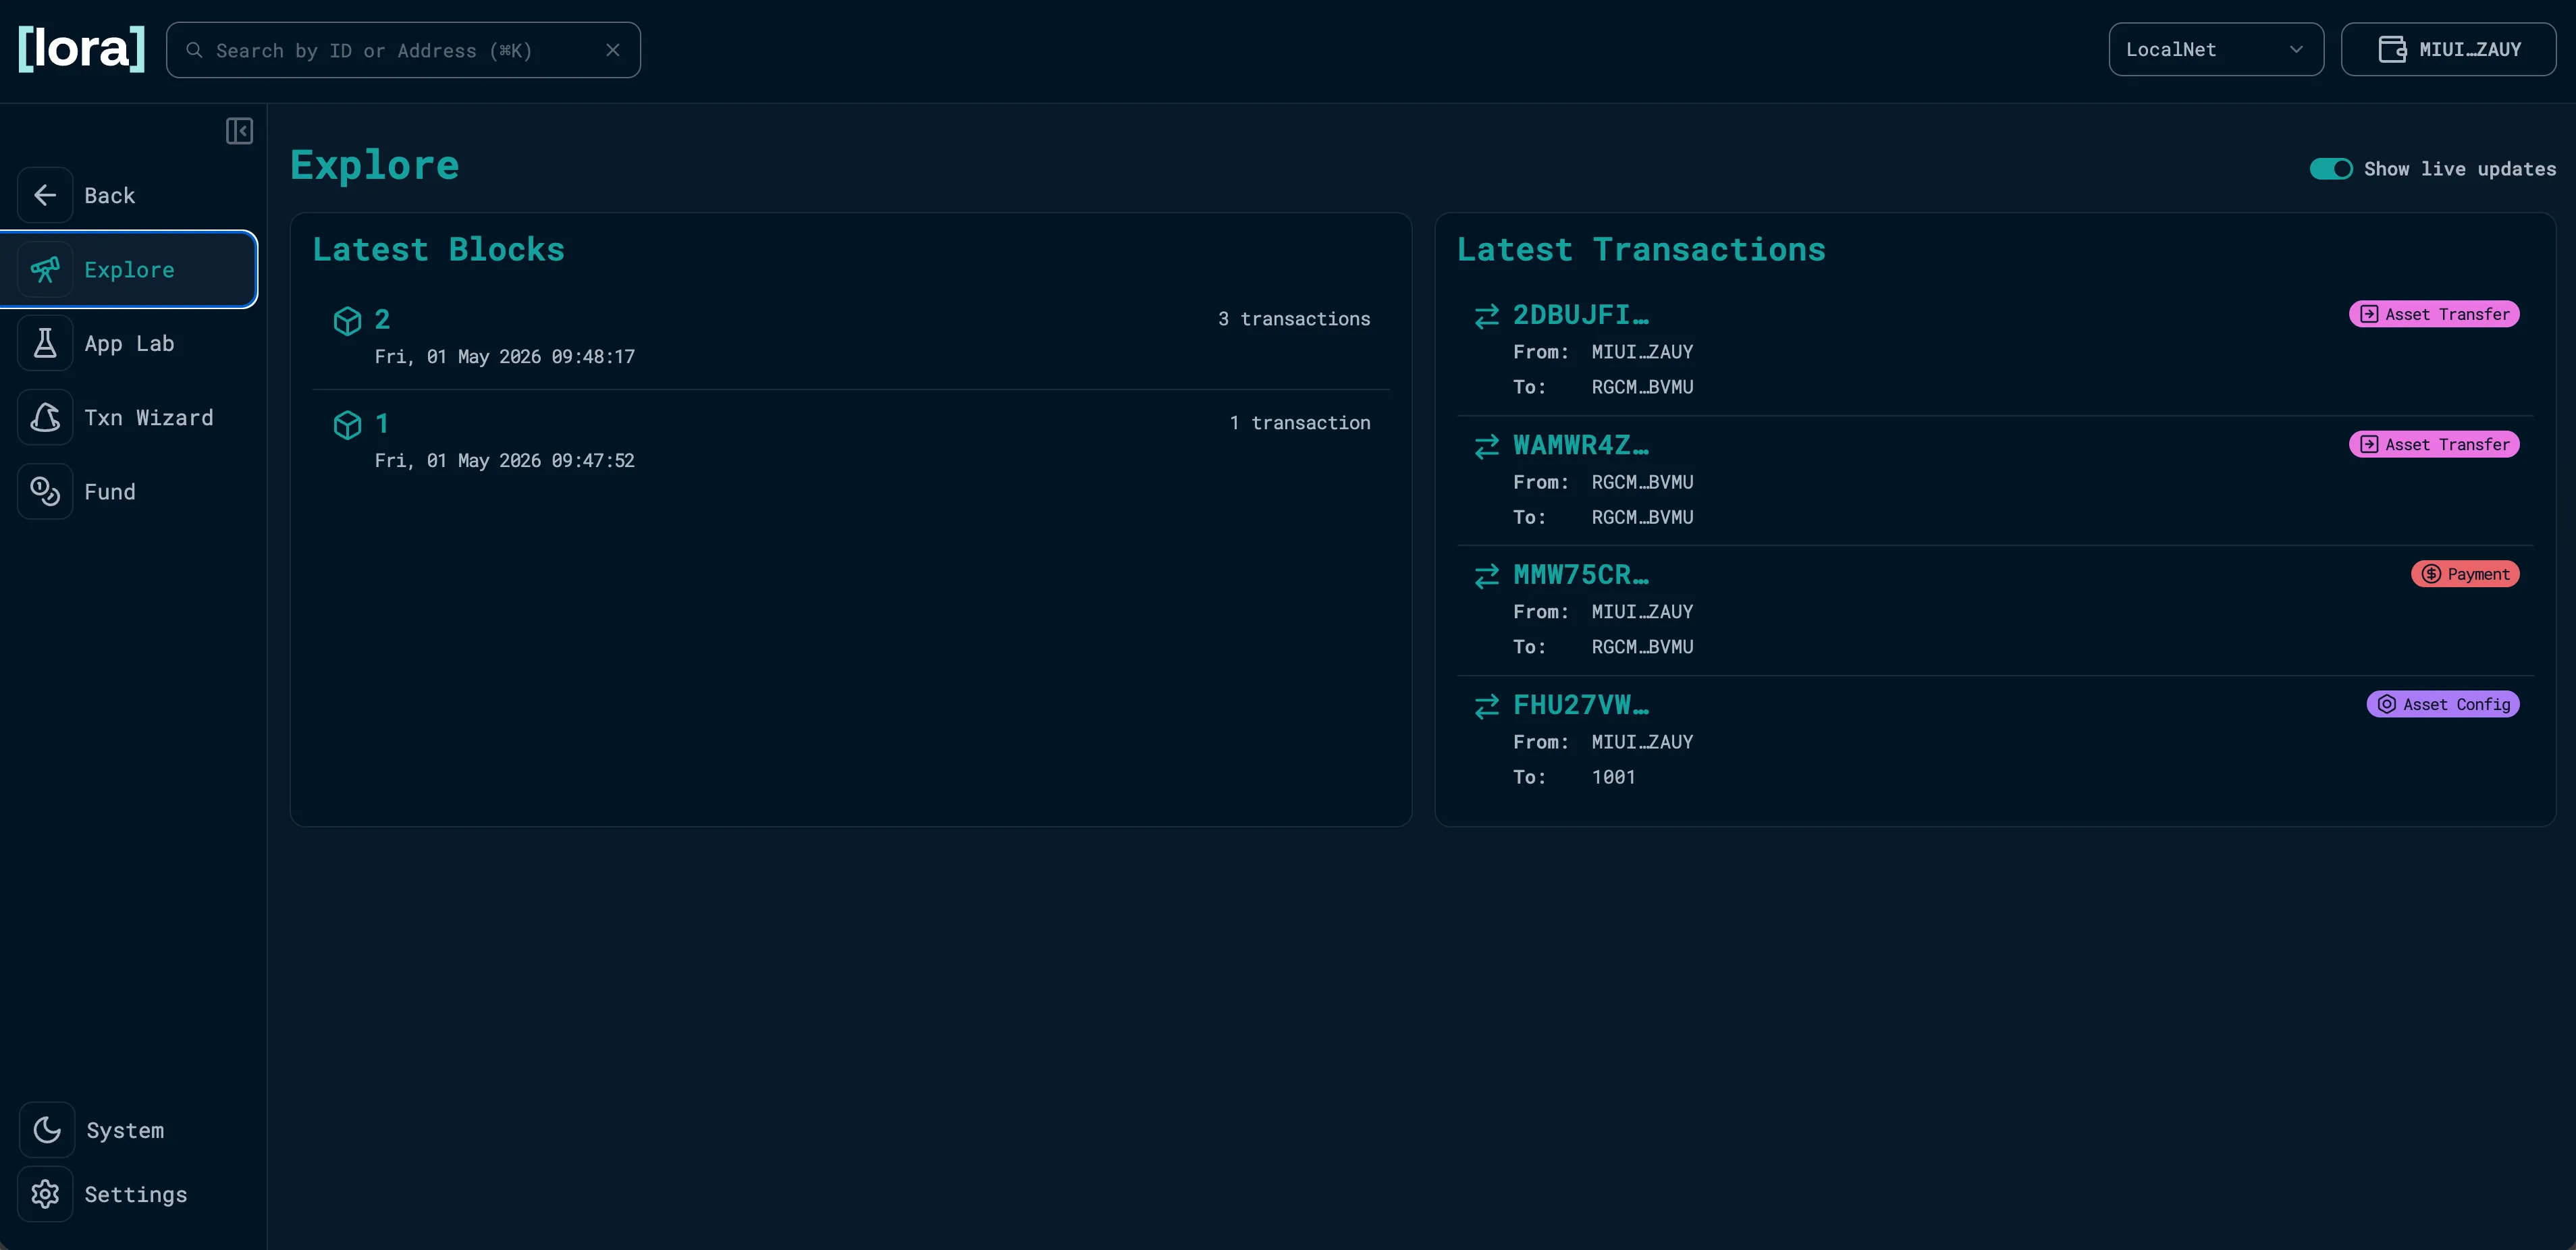
Click through the transactions to see how each step was executed and grouped together.
Next Steps
Section titled “Next Steps”You now know multiple ways to create and send assets. Next, we are going to start learning about custom smart contract development by going back to the Hello World template you selected in Getting Ready To Build.