Your First Asset
Hello, Developer! Let’s create your first asset on Algorand.
This guide shows two ways to create your first Algorand Standard Asset (ASA) on LocalNet.
By the end, you will:
- Create an ASA using LORA (Live Onchain Resource Analyzer)
- Create an ASA programmatically with TypeScript or Python
- View your asset onchain using LORA
If you want to know more about what ASAs are, check out the documentation here:
When you’re ready, let’s dive in!
Create an Asset
Section titled “Create an Asset”Creating an asset with LORA
Section titled “Creating an asset with LORA”-
Follow the steps in Getting Ready To Build to start LocalNet
-
Follow the steps in Using LORA to connect a test wallet funded with Algo.
-
Navigate to Txn Wizard.
-
Click
Add Transaction.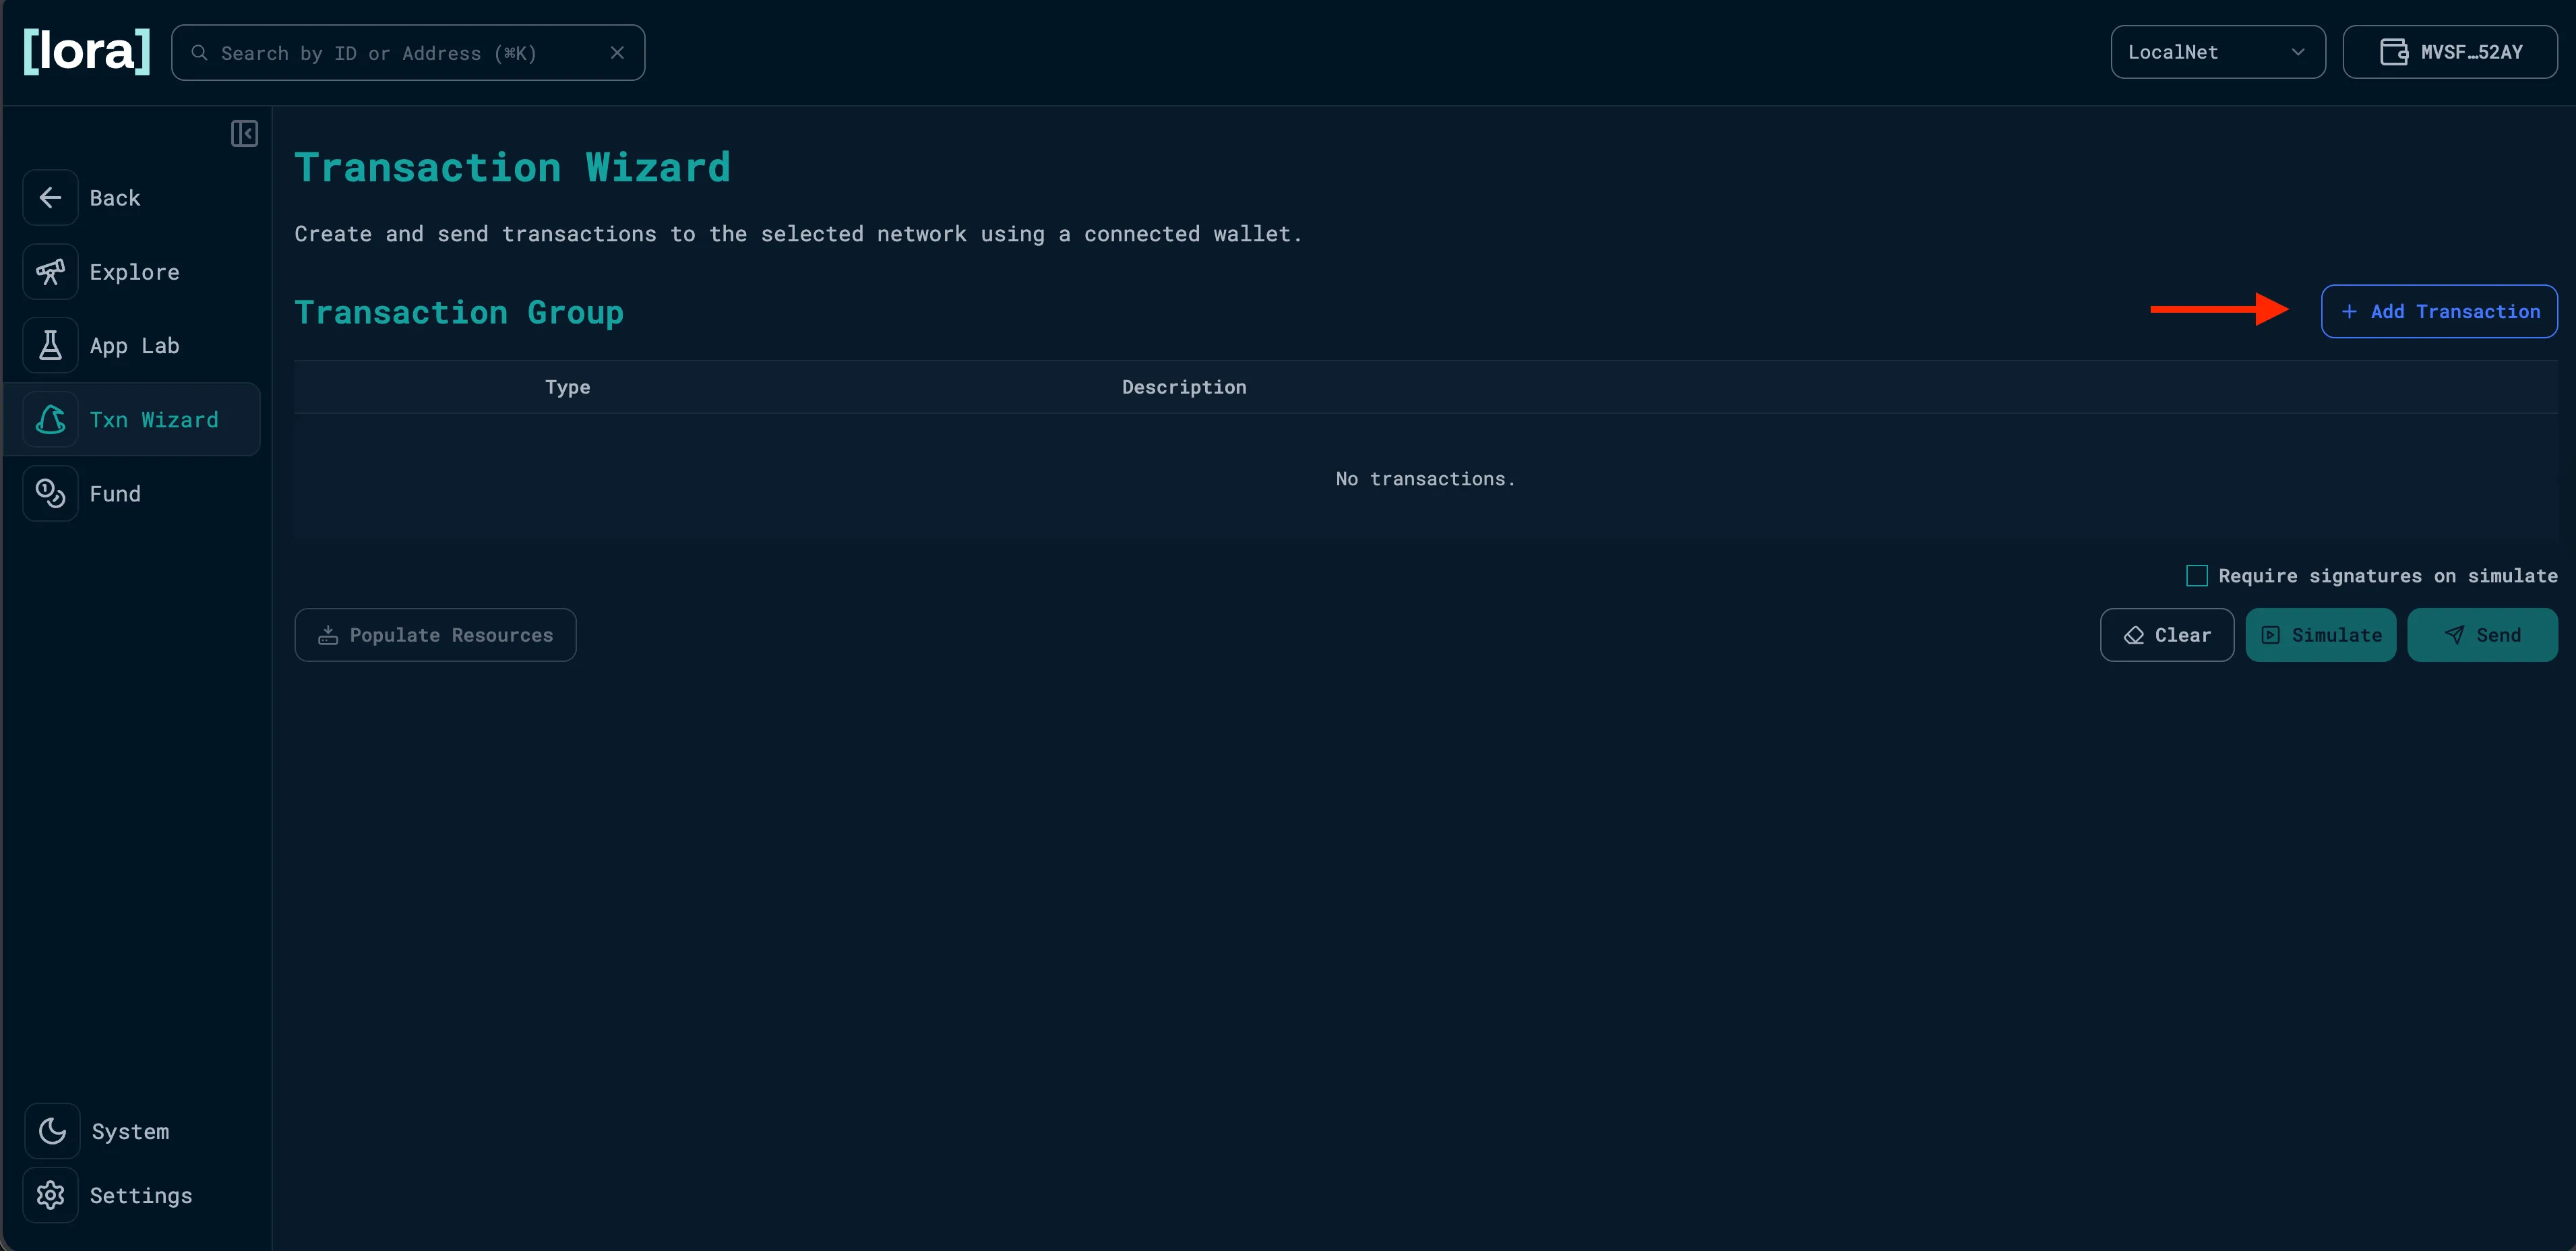
Add Transaction -
Choose
Asset createfrom the dropdown and fill out the asset configuration fields.For this example, we’ll use the following basic config:
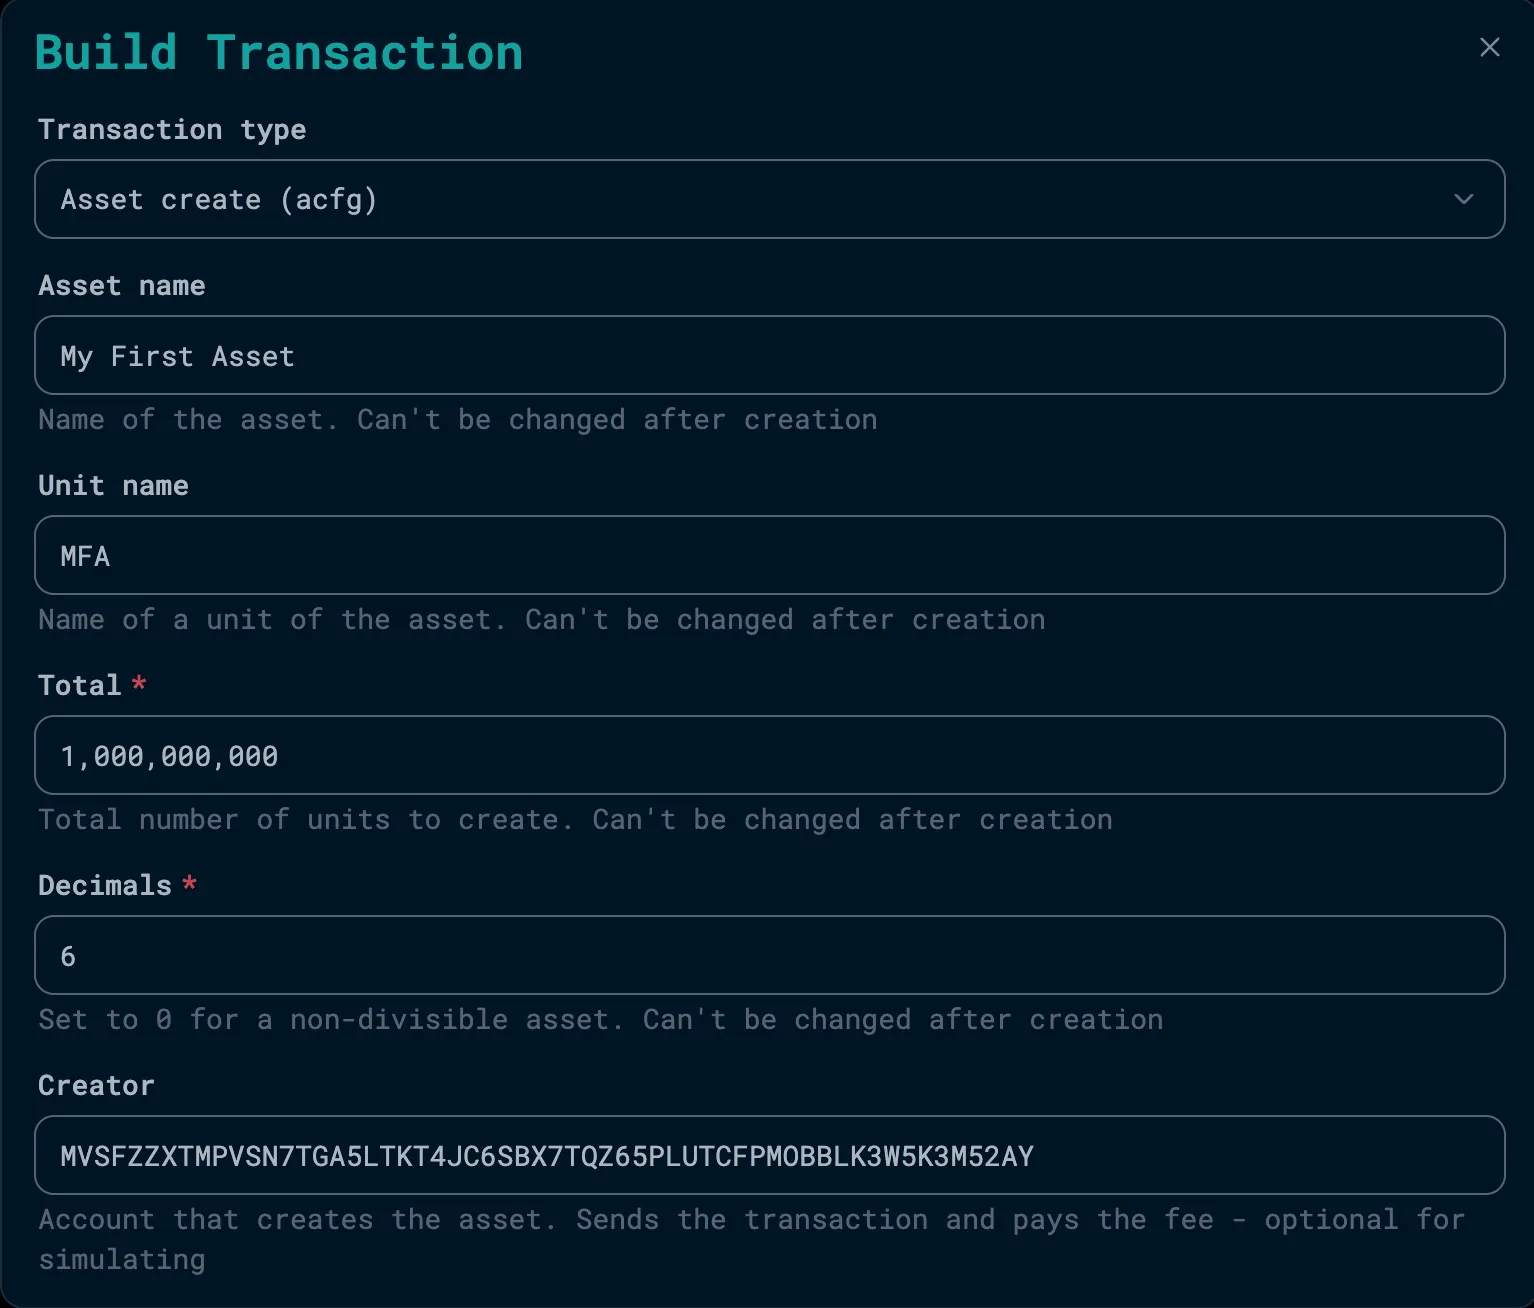
Asset Configuration The creator field is auto-populated with your connected wallet address.
For more information on the optional fields like Manager, Reserve, Freeze, and Clawback, check out the ASA documentation.
-
Click
Addand the Asset Config transaction will be added to the transaction group. ClickSendto submit the transaction.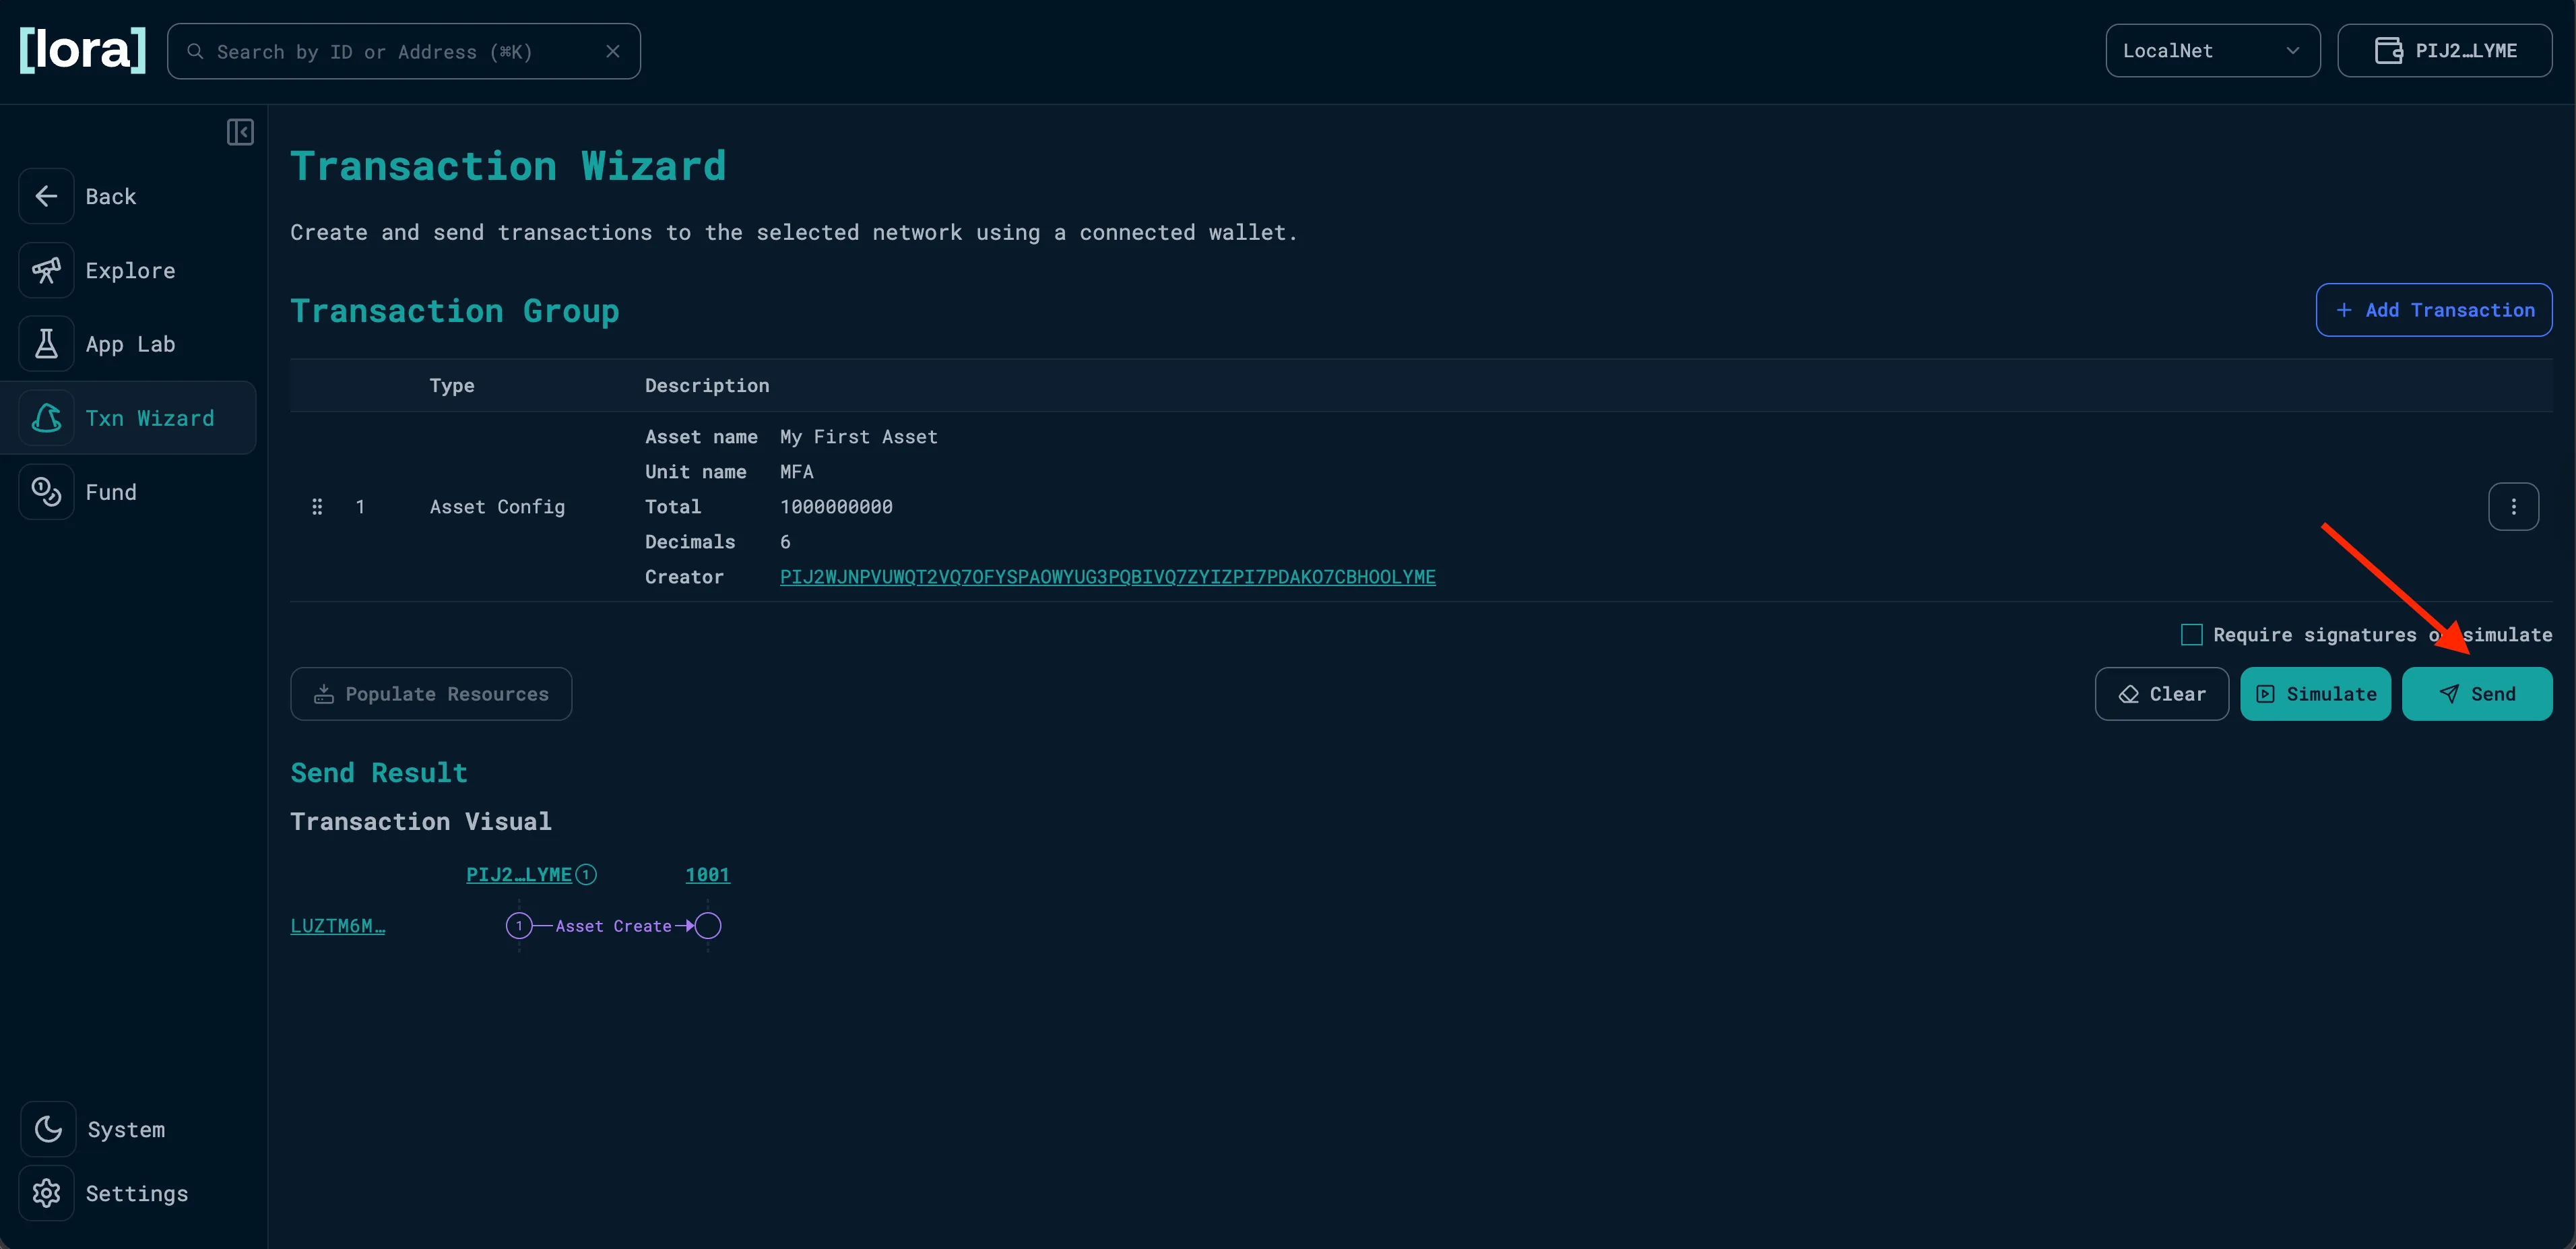
Submit Transaction -
You’ve now successfully created an asset using LORA! Next, try creating the asset using TypeScript or Python.
-
Follow the steps in Getting Ready To Build to initialize a new AlgoKit project and start LocalNet
-
Create a new file where we will write the script that will create your new asset. You can create it wherever you’d like, but in this example, we’ve created it in the root directory and called it
first-asset.ts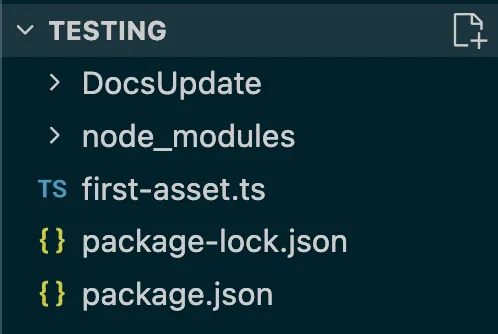
File Structure -
Write the script that will create the asset.
Each of the following sub-sections will add code to the file you just created:
a. Initialize the client and create the test account that will create the asset
import { AlgorandClient, algo } from "@algorandfoundation/algokit-utils";async function main(): Promise<void> {console.log("🚀 Creating your first asset...");const algorand = AlgorandClient.defaultLocalNet(); // Create a client connected to LocalNetconst alice = await algorand.account.fromEnvironment("ALICE", algo(100)); // ALICE is a pre-funded LocalNet test accountconsole.log(`Alice: ${alice.addr}`);b. Define the parameters for the assetCreate() method
const result = await algorand.send.assetCreate({//Mandatory fieldssender: alice.addr,decimals: 6, //Number decimal places a whole unit can be broken up intototal: 1_000_000_000n, // Total supply in base units (includes decimals)defaultFrozen: false,//Optional asset config fieldsassetName: 'My First ASA',unitName: 'MFA',manager: alice.addr,reserve: alice.addr,freeze: alice.addr,clawback: alice.addr,url: 'https://algorand.co',});//Capture the unique asset ID of the asset after it's createdconst assetId = result.assetId; // This is automatically assigned to each ASA as it's createdconsole.log(`Asset created with ID: ${assetId}`);}c. Call the main function
main().catch(console.error); //Calls the function when you run the scriptd. Final script:
import { AlgorandClient, algo } from "@algorandfoundation/algokit-utils";async function main(): Promise<void> {console.log("🚀 Creating your first asset...");const algorand = AlgorandClient.defaultLocalNet();const alice = await algorand.account.fromEnvironment("ALICE", algo(100));console.log(`Alice: ${alice.addr}`);const result = await algorand.send.assetCreate({//Mandatory fieldssender: alice.addr,total: 1_000_000_000n,decimals: 6,defaultFrozen: false,//Optional asset config fieldsassetName: 'My First ASA',unitName: 'MFA',manager: alice.addr,reserve: alice.addr,freeze: alice.addr,clawback: alice.addr,url: 'https://algorand.co',});//Capture the unique asset ID of the asset after it's createdconst assetId = result.assetId;console.log(`Asset created with ID: ${assetId}`);}main().catch(console.error); -
Run the script:
npx tsx first-asset.ts -
Your console log should look something like this:

Create Asset Logs -
You’ve successfully created a new asset programmatically! To view it onchain, you can use LORA. In your terminal, type the following command to open it in the browser:
algokit explore
You can now check the Explore tab, and you will see that a new block was created containing your Create Asset transaction. Click on that to view information about the transaction.

-
Follow the steps in Getting Ready To Build to initialize a new AlgoKit project and start LocalNet
-
Create a new file where we will write the script that will create your new asset. You can create it wherever you’d like, but in this example, we’ve created it in the root directory and called it
first_asset.py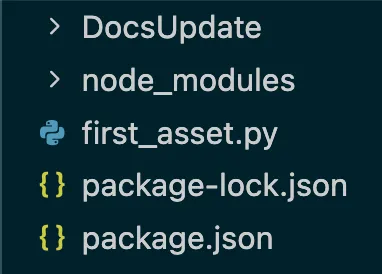
File Structure -
Write the script that will create the asset.
Each of the following sub-sections will add code to the file you just created:
a. Initialize the client and create the test account that will create the asset
from algokit_utils import AlgorandClient, AlgoAmount, AssetCreateParamsdef main():print("🚀 Creating your first asset...")algorand = AlgorandClient.default_localnet()alice = algorand.account.from_environment("ALICE", AlgoAmount(algo=100))print(f"Alice: {alice.address}")b. Define the parameters for the asset_create() method
result = algorand.send.asset_create(AssetCreateParams(# Mandatory fieldssender=alice.address,total=1_000_000_000, # Amount of whole units of the assetdecimals=6, # Amount of fractional units of the assetdefault_frozen=False,# Optional asset config fieldsasset_name="My First ASA",unit_name="MFA",manager=alice.address,reserve=alice.address,freeze=alice.address,clawback=alice.address,url="https://algorand.co",))# Capture the unique asset ID of the asset after it's createdasset_id = result.asset_idprint(f"Asset created with ID: {asset_id}")c. Call the main function
if __name__ == "__main__":main()d. Final script:
from algokit_utils import AlgorandClient, AlgoAmount, AssetCreateParamsdef main():print("🚀 Creating your first asset...")algorand = AlgorandClient.default_localnet()alice = algorand.account.from_environment("ALICE", AlgoAmount(algo=100))print(f"Alice: {alice.address}")result = algorand.send.asset_create(AssetCreateParams(# Mandatory fieldssender=alice.address,total=1_000_000_000, # Amount of whole units of the assetdecimals=6, # Amount of fractional units of the assetdefault_frozen=False,# Optional asset config fieldsasset_name="My First ASA",unit_name="MFA",manager=alice.address,reserve=alice.address,freeze=alice.address,clawback=alice.address,url="https://algorand.co",))# Capture the unique asset ID of the asset after it's createdasset_id = result.asset_idprint(f"Asset created with ID: {asset_id}")if __name__ == "__main__":main() -
Run the script:
python first_asset.py -
Your console log should look something like this:

Create Asset Logs -
You’ve successfully created a new asset programmatically! To view it onchain, you can use LORA. In your terminal, type the following command to open it in the browser:
algokit explore
You can now check the Explore tab, and you will see that a new block was created containing your Create Asset transaction. Click on that to view information about the transaction.
View Your Asset onchain with LORA
Section titled “View Your Asset onchain with LORA”-
If you haven’t already, open LORA and connect your wallet
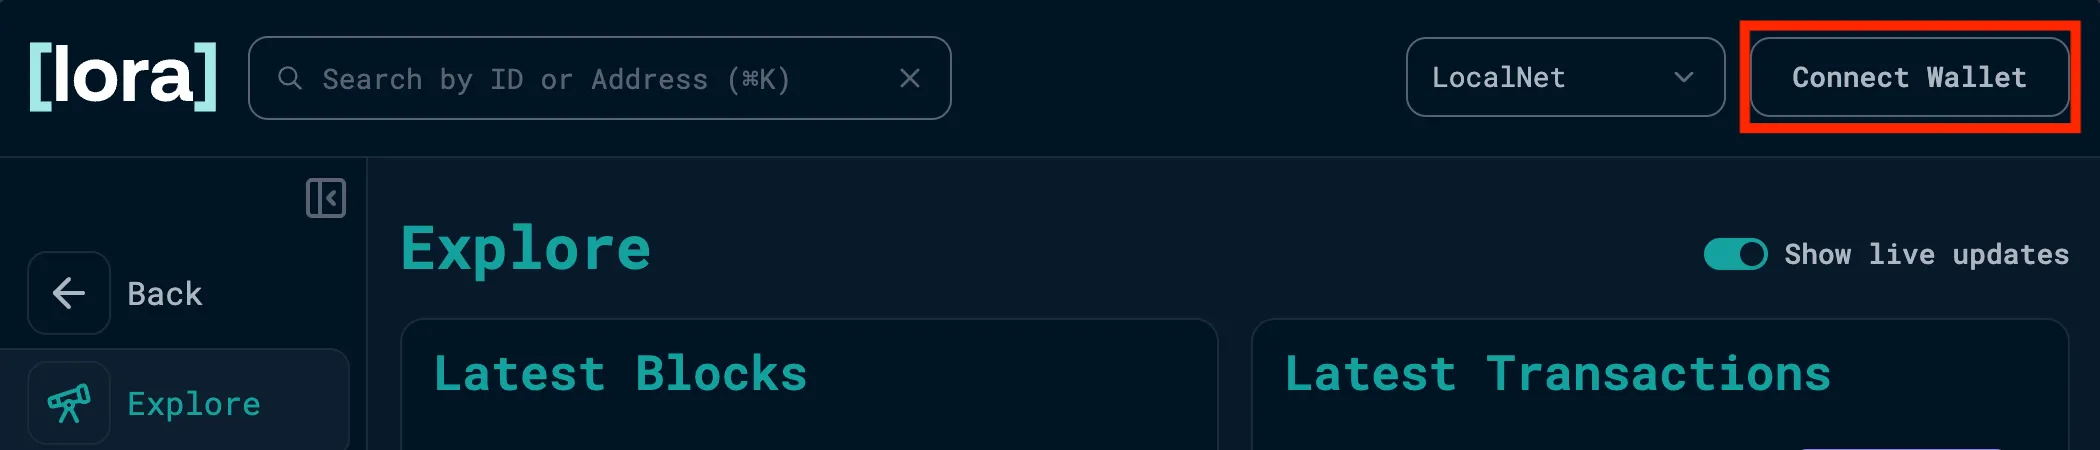
LORA home screen -
Click on Accounts and select the account you used to create the asset.
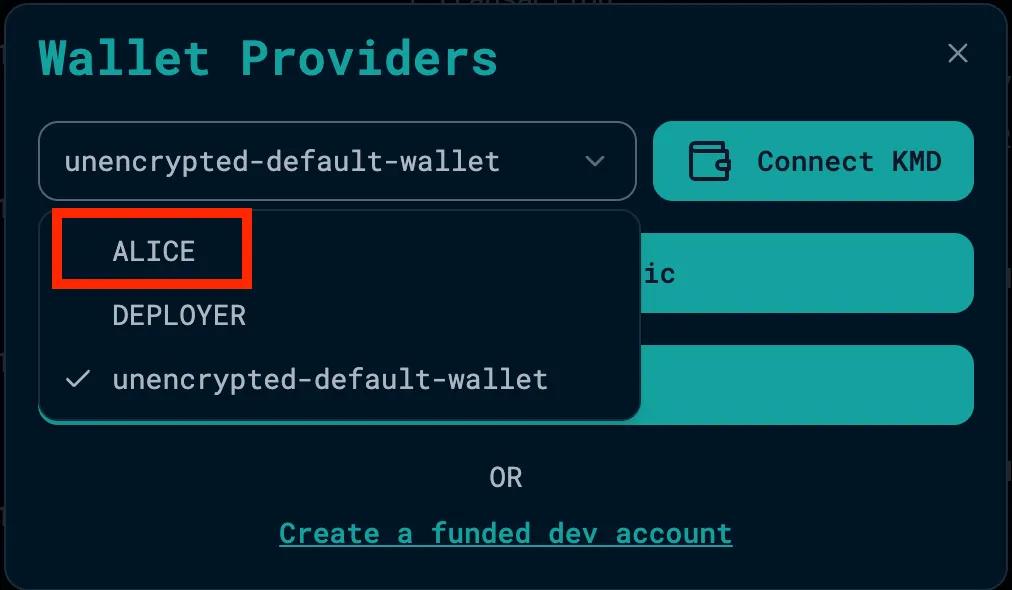
LORA connect wallet modal -
With Alice selected, click
viewto open the account details.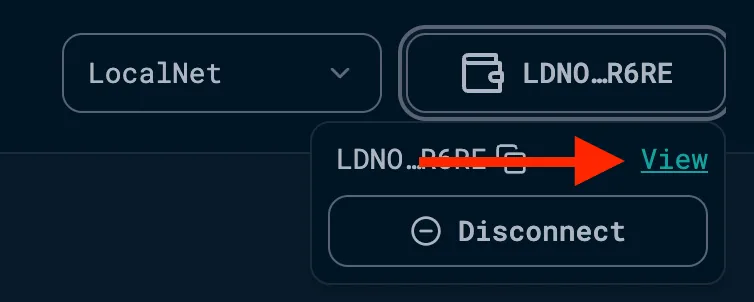
View Alice -
You will see a history of all the transactions from this account, and if you scroll to the Assets section, you should see your newly created asset listed.
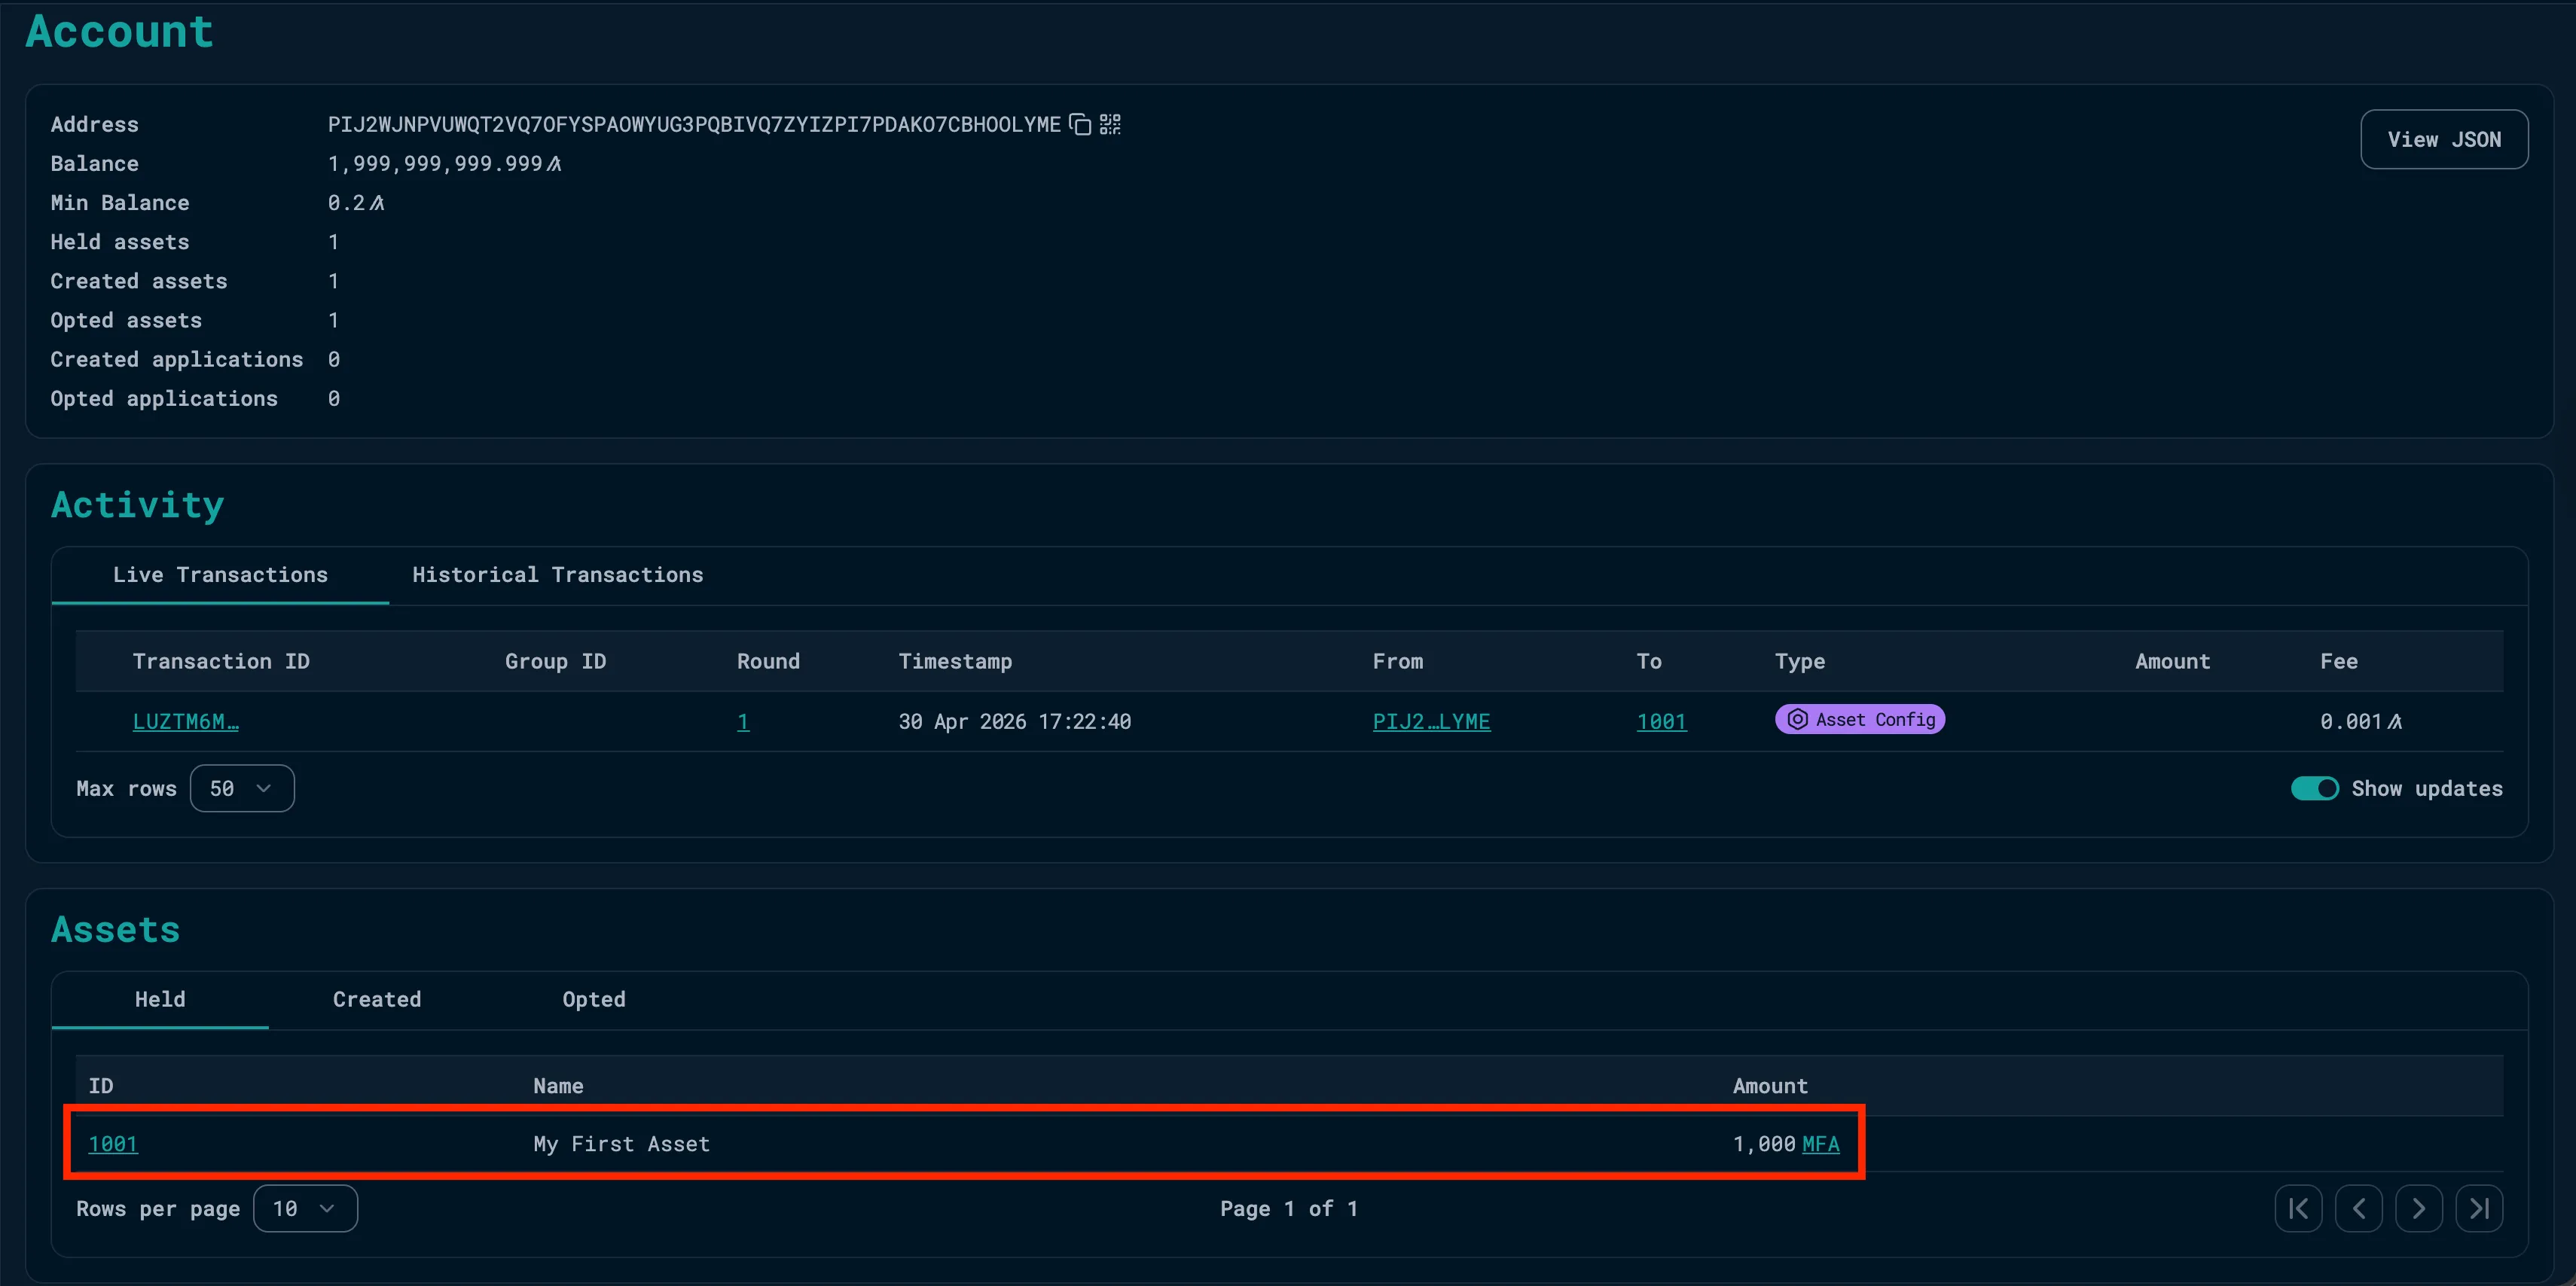
Creator's Balance -
Click the Asset ID to view the asset. You will see the configuration details used to create the asset, as well as a history of all the transactions for that asset.
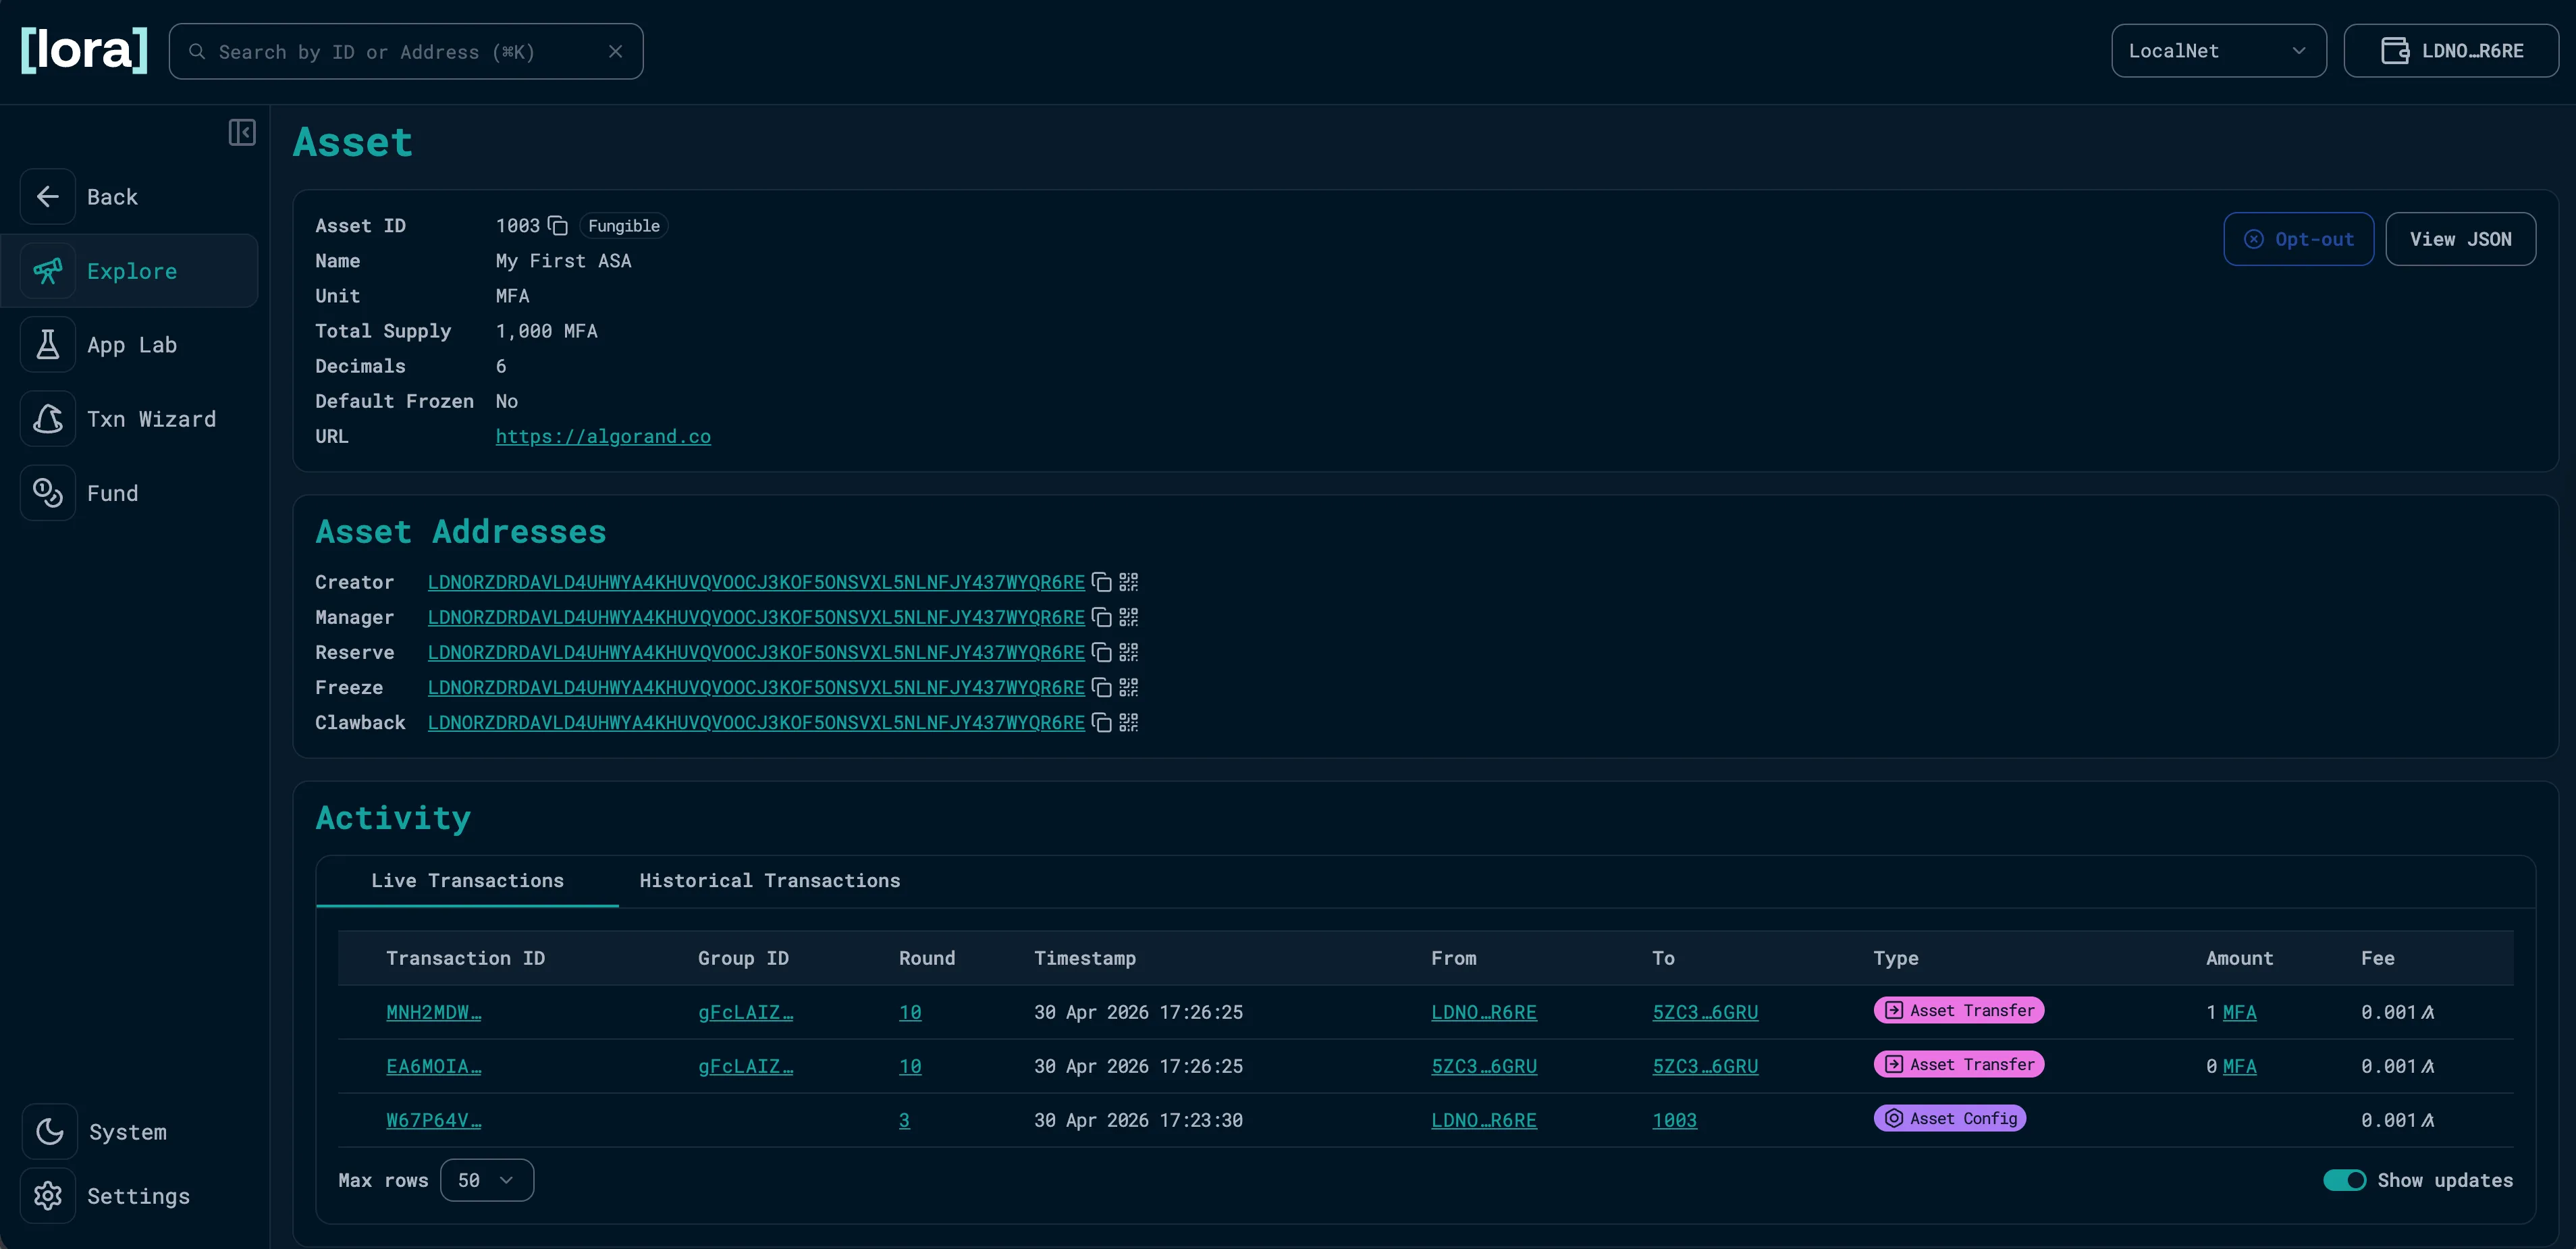
Asset details
Next Steps
Section titled “Next Steps”Now that you’ve learned multiple ways to create an asset, we will show you how to transfer the asset programmatically or using LORA.