Your First Smart Contract
In Getting Ready To Build, you initialized a new AlgoKit project and selected the Hello World smart contract template.
This guide returns to that project and shows two ways to work with the contract:
- Use the generated deployment script to compile, deploy, and call the contract
- Use LORA (Live Onchain Resource Analyzer) to deploy the compiled contract and call its
hellomethod visually
By the end, you will:
- Compile a smart contract
- Deploy a smart contract to LocalNet
- Call a smart contract method
- Inspect the deployed application in LORA
Deploy the Contract with the Generated Script
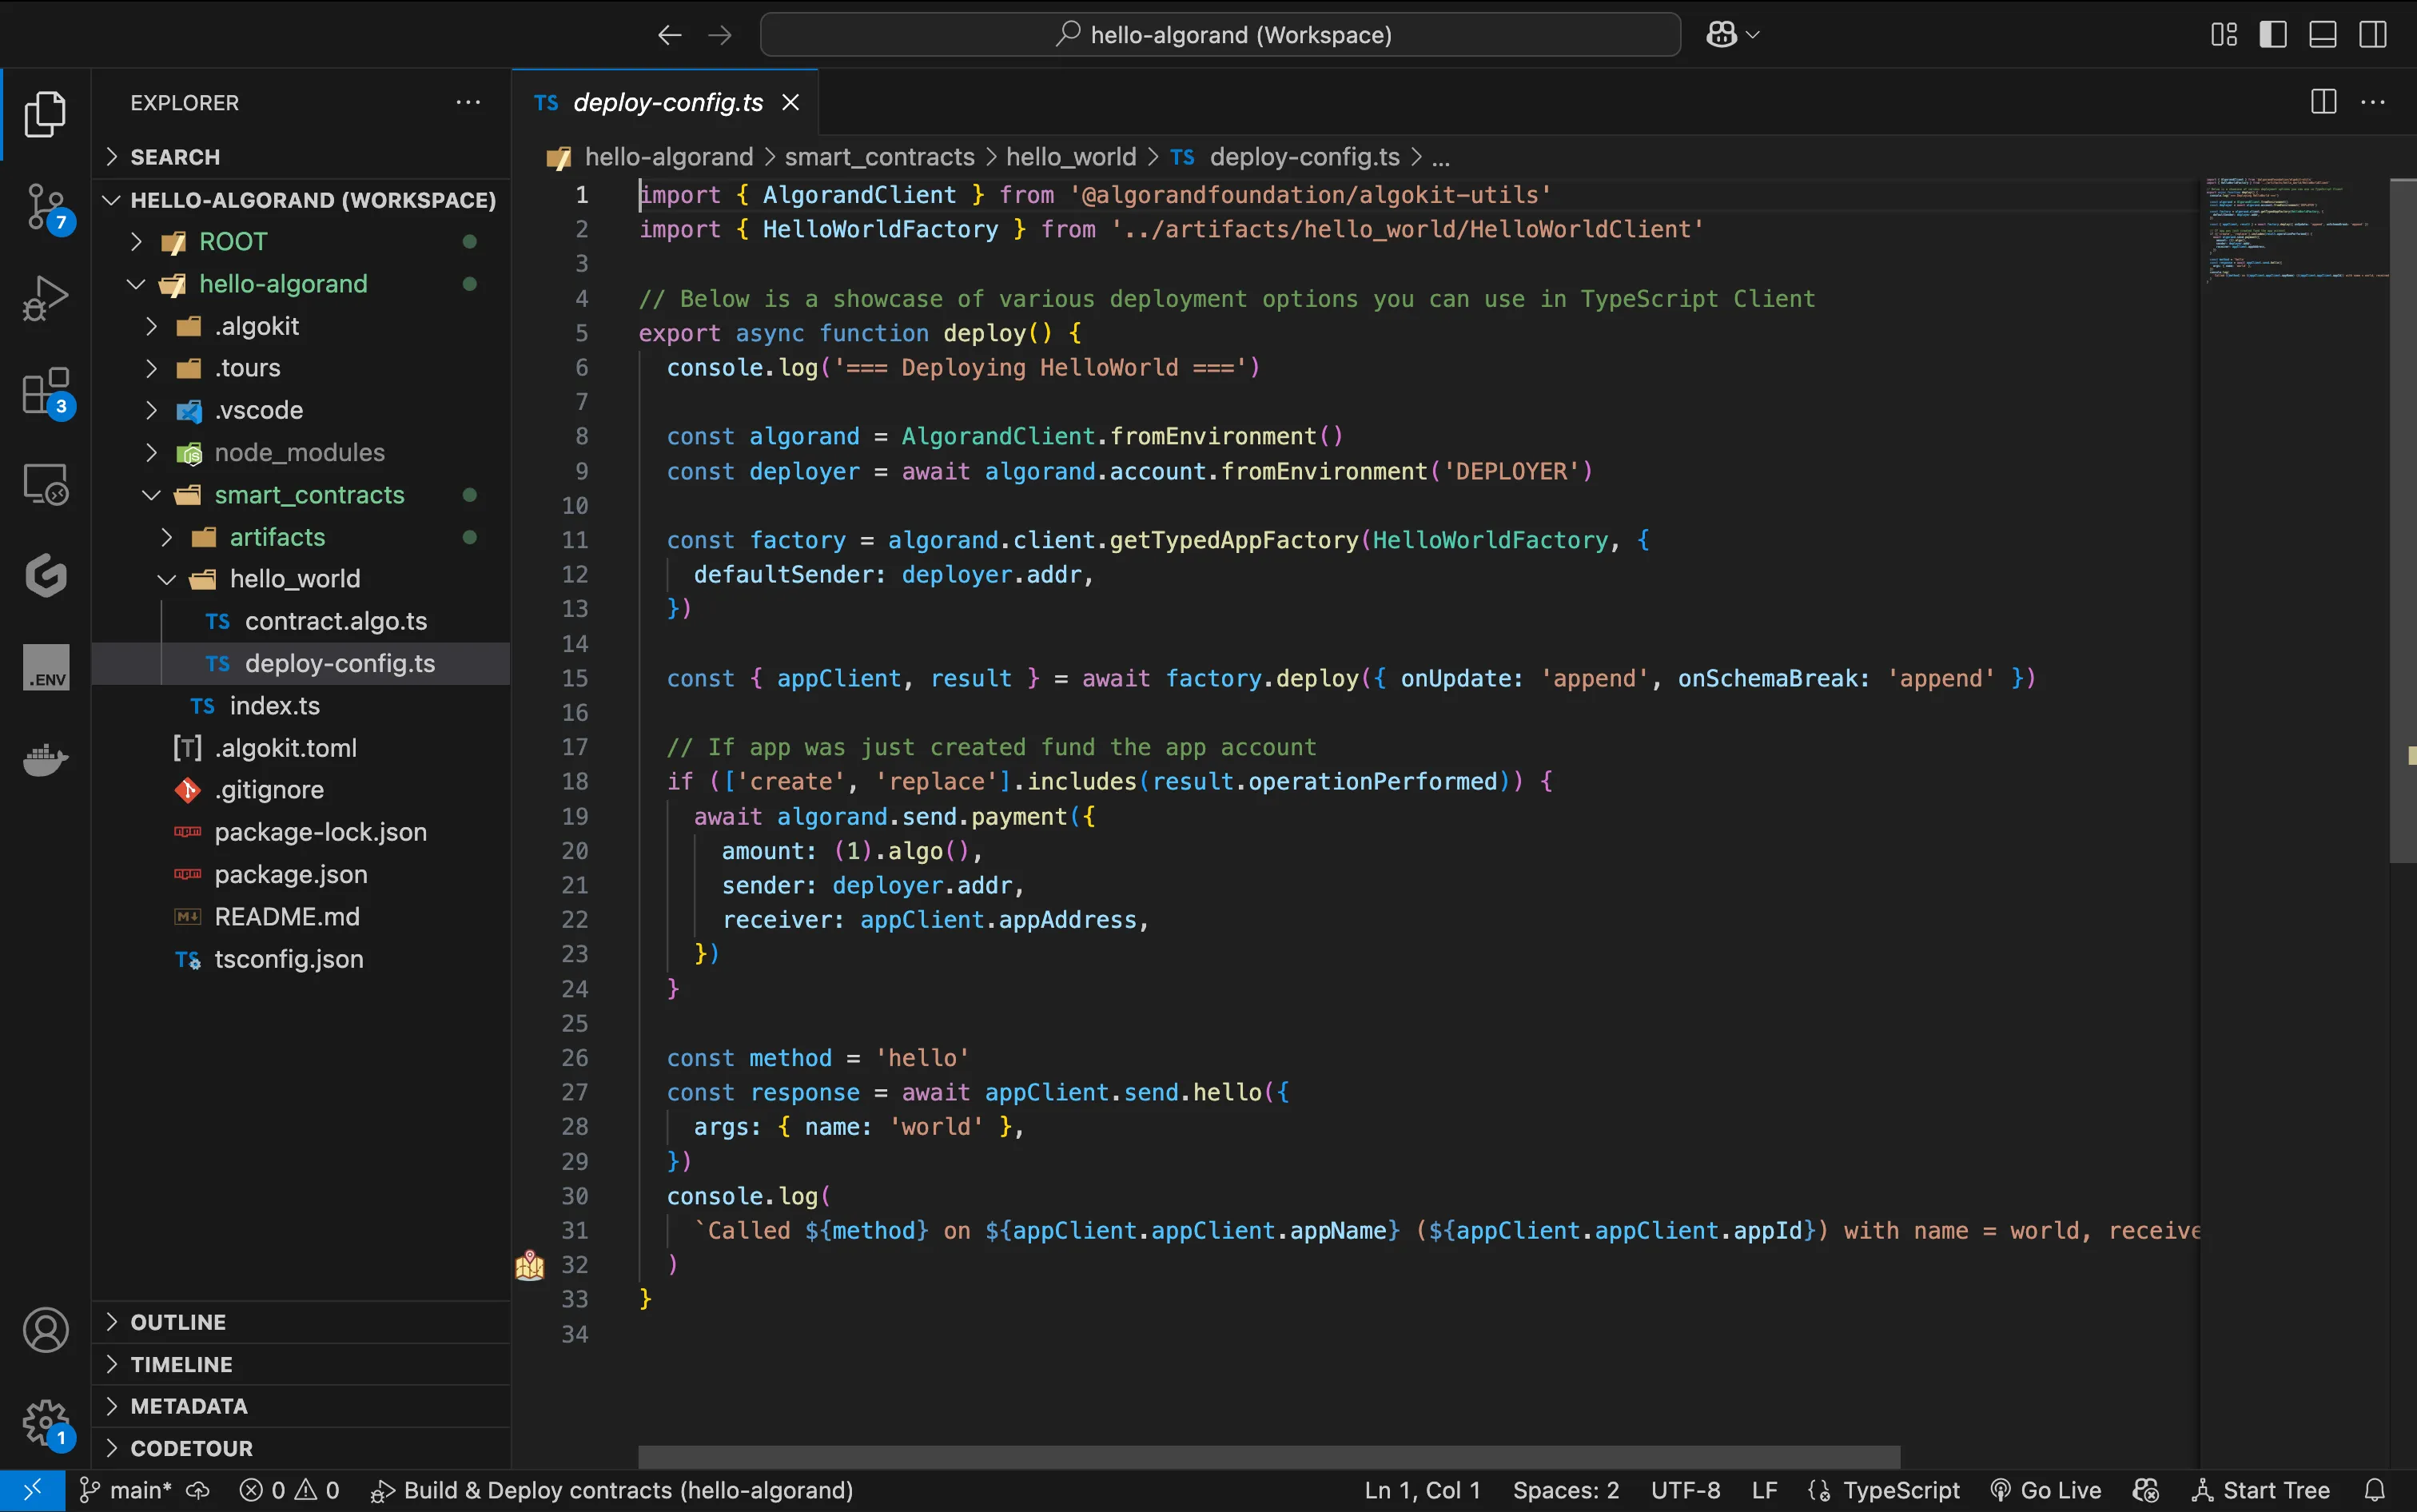
Section titled “Deploy the Contract with the Generated Script”You will notice in the smart_contracts/hello_world folder a file named deploy-config.ts which is a simple example of using AlgoKit to deploy the HelloWorld smart contract in contract.algo.ts on the LocalNet started earlier and then call the hello method.
Now there are two ways to run the deploy-config.ts file to deploy and call the smart contract:
-
By hitting
F5it will start LocalNet, build the smart contract, deploy and call the smart contractcontract.algo.tsby running thedeploy-config.tsfile. -
Alternatively, you can run the following commands from the terminal to build the contract and run the
deploy-config.tsfile:algokit project run buildalgokit project deploy localnet
The output should look similar to the following:
=== Deploying HelloWorld ===Idempotently deploying app "HelloWorld" from creator RQGFSWXL2RKDBO53MN3ZRWCO3CP2HCZ6T4D5DMNJSIXRV76XAEBUJNHOMY using 86 bytes of AVM (Algorand Virtual Machine) bytecode and 4 bytes of AVM bytecodeApp HelloWorld not found in apps created by RQGFSWXL2RKDBO53MN3ZRWCO3CP2HCZ6T4D5DMNJSIXRV76XAEBUJNHOMY; deploying app with version 1.0.App created by RQGFSWXL2RKDBO53MN3ZRWCO3CP2HCZ6T4D5DMNJSIXRV76XAEBUJNHOMY with ID 2225 via transaction PSO2XD77YINZRSNH5X76EN6QZYC2I3P6NITJQCCSDS7IC2PJ4RYASending 1000000 µALGO from RQGFSWXL2RKDBO53MN3ZRWCO3CP2HCZ6T4D5DMNJSIXRV76XAEBUJNHOMY to JM7DKIZGR3M4EGZYYR7LXUDX3R7X6QLRV4S2YVLTSDZP73XLX5A6ZDAQLE via transaction T66O4VNOD5CV6RZ75J53PHFMIIX2DCGT2Q3VM7W3W4CJ7DJQK6MAApp 2225 called with hello(world) by RQGFSWXL2RKDBO53MN3ZRWCO3CP2HCZ6T4D5DMNJSIXRV76XAEBUJNHOMY via transaction W2ZQYBEAFXDKHWDBBKJ6WC56ASAQ267ZEHYESWYLZP3YT3AACMGQCalled hello on HelloWorld (2225) with name = world, received: Hello, worldThe deployed application’s App ID and application address are displayed, followed by the message returned from the smart contract call.
When AlgoKit builds the smart contract, it generates artifacts in the artifacts folder. These artifacts include:
- Native TEAL (Transaction Execution Approval Language) smart contract code:
HelloWorld.approval.teal,HelloWorld.clear.teal - Contract ABI (Application Binary Interface):
HelloWorld.arc56.json - Auto-generated typed application client:
HelloWorldClient.ts
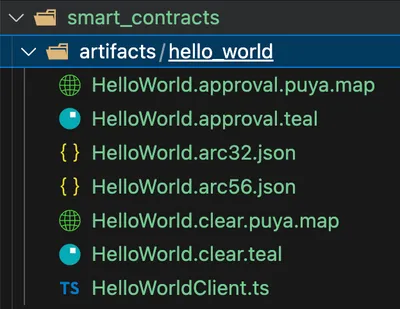
Tools like LORA and goal can use these artifacts to deploy and interact with your smart contract across Algorand networks.
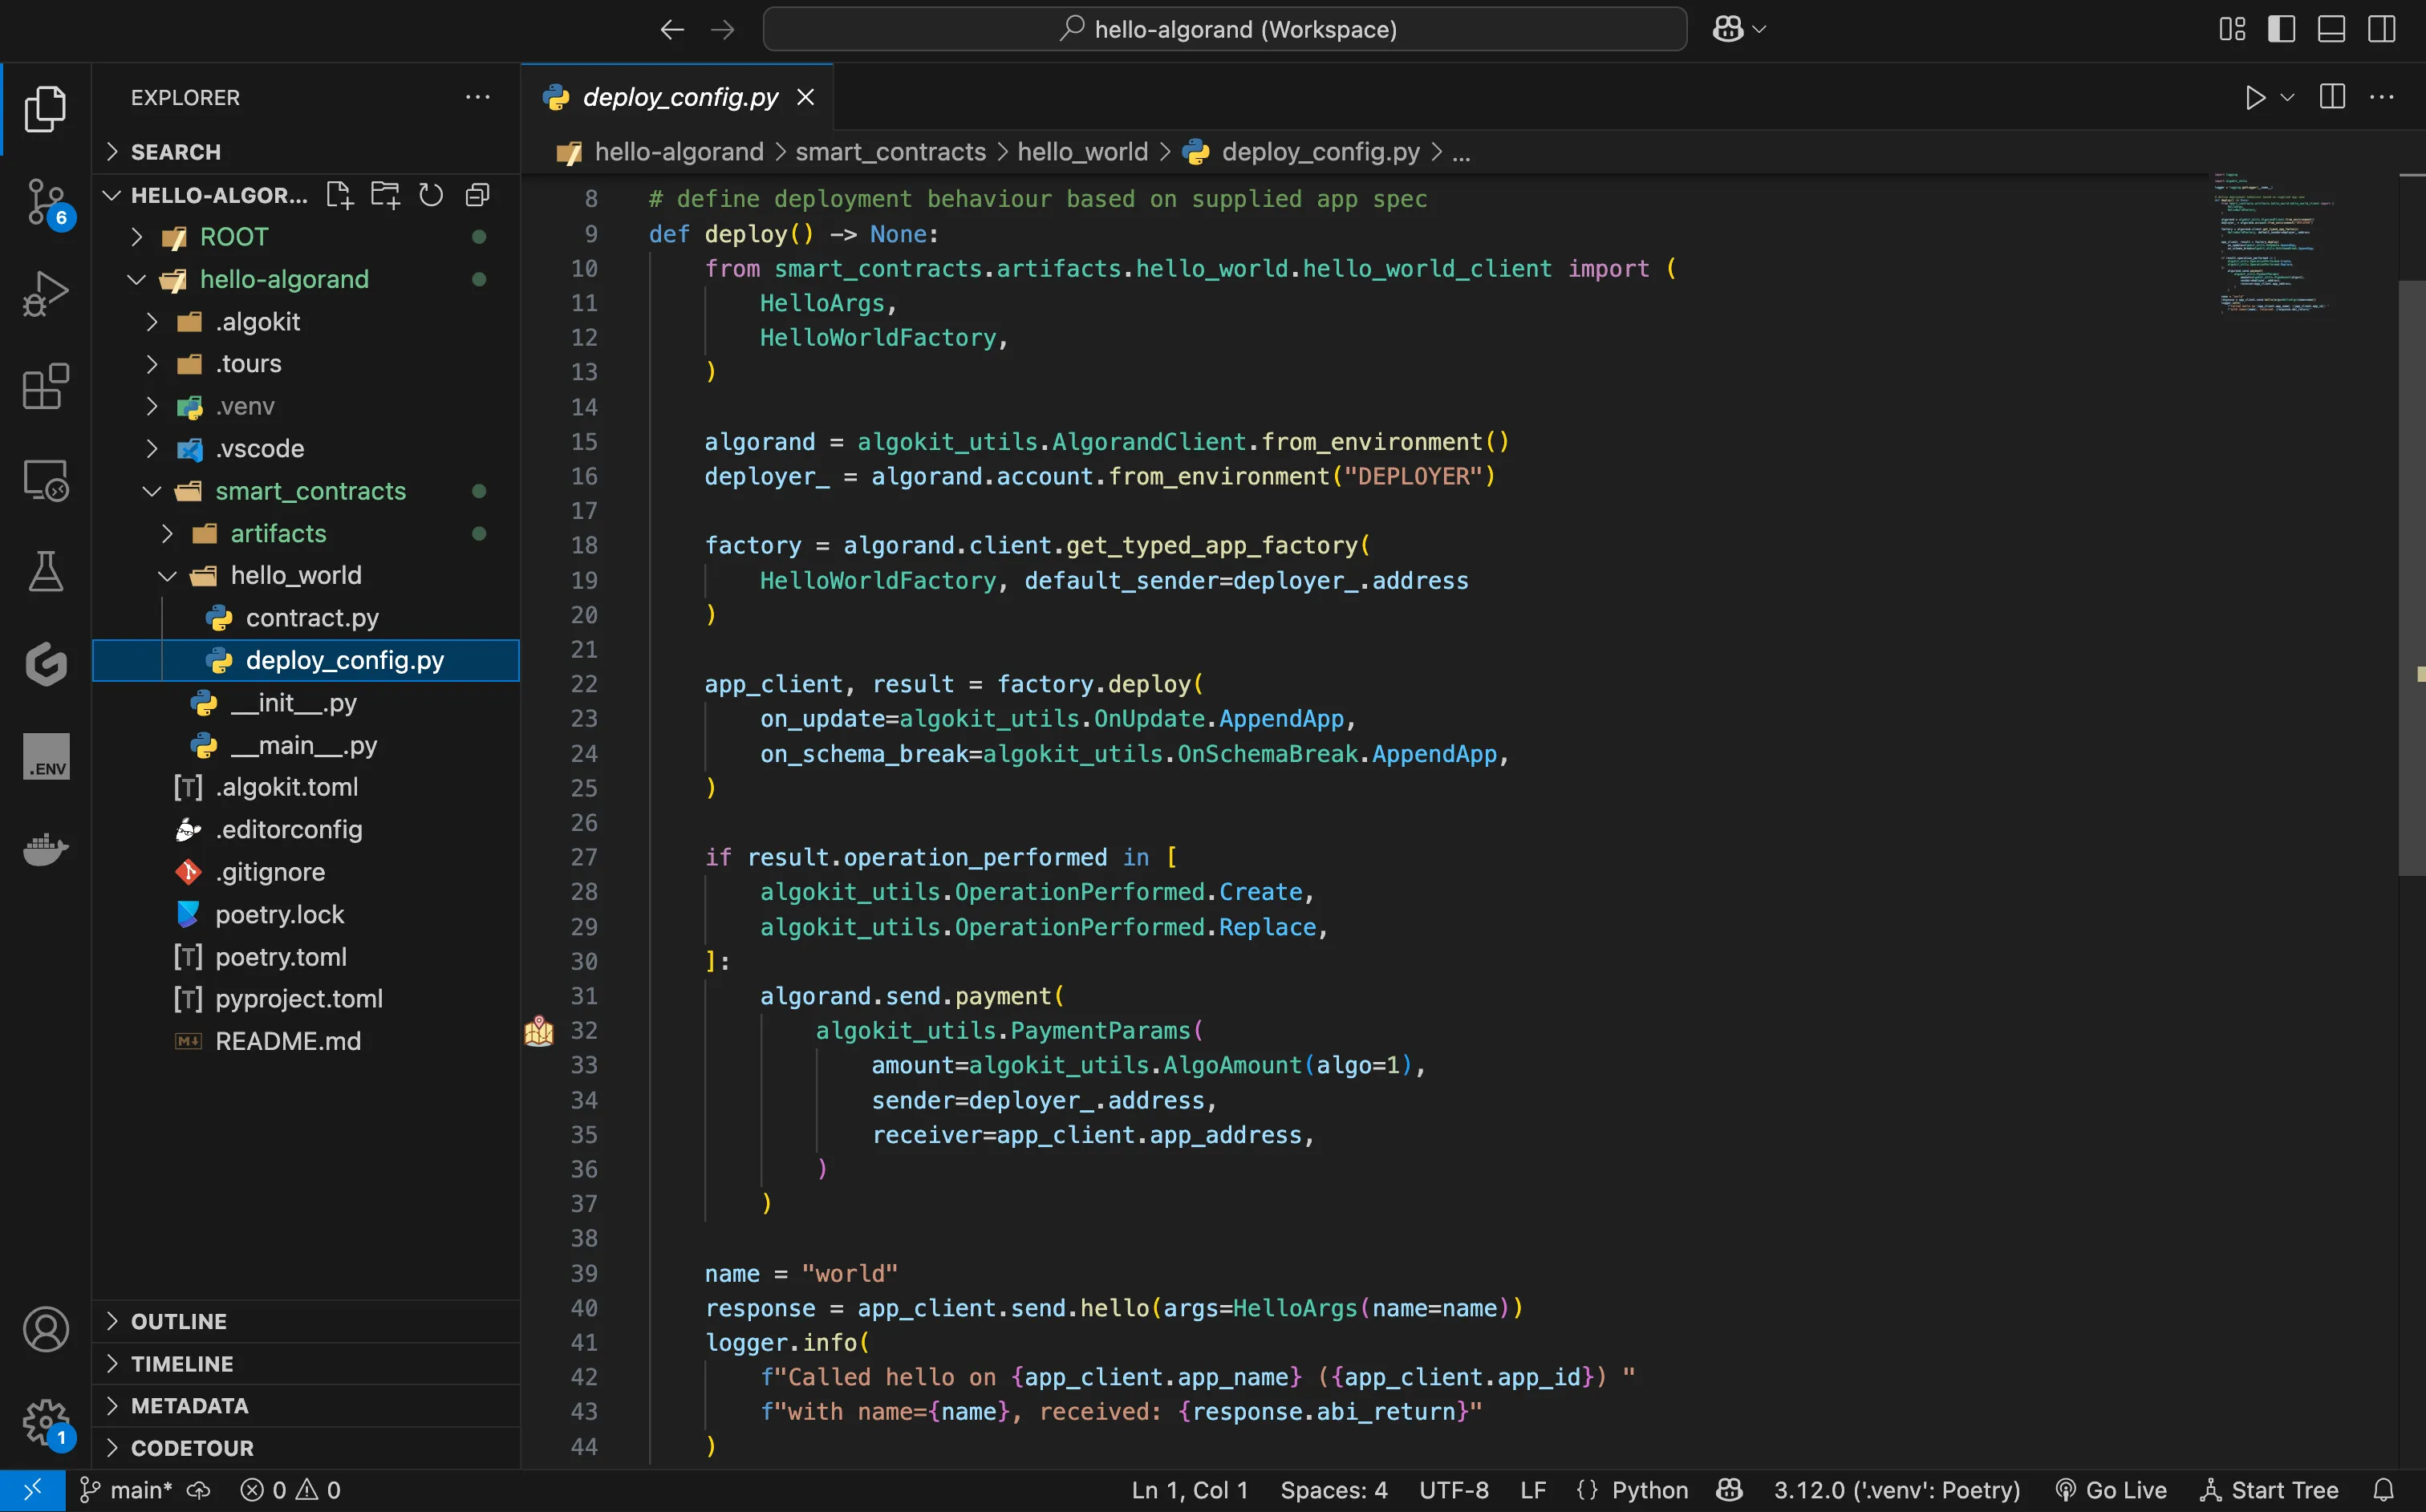
Once the starter project is created, you will notice in the smart_contracts/hello_world folder a file named deploy_config.py which is a simple example of using AlgoKit to deploy the HelloWorld smart contract in contract.py on the Local Algorand blockchain started earlier and then call the hello method.
Now there are two ways to run the deploy_config.py file to deploy and call the smart contract:
-
By hitting
F5it will start LocalNet, build the smart contract, deploy and call the smart contractcontract.pyby running thedeploy_config.pyfile. -
Alternatively, you can run the following commands from the terminal to build the contract and run the
deploy_config.pyfile:algokit project run buildalgokit project deploy localnet
The output should look similar to the following:
Deploying hello_worldCalled hello on HelloWorld (2225) with name=world, received: Hello, worldThe App ID of of the deployed contract is displayed, followed by the message returned from the smart contract call.
When AlgoKit builds the smart contract, it generates artifacts in the artifacts folder. These artifacts include:
- Native TEAL (Transaction Execution Approval Language) smart contract code:
HelloWorld.approval.teal,HelloWorld.clear.teal - Contract ABI:
HelloWorld.arc56.json - Auto-generated typed application client:
hello_world_client.py
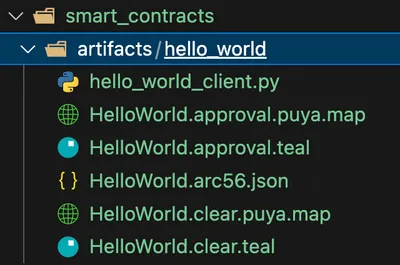
Tools like LORA and goal can use these artifacts to deploy and interact with your smart contract across Algorand networks.
Deploy Hello World application
Section titled “Deploy Hello World application”The generated deployment script is the fastest way to deploy and test your contract from code. Next, you’ll use LORA to see the same contract workflow through a visual interface.
This is useful when you want to inspect app specs, build calls manually, or understand what the deployment process is doing under the hood.
Launch LORA:
algokit explore-
To deploy your smart contract application, select the
App Laband click on theCreatebutton.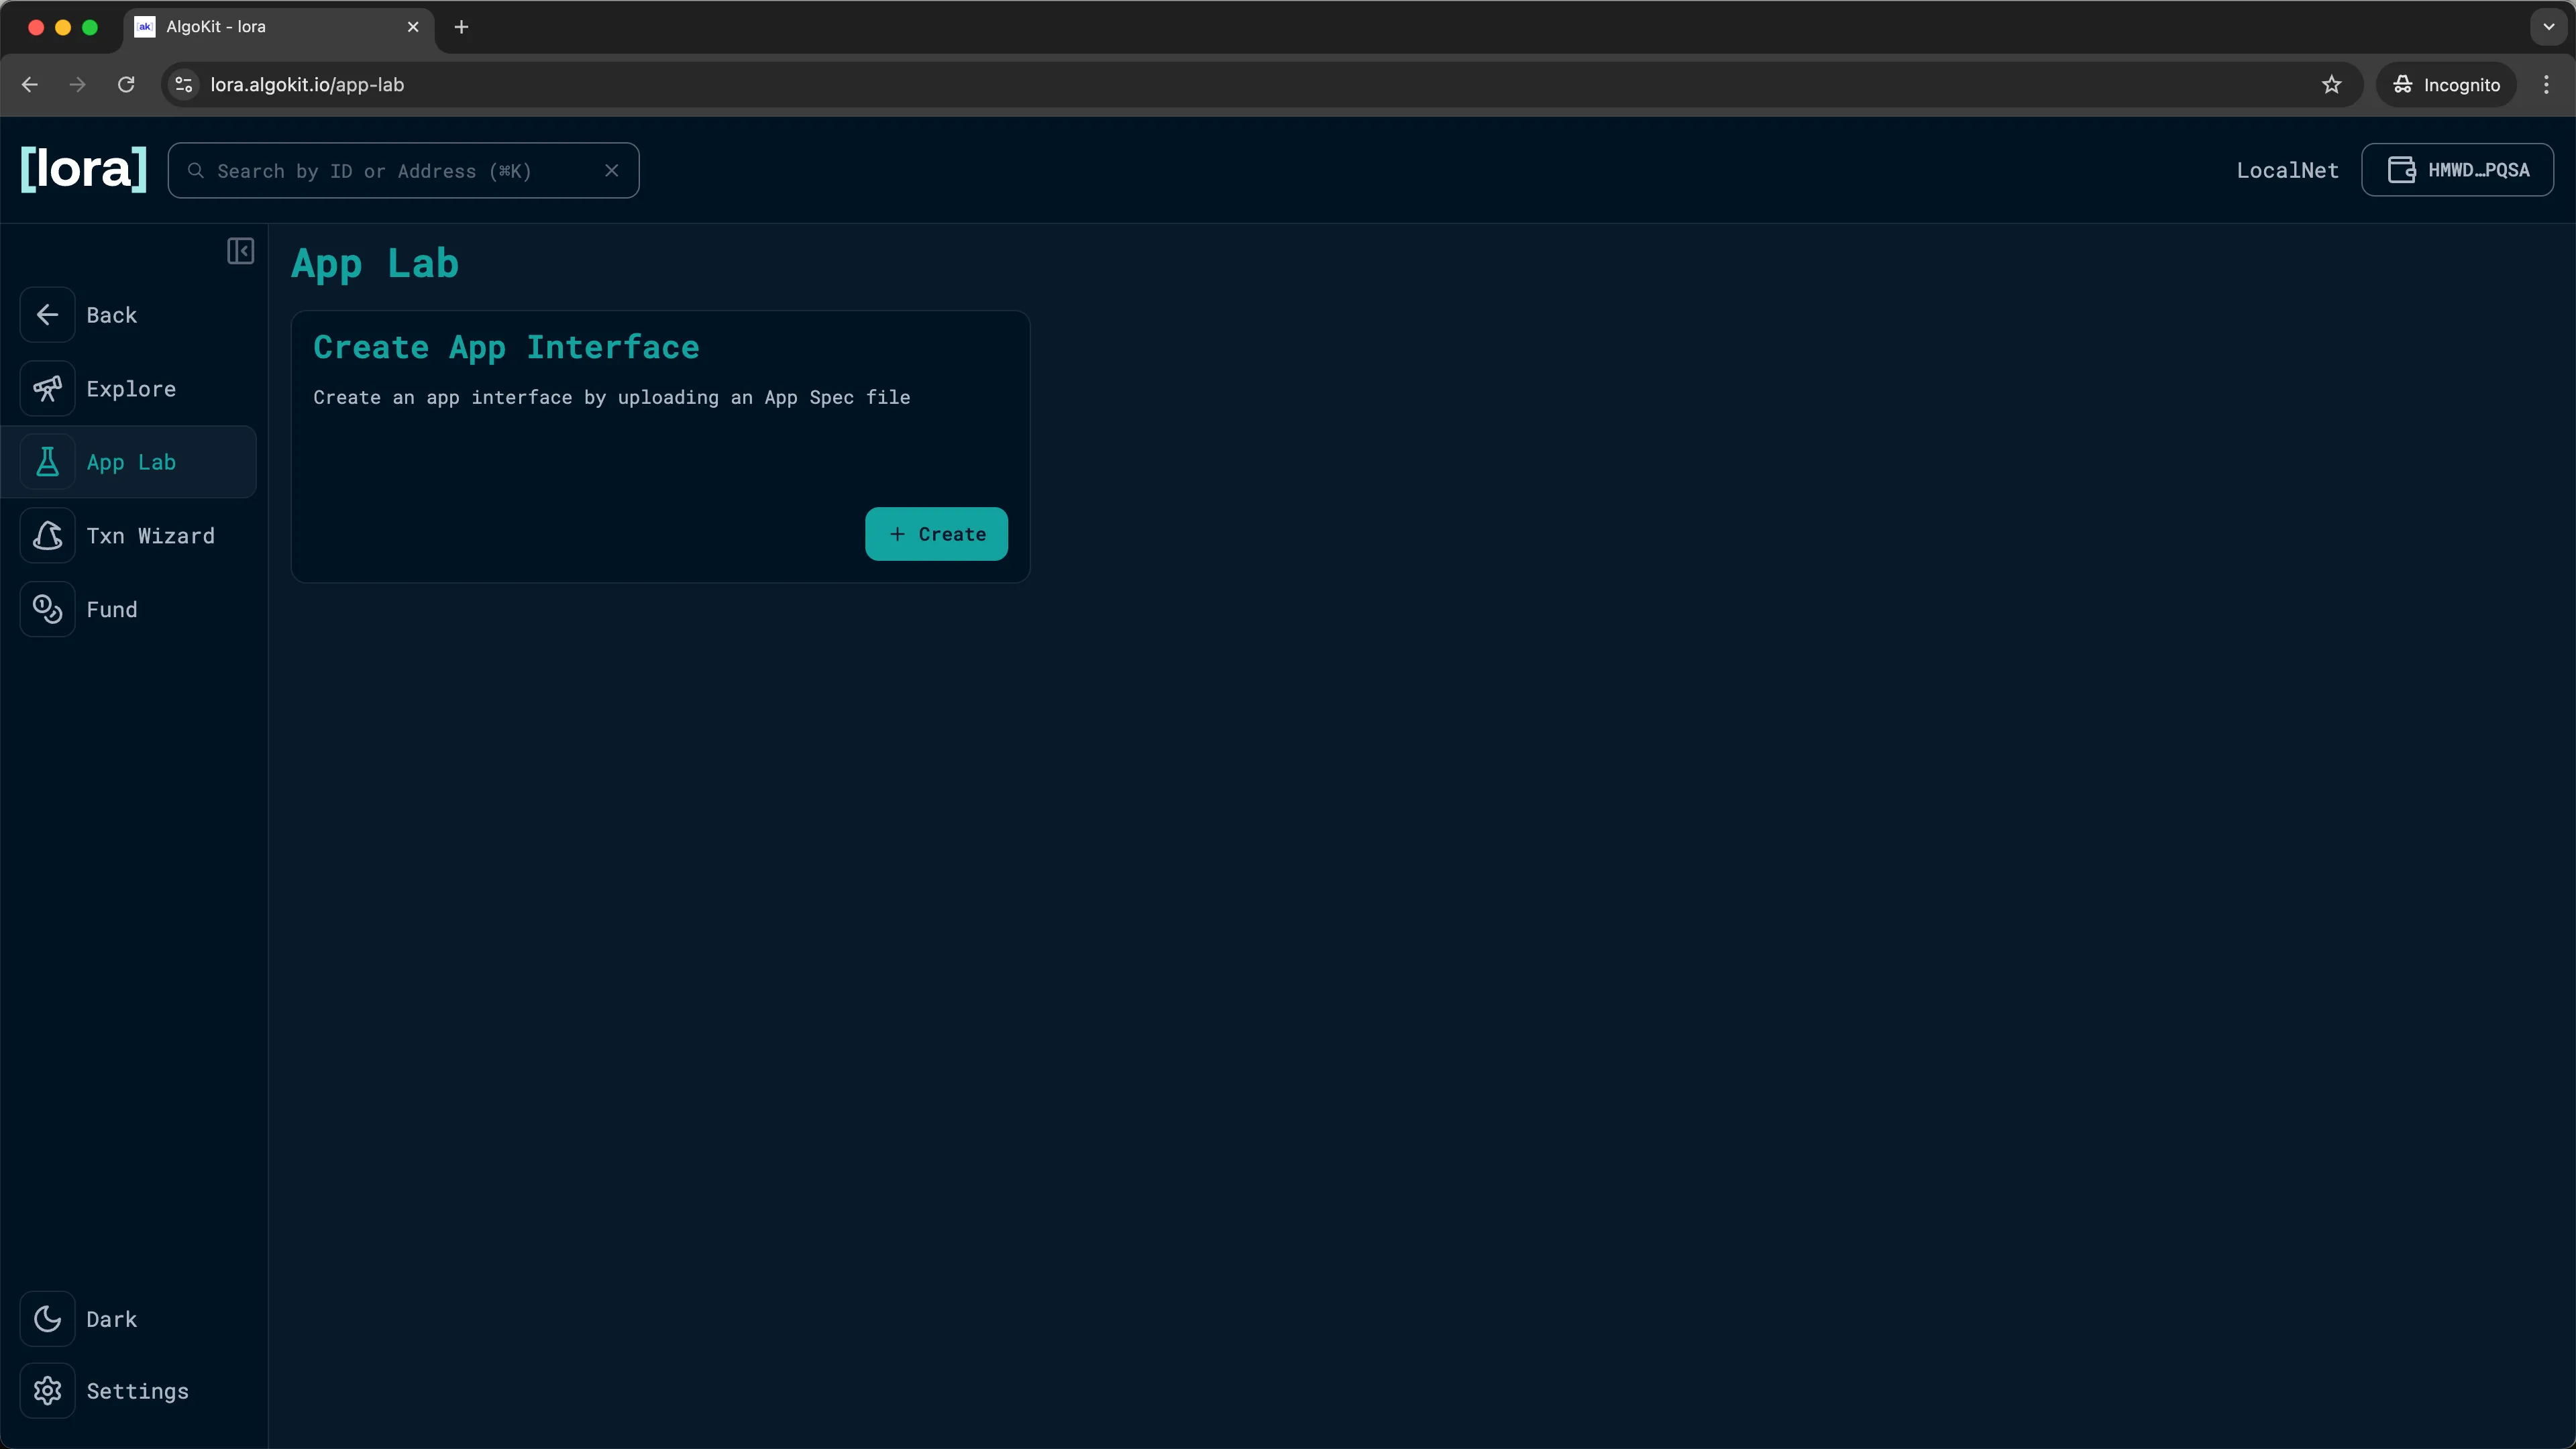
LORA: App Lab -
Click
Deploy newand clickSelect an ARC-32 JSON app spec file. This opens a window for you to browse to the artifacts created in the previous section of this guide. Select theHelloWorld.arc32.jsonmanifest file.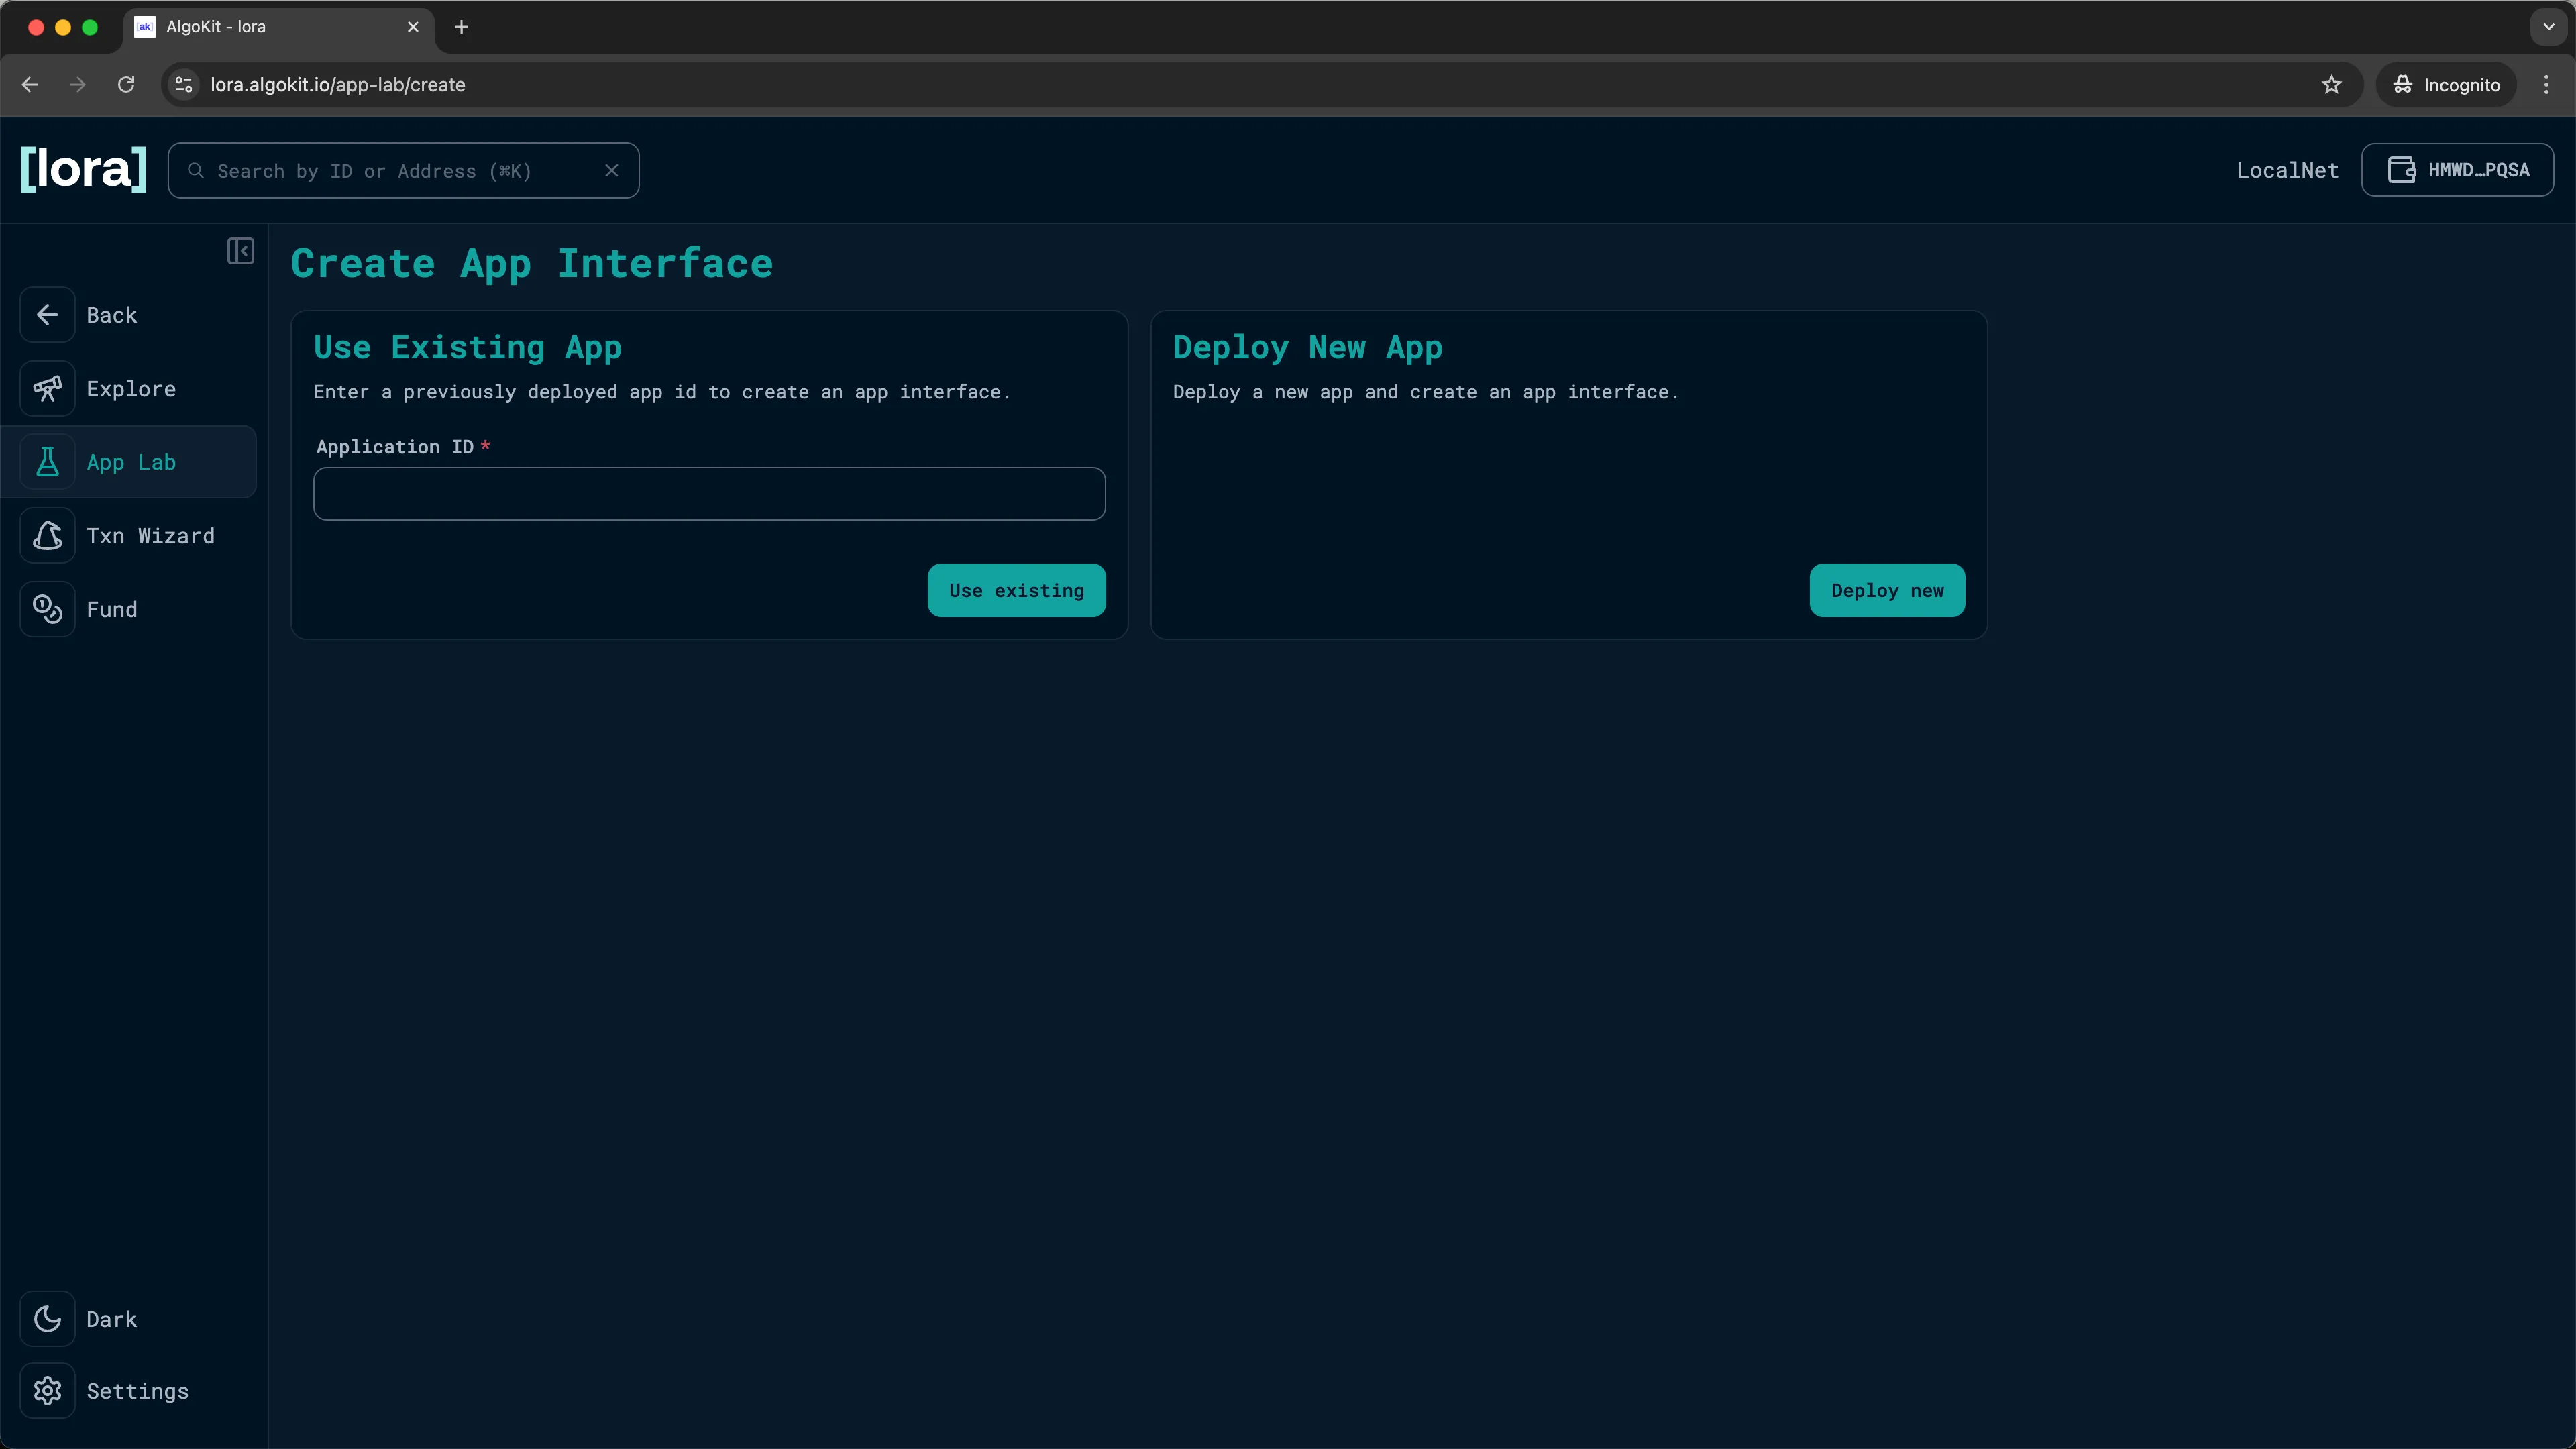
LORA: Deploying your app 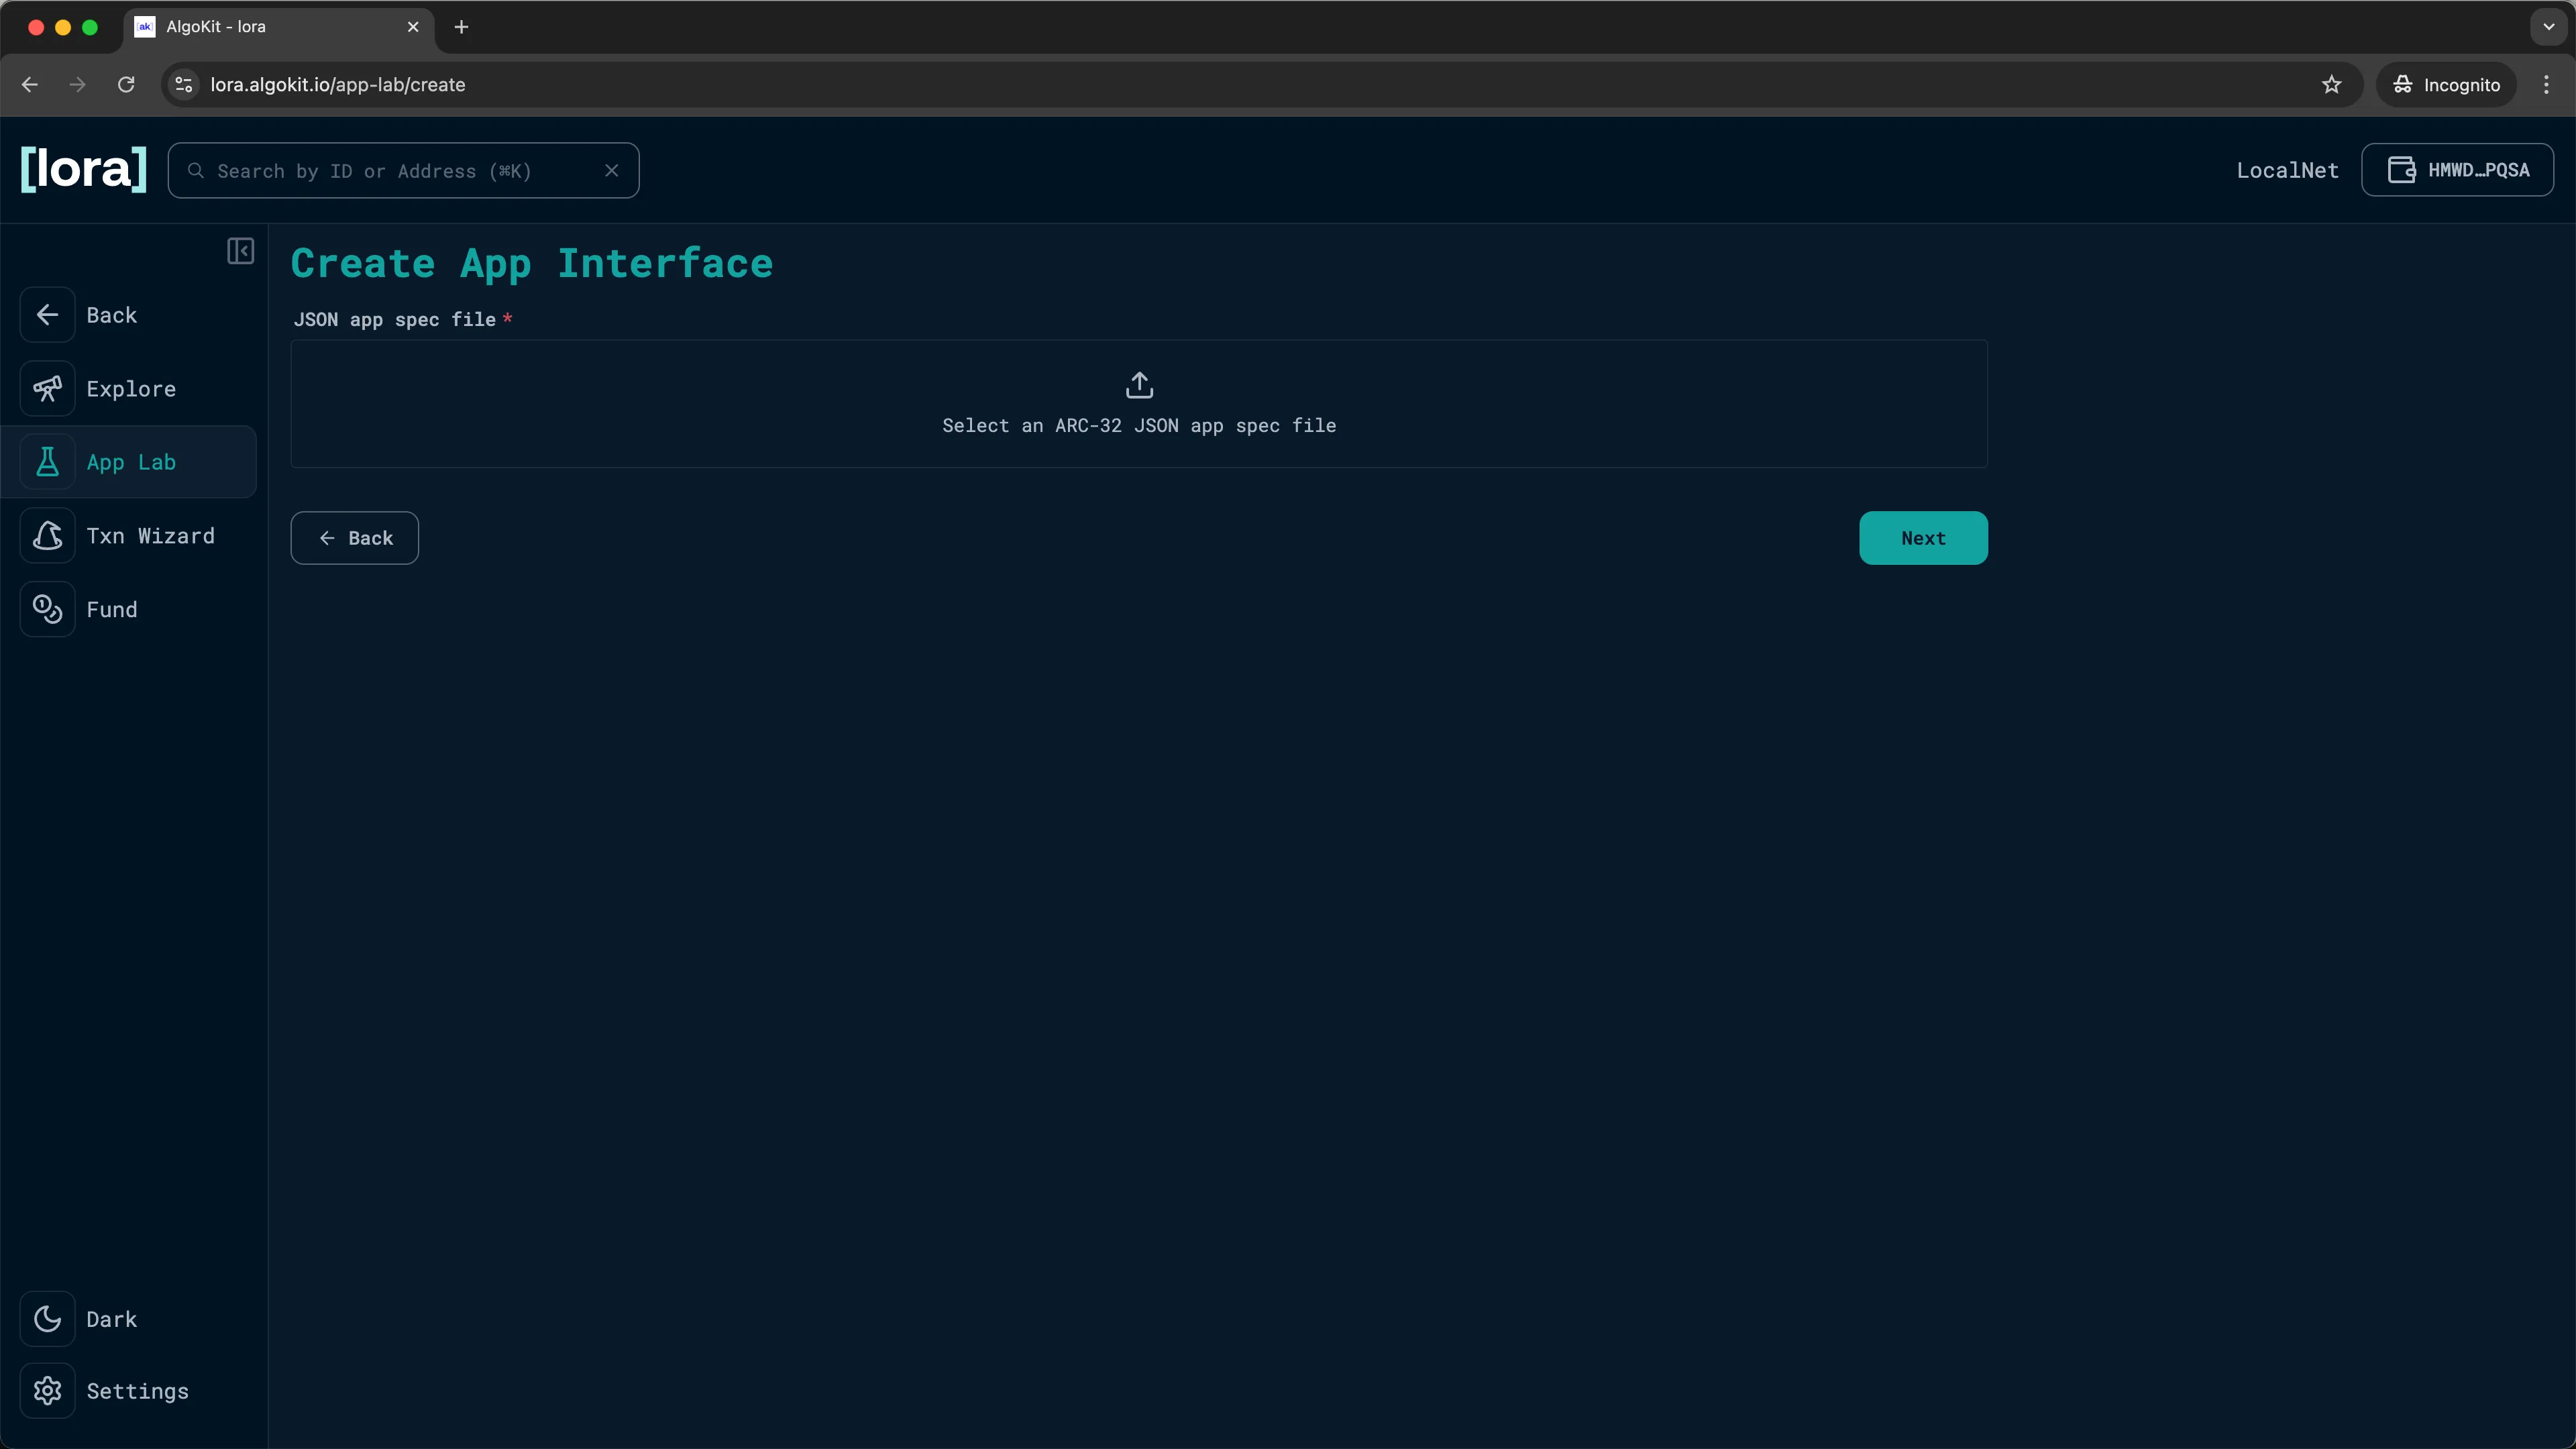
LORA: ARC-32/ARC-56 App Spec 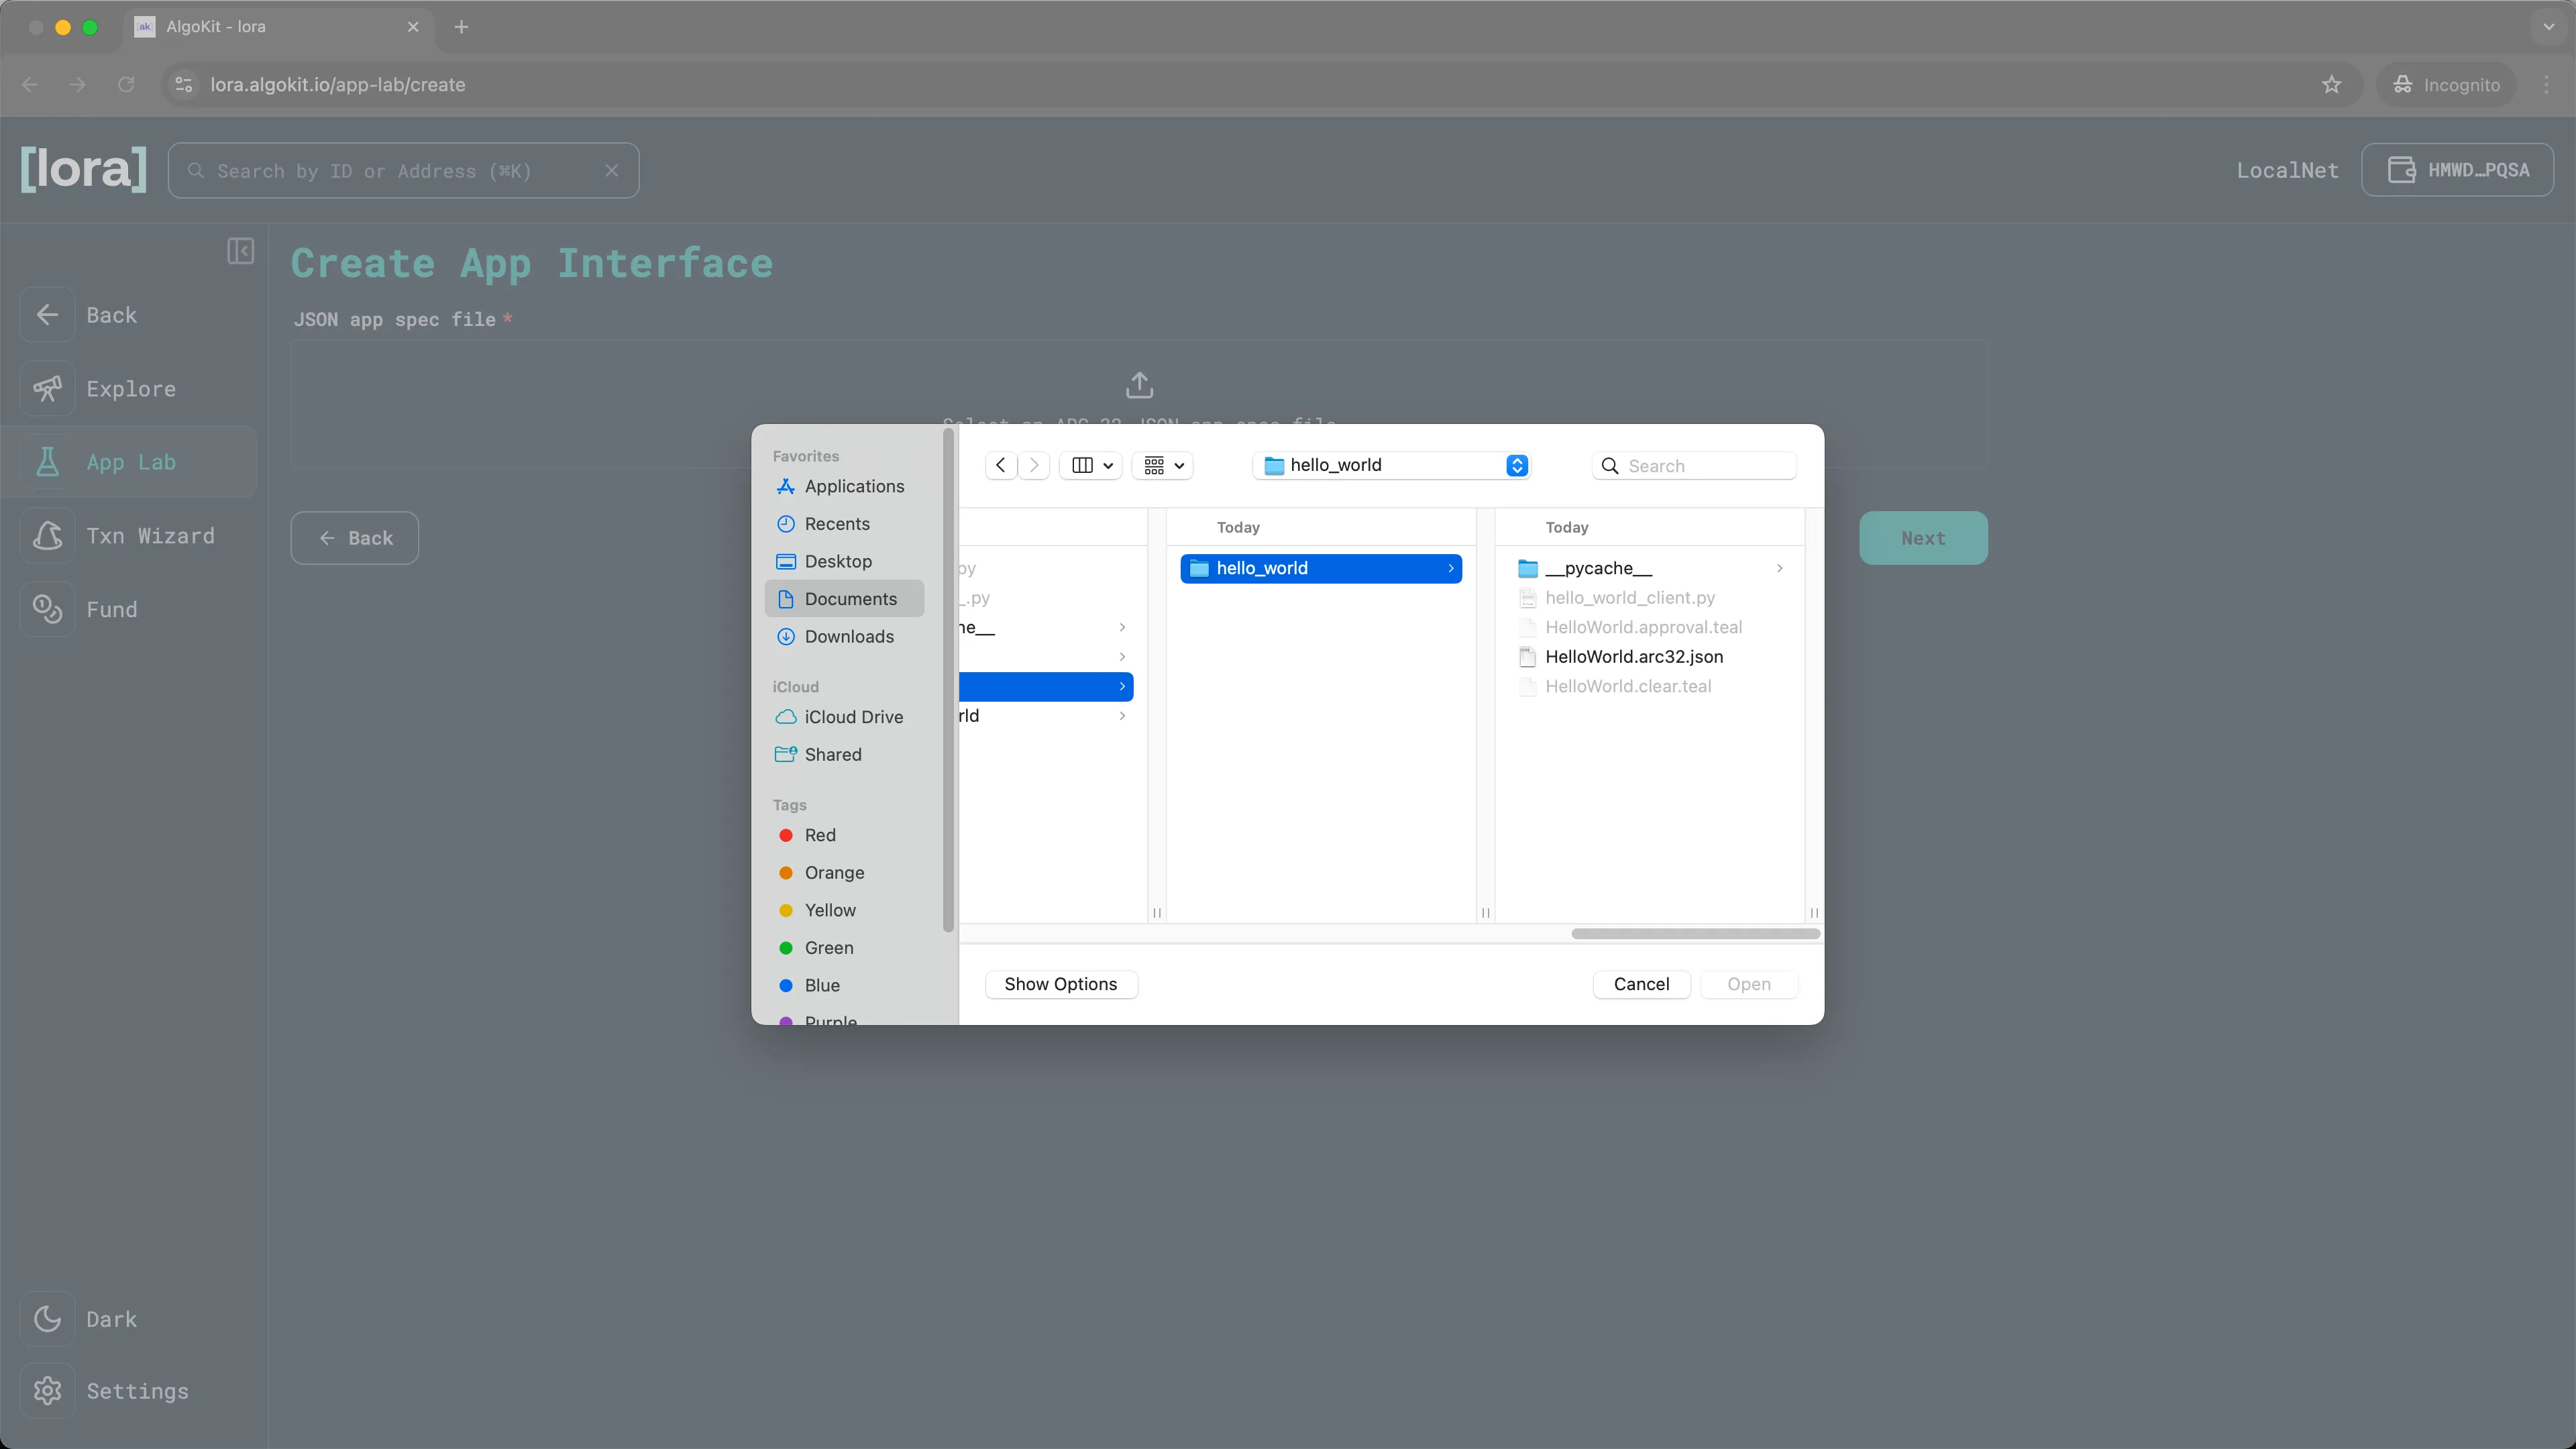
LORA: Uploading generated app spec -
This will load the specific manifest file for the Hello World sample application. Click
Next.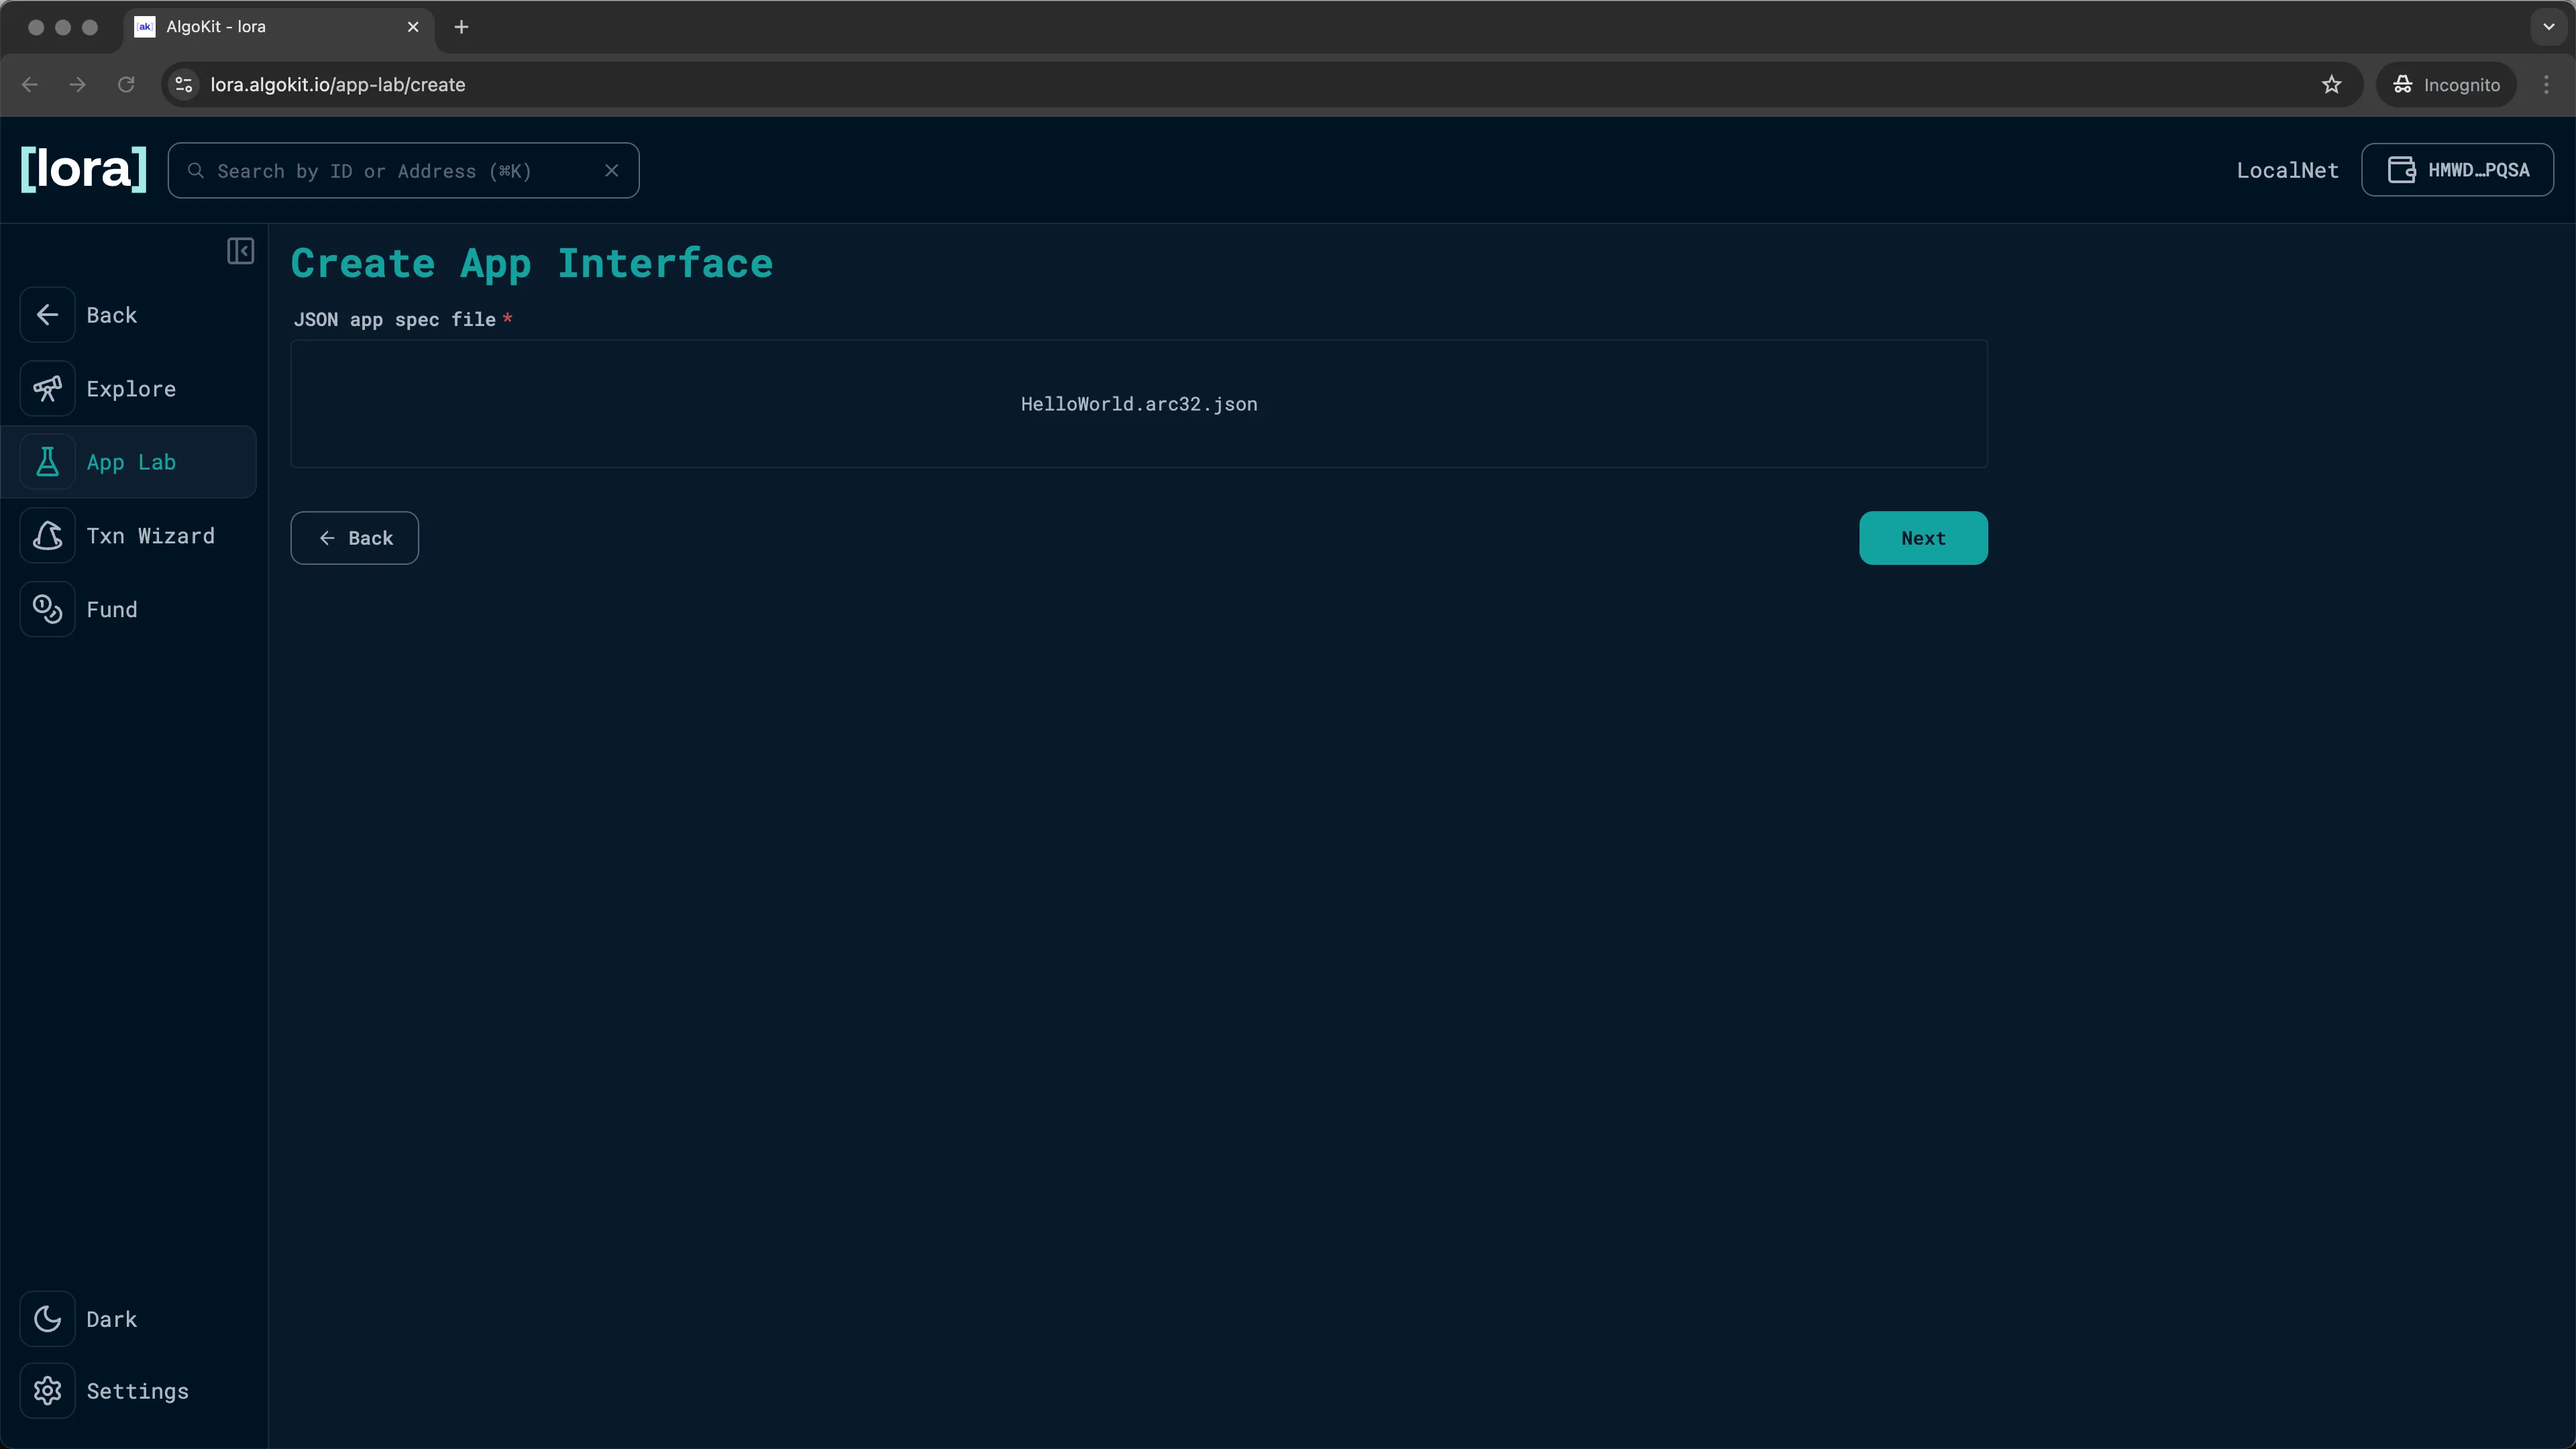
LORA: App spec uploaded successfully -
You can change the
Nameand theVersionof your app. For this guide we’ll keep the default values. ClickNext.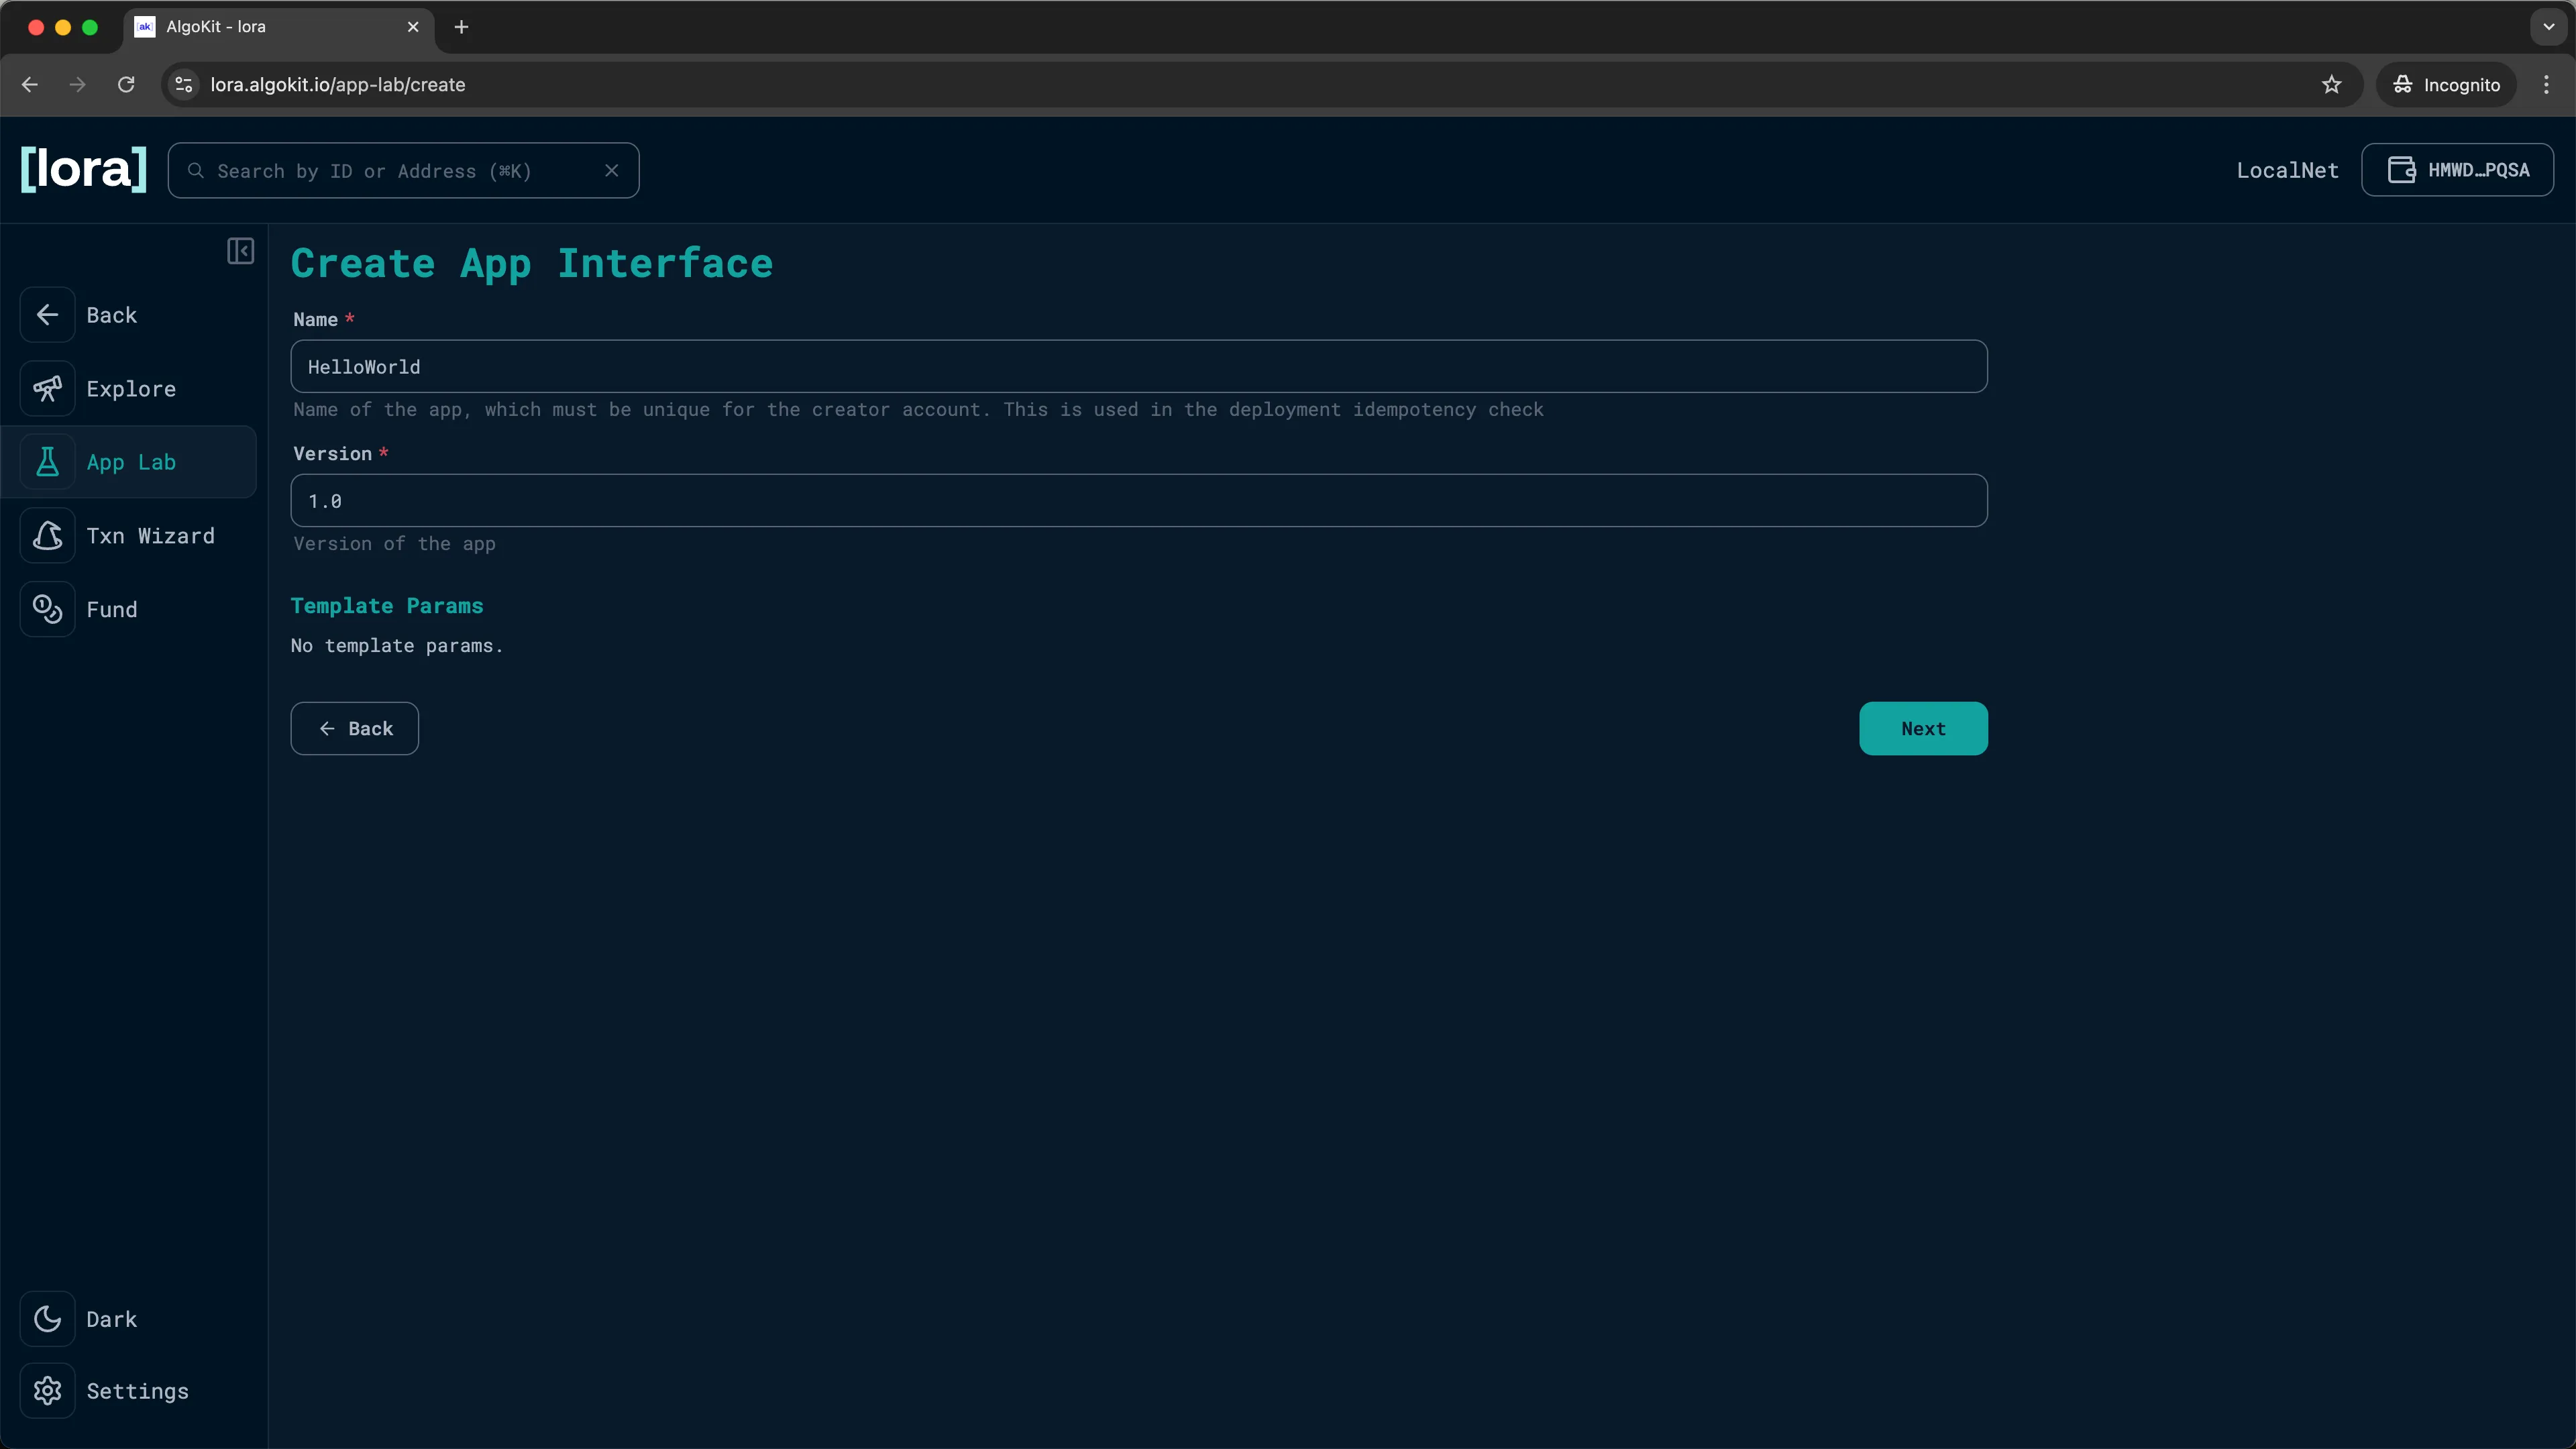
LORA: Specify app name and version -
Click the
() Callbutton. Then build and add the create transaction by clickingAdd.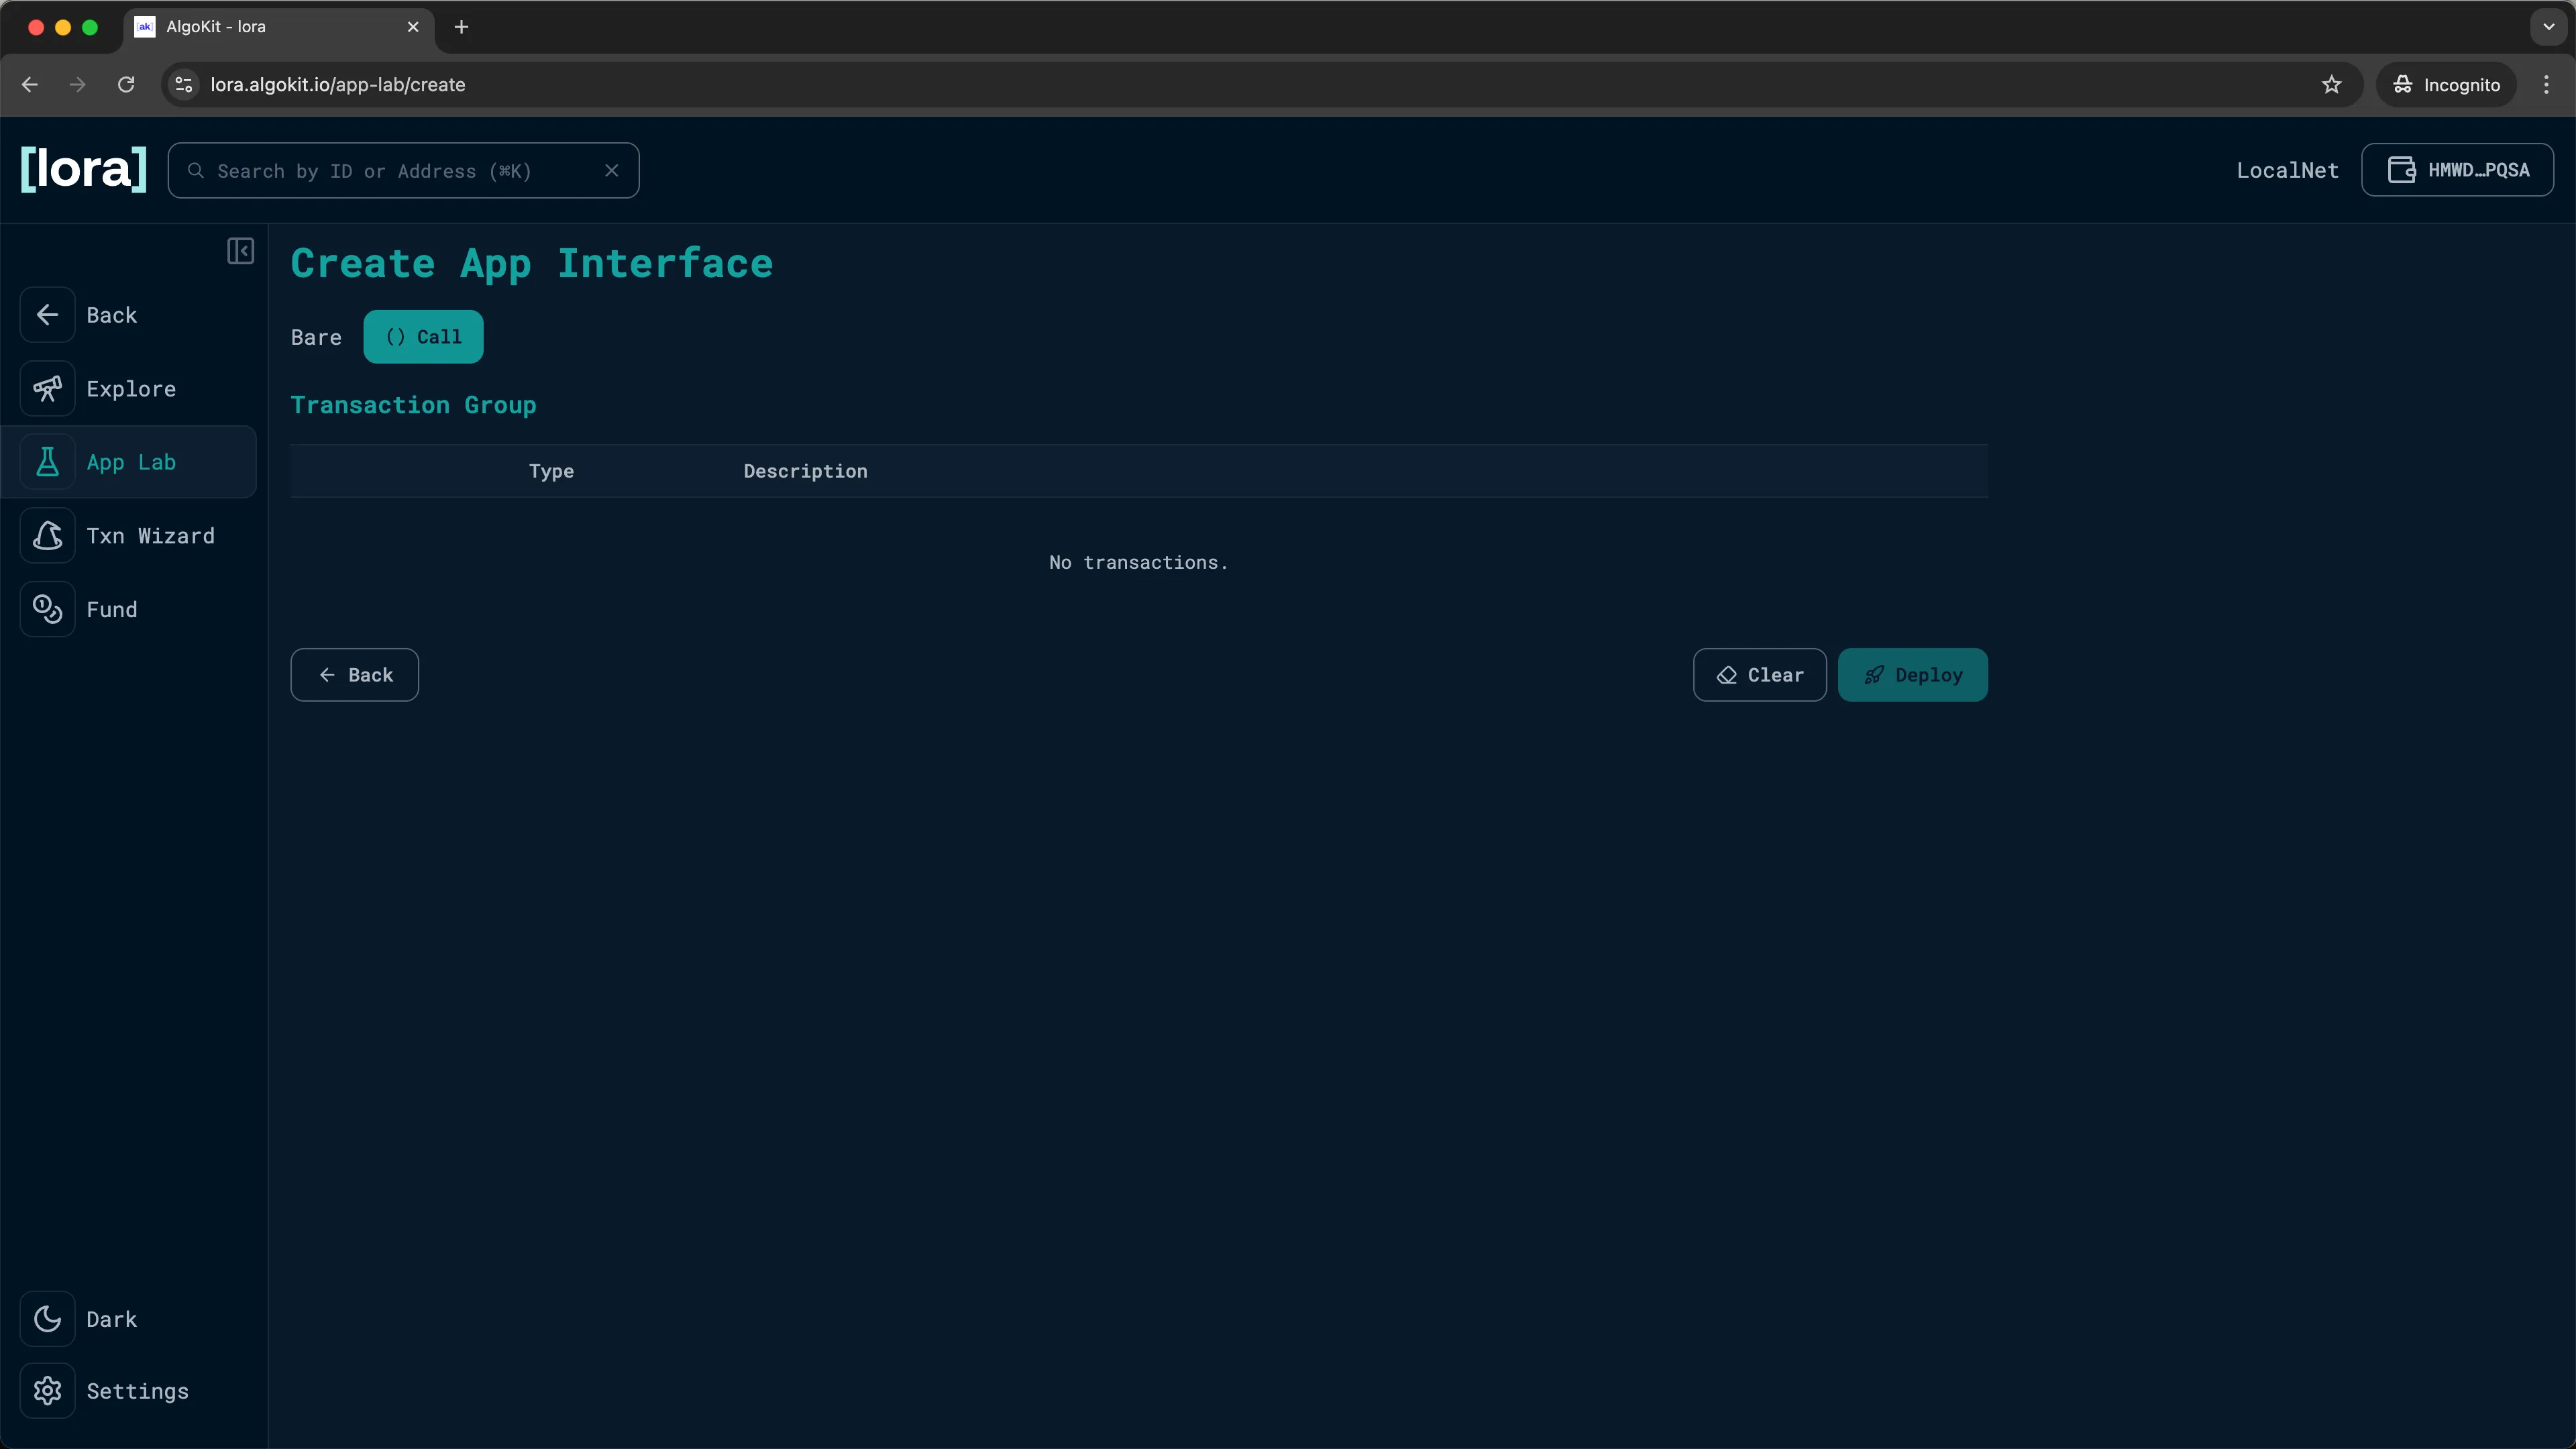
LORA: Transaction builder 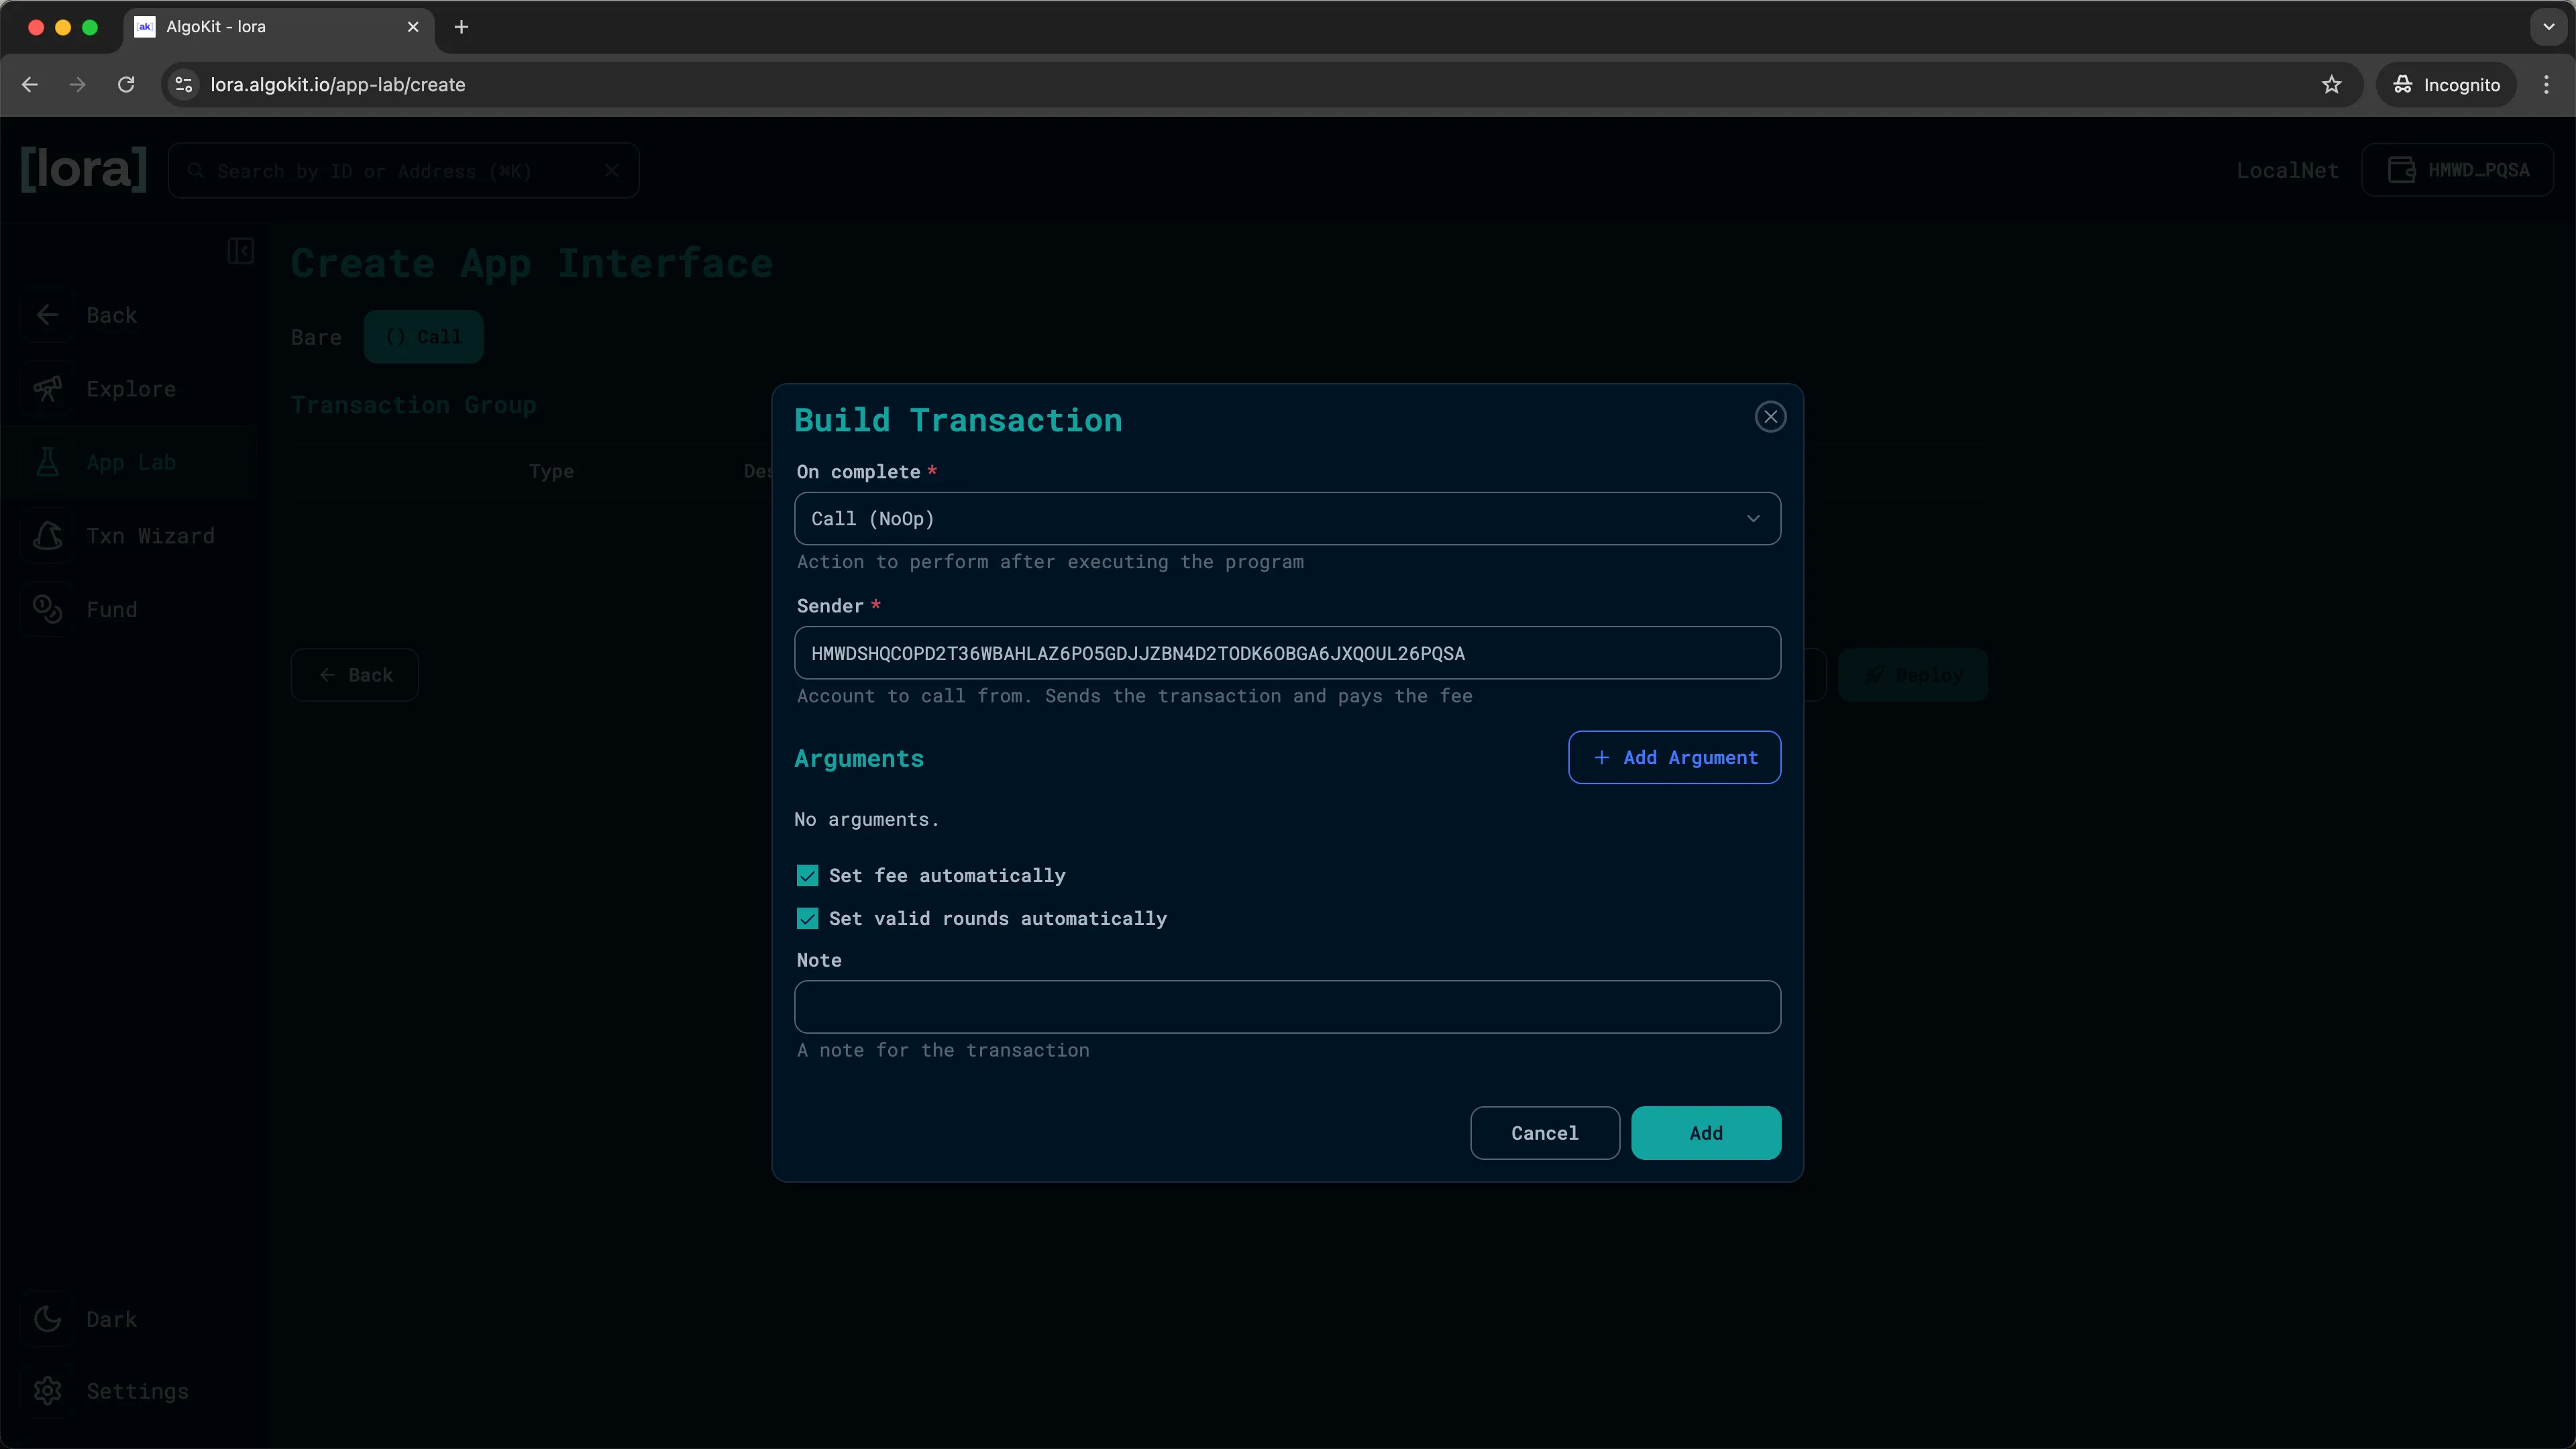
LORA: Create new transaction -
Click
Deployand sign the transaction by clickingOKin the KMD (Key Management Daemon) popup to deploy the smart contract to LocalNet.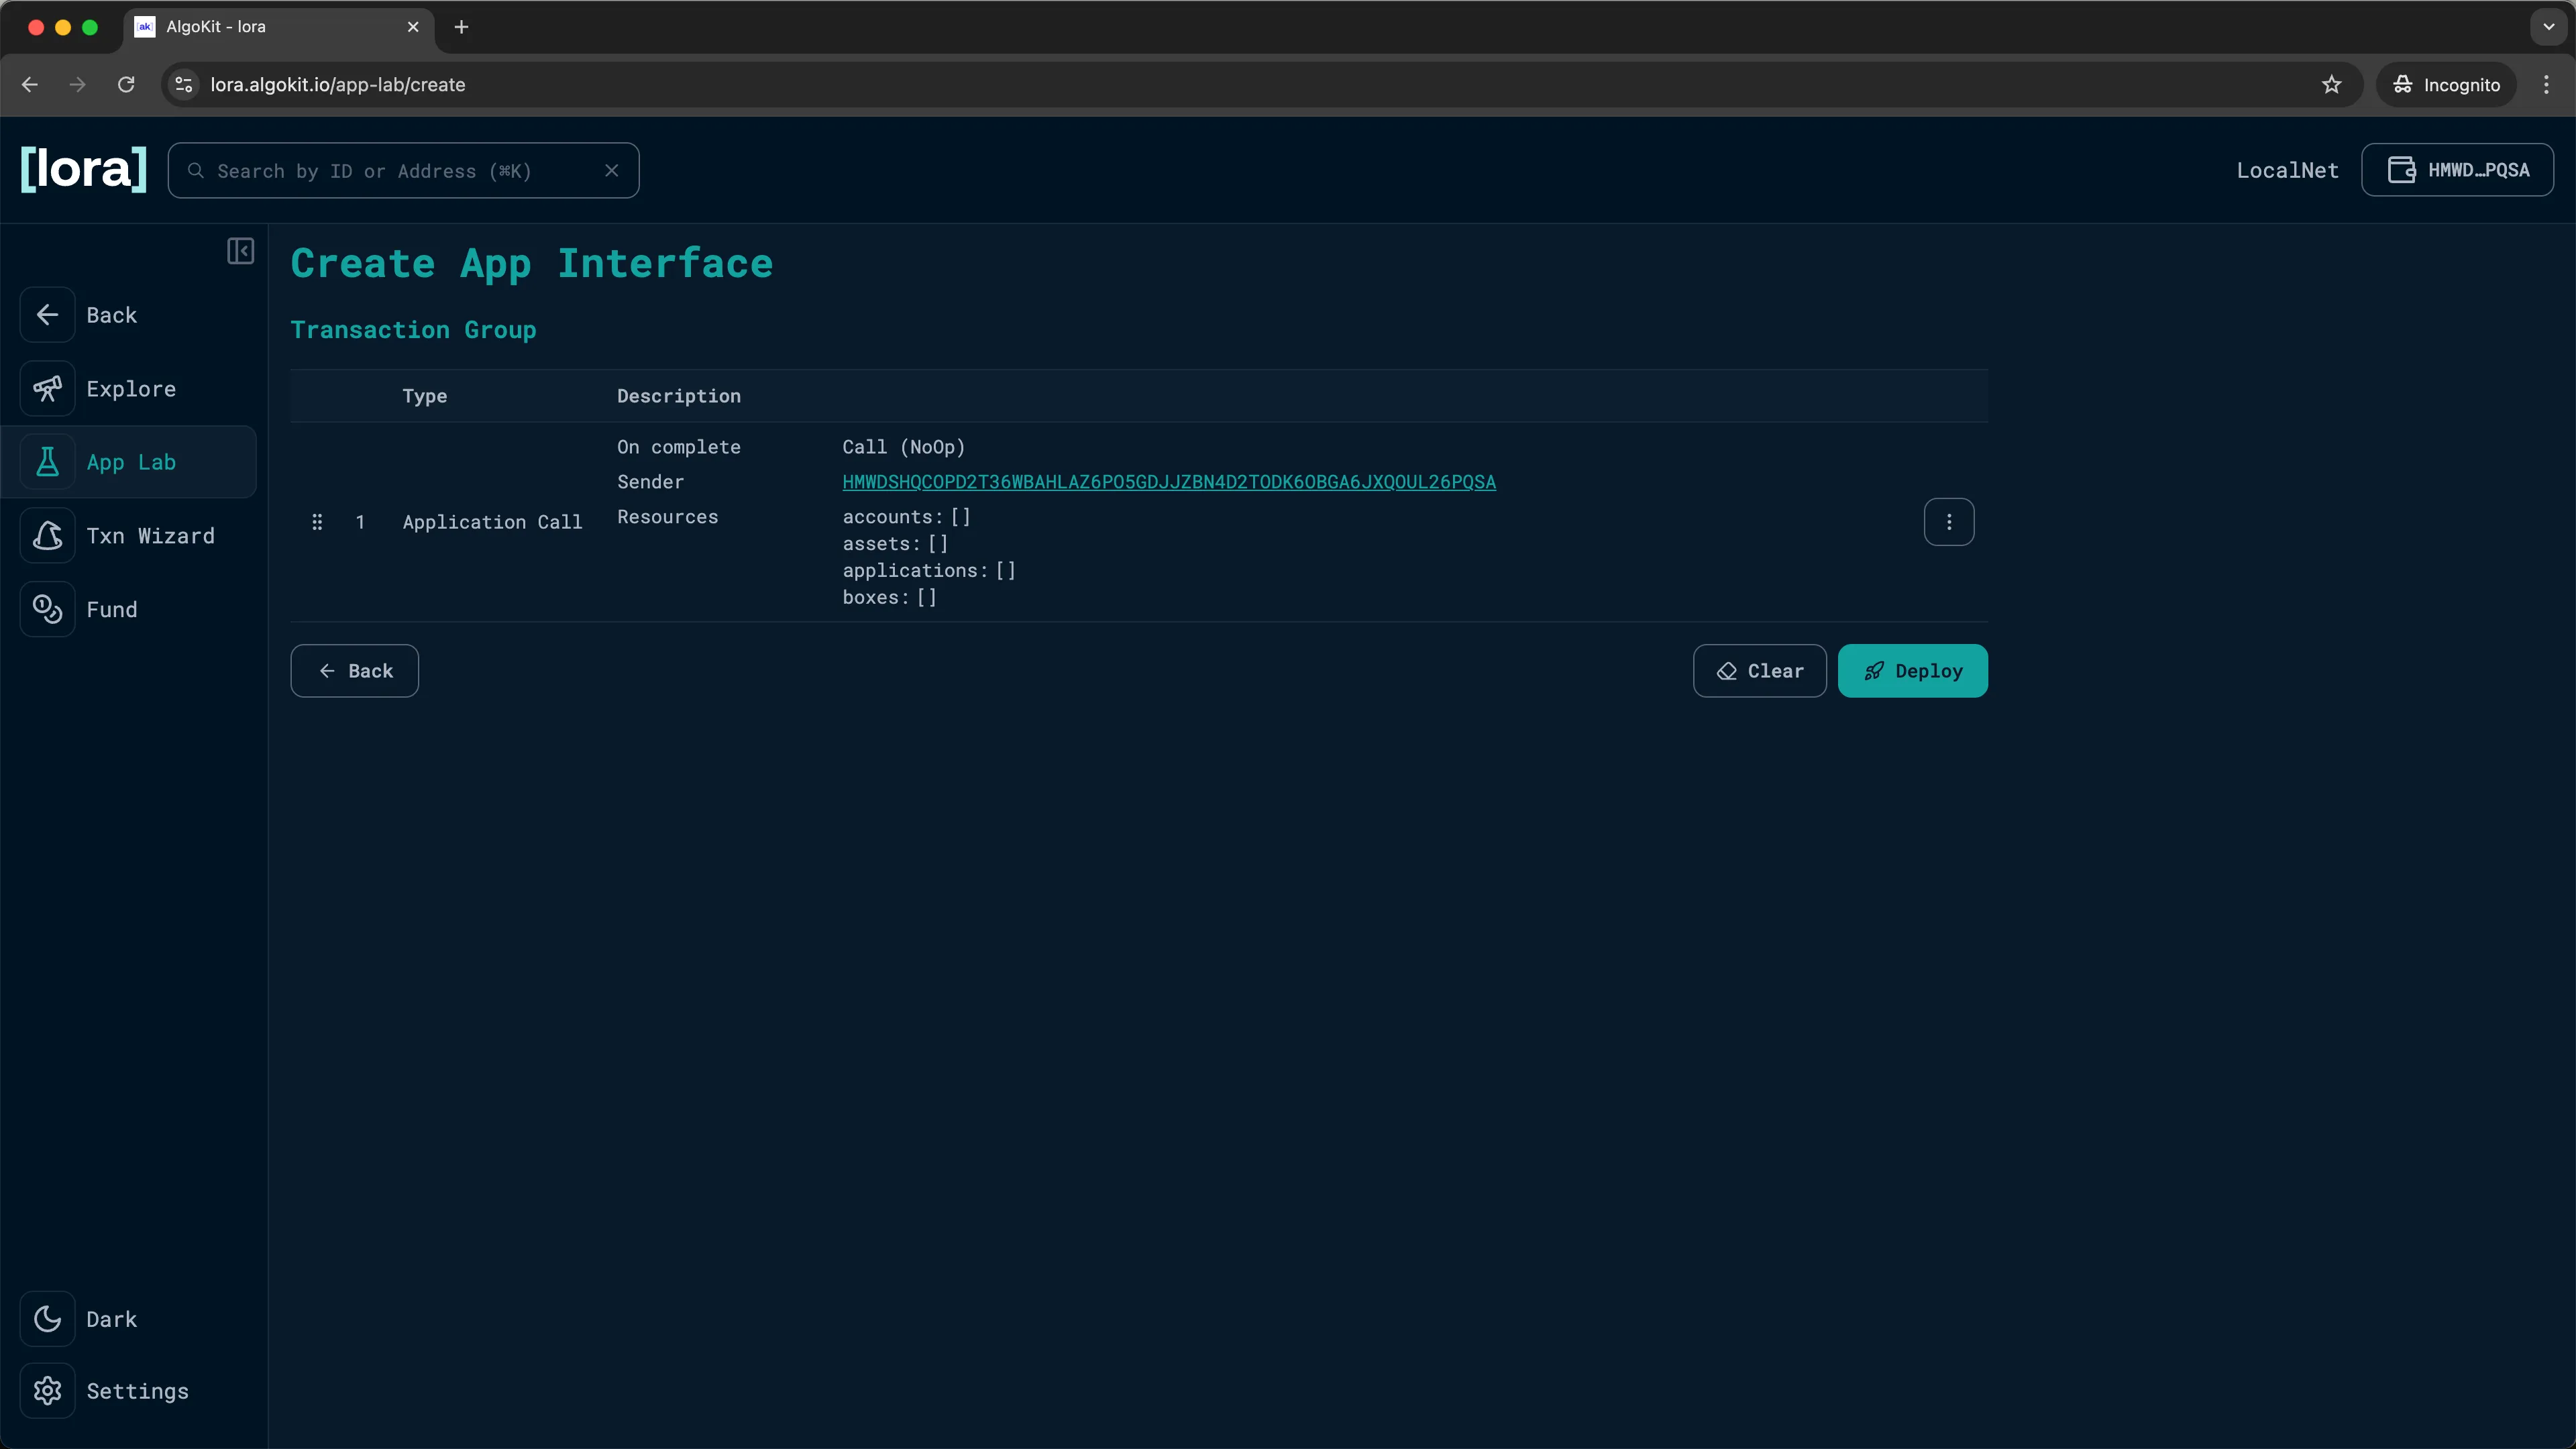
LORA: Transaction created -
You should now see the deployed
HelloWorldcontract on theApp Labpage.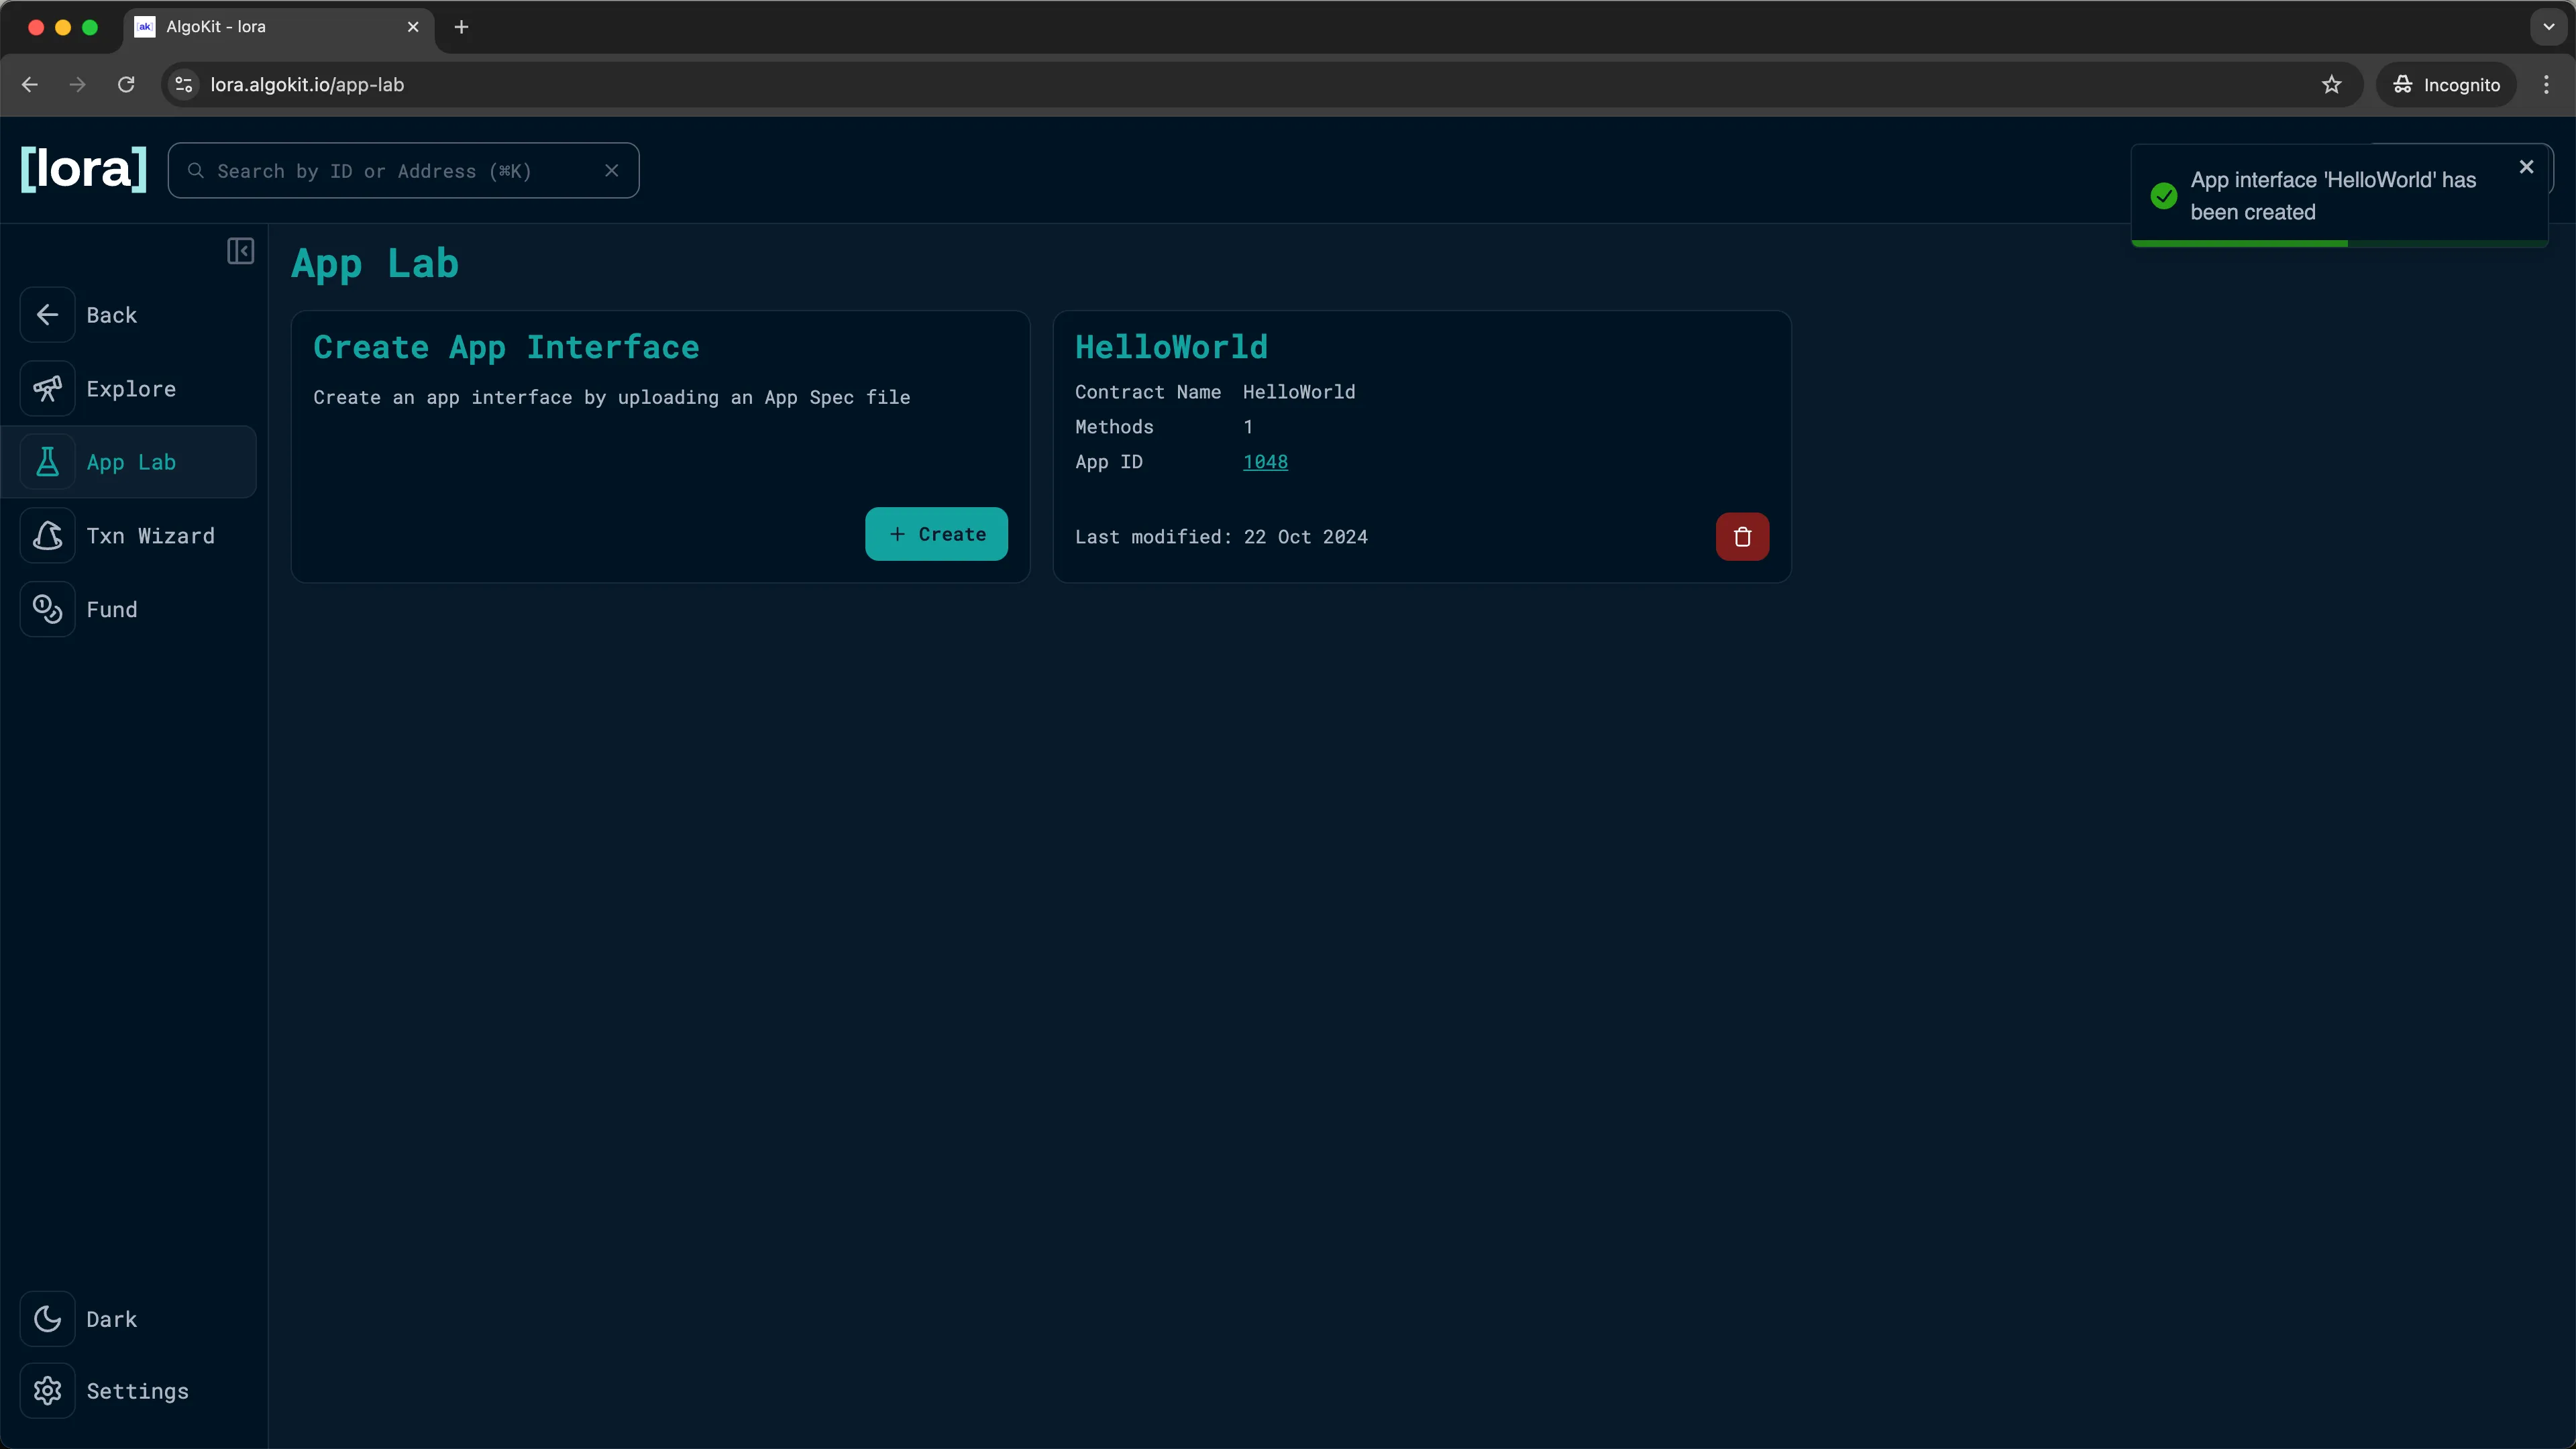
LORA: Your app is now deployed
Call the hello Method
Section titled “Call the hello Method”With the application deployed, you can now begin interacting with it.
-
Click on the
App IDinside theHelloWorldcard to go to theApplicationpage.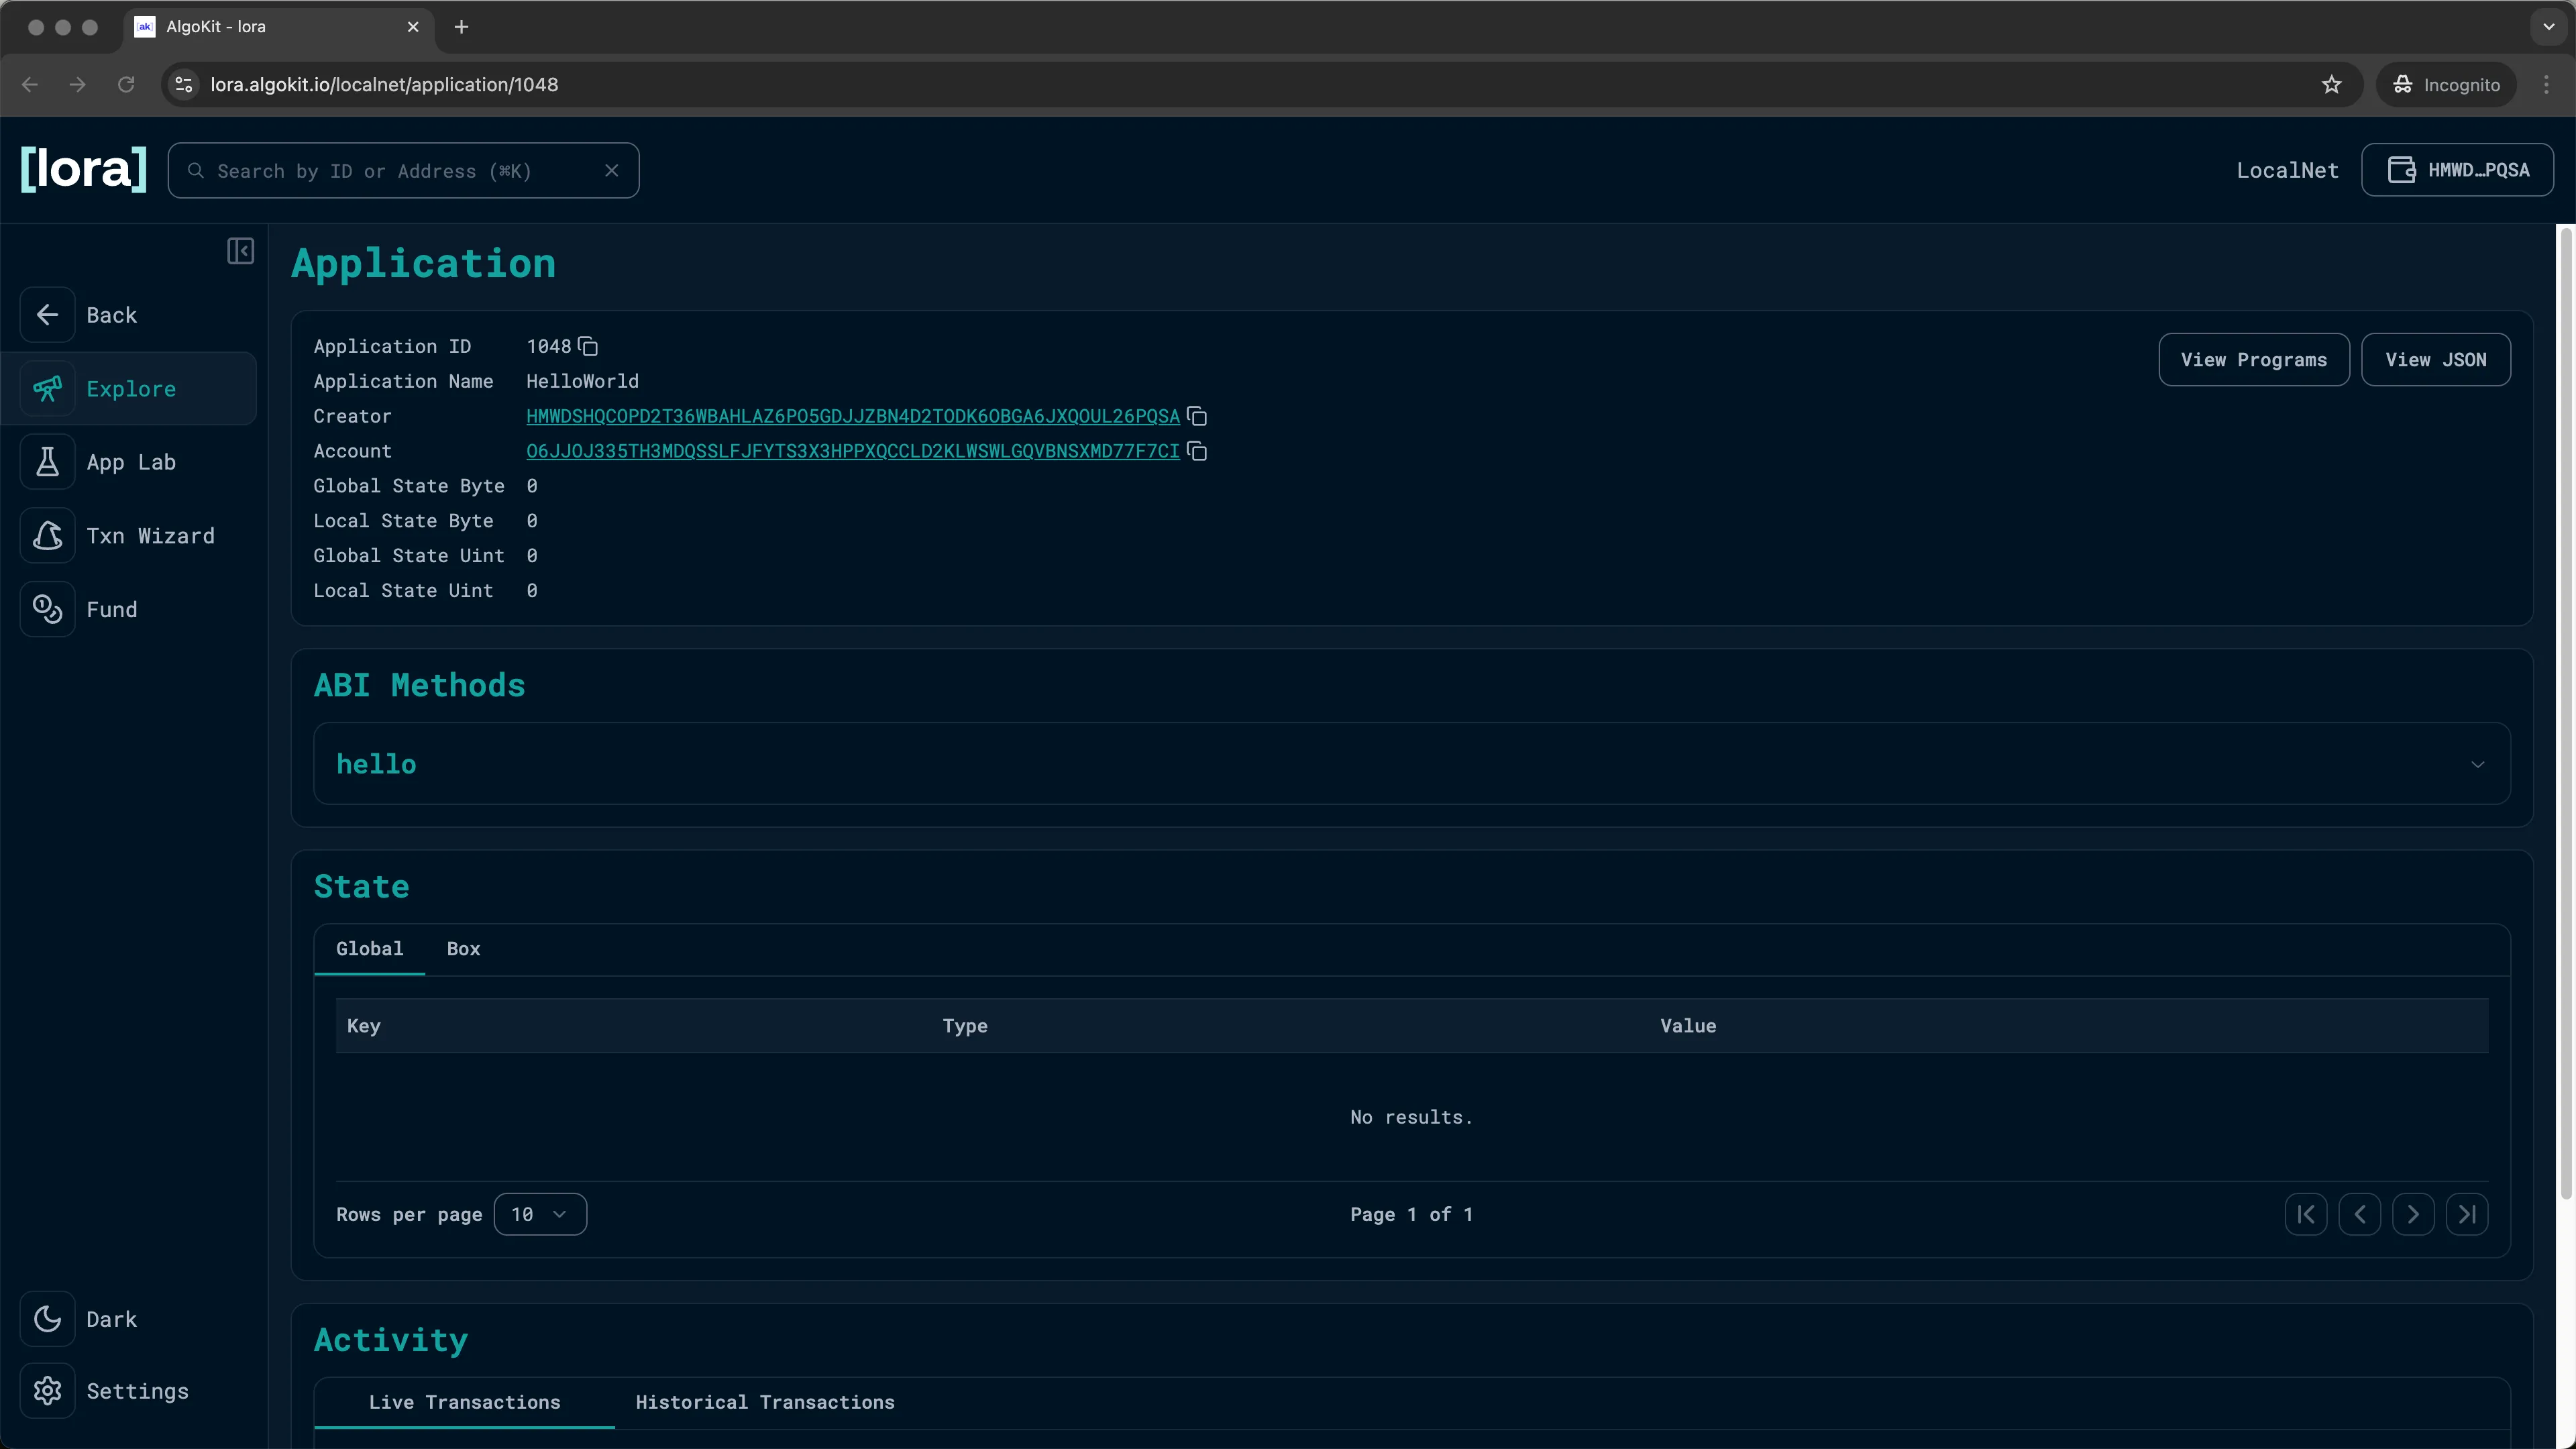
LORA: Inspecting your on-chain app -
Inside the
ABI Methodssection, you should see thehellomethod. Click on the dropdown and theCallbutton. You will be prompted with a popup allowing you to enter the parameter for thehellomethod and call it.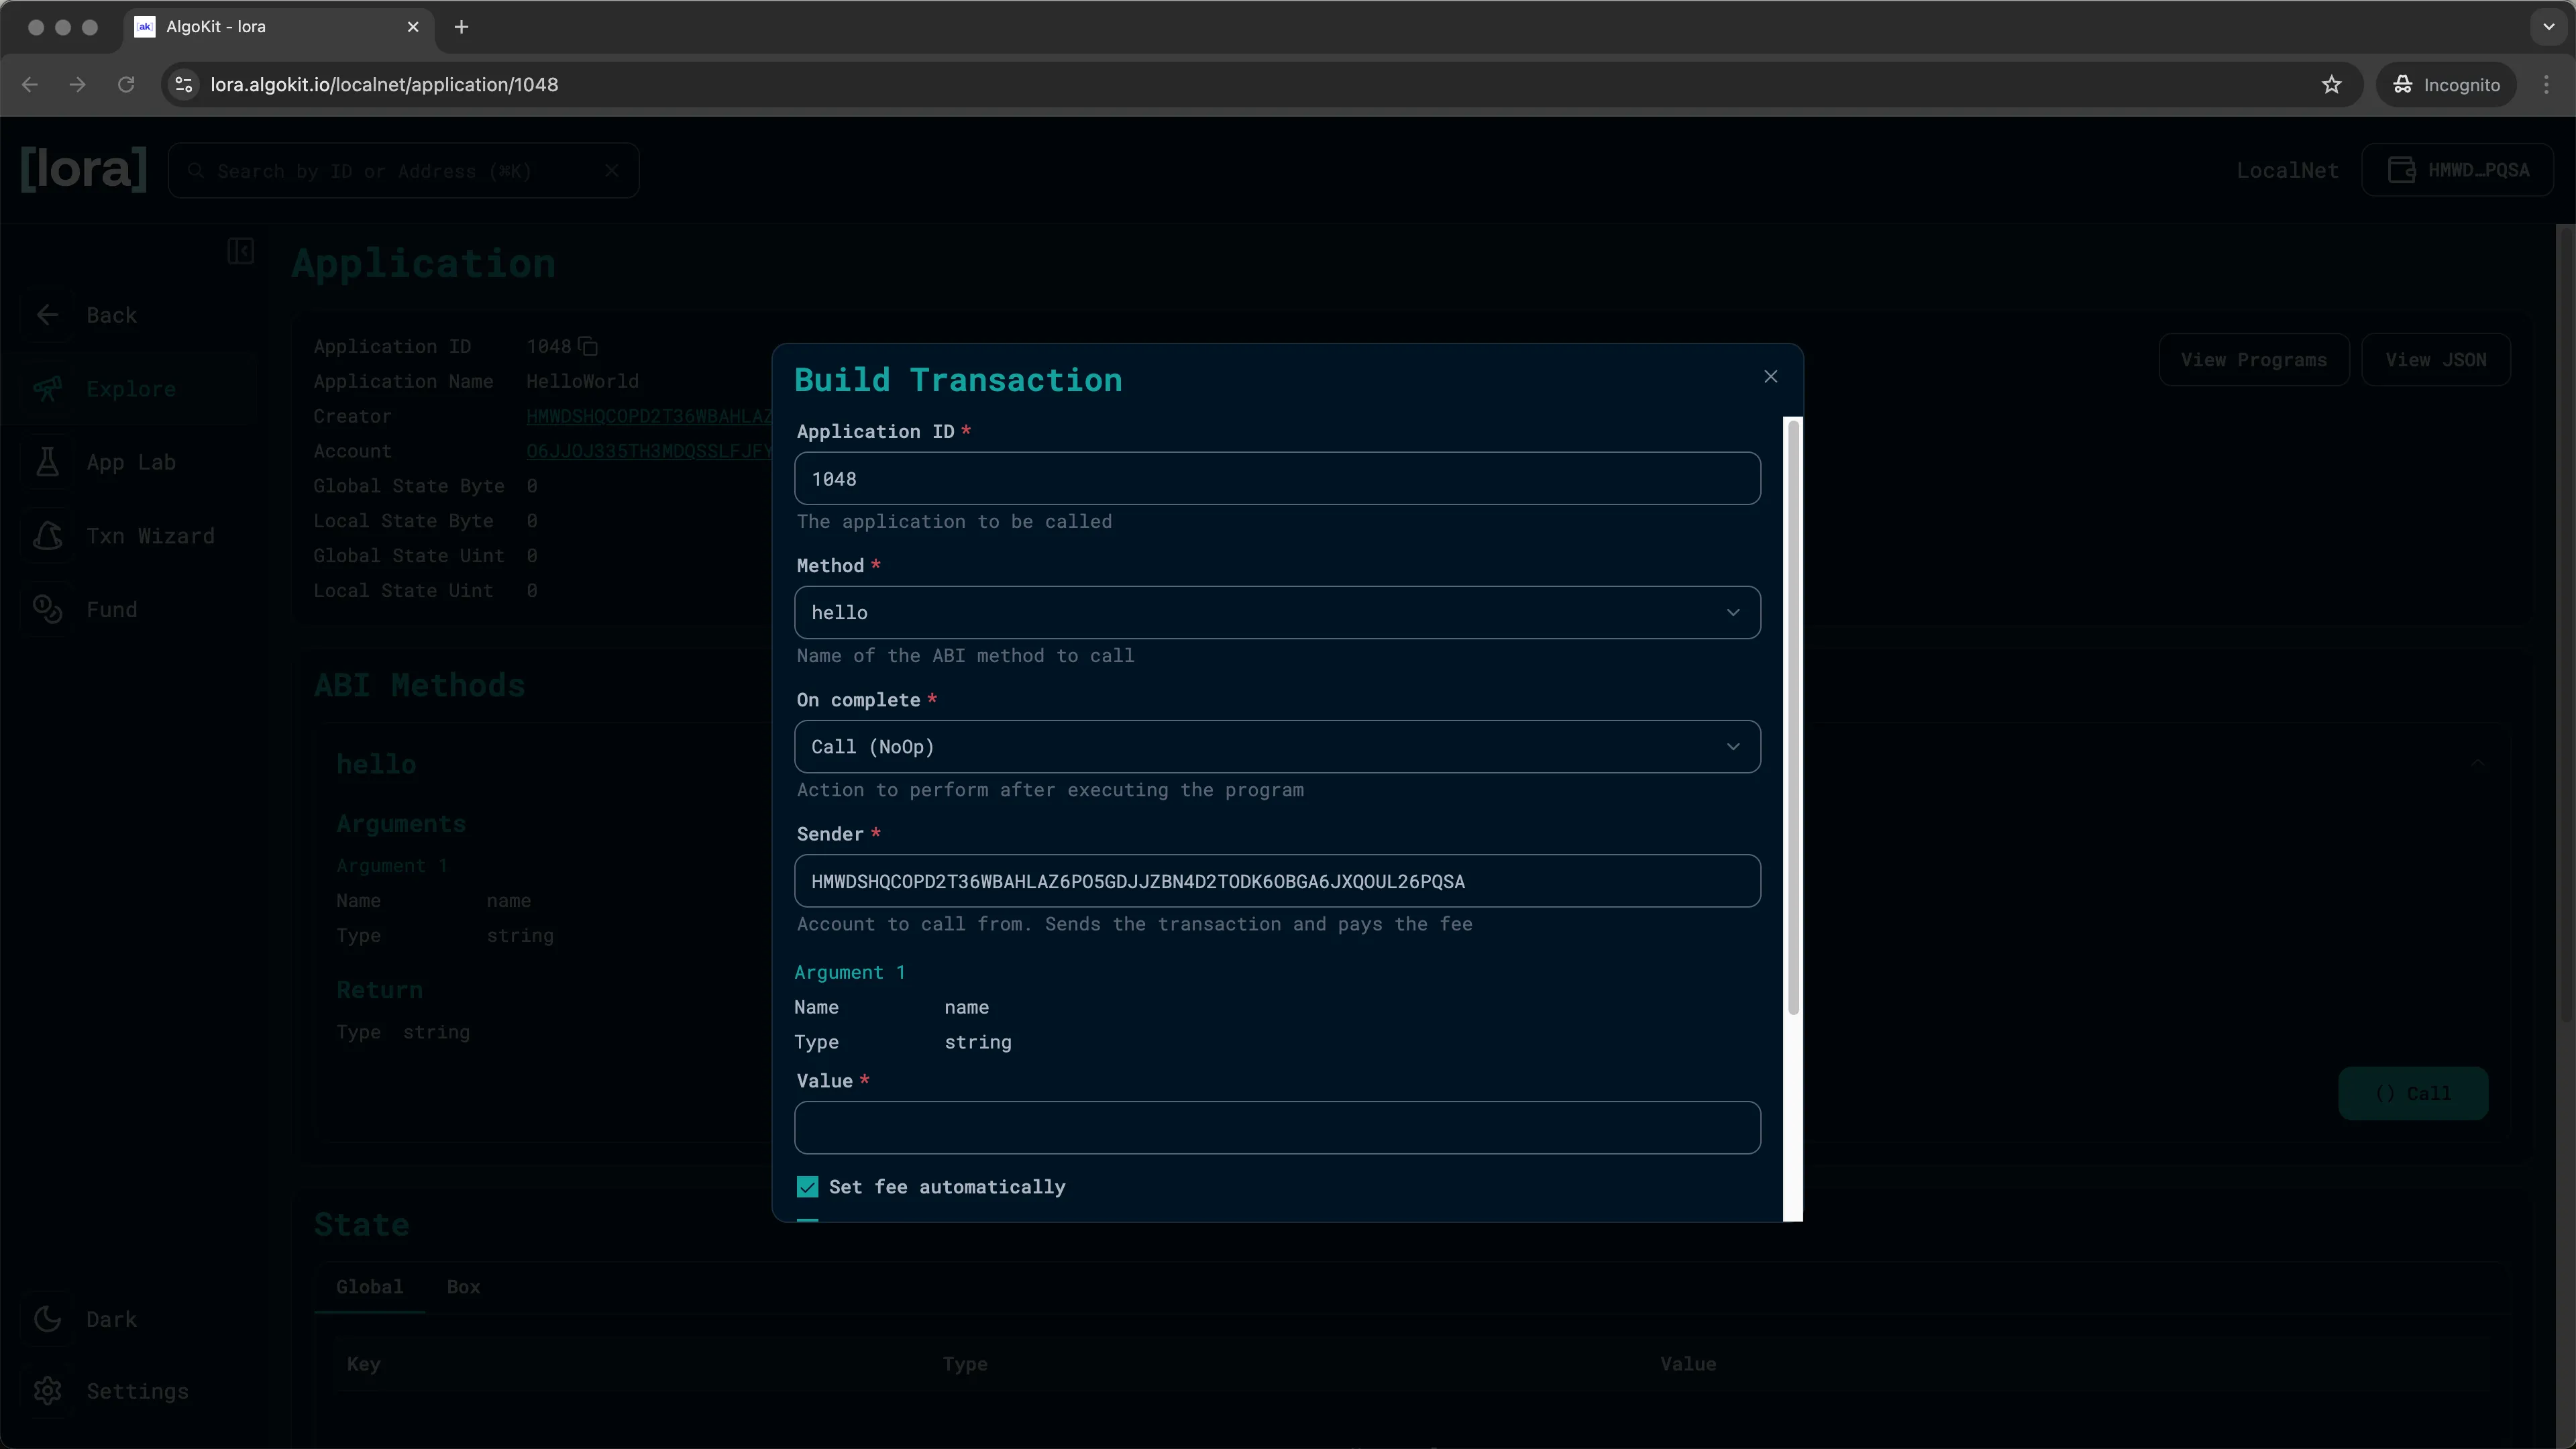
LORA: ABI methods -
Enter a string in the
valueinput and click onAdd.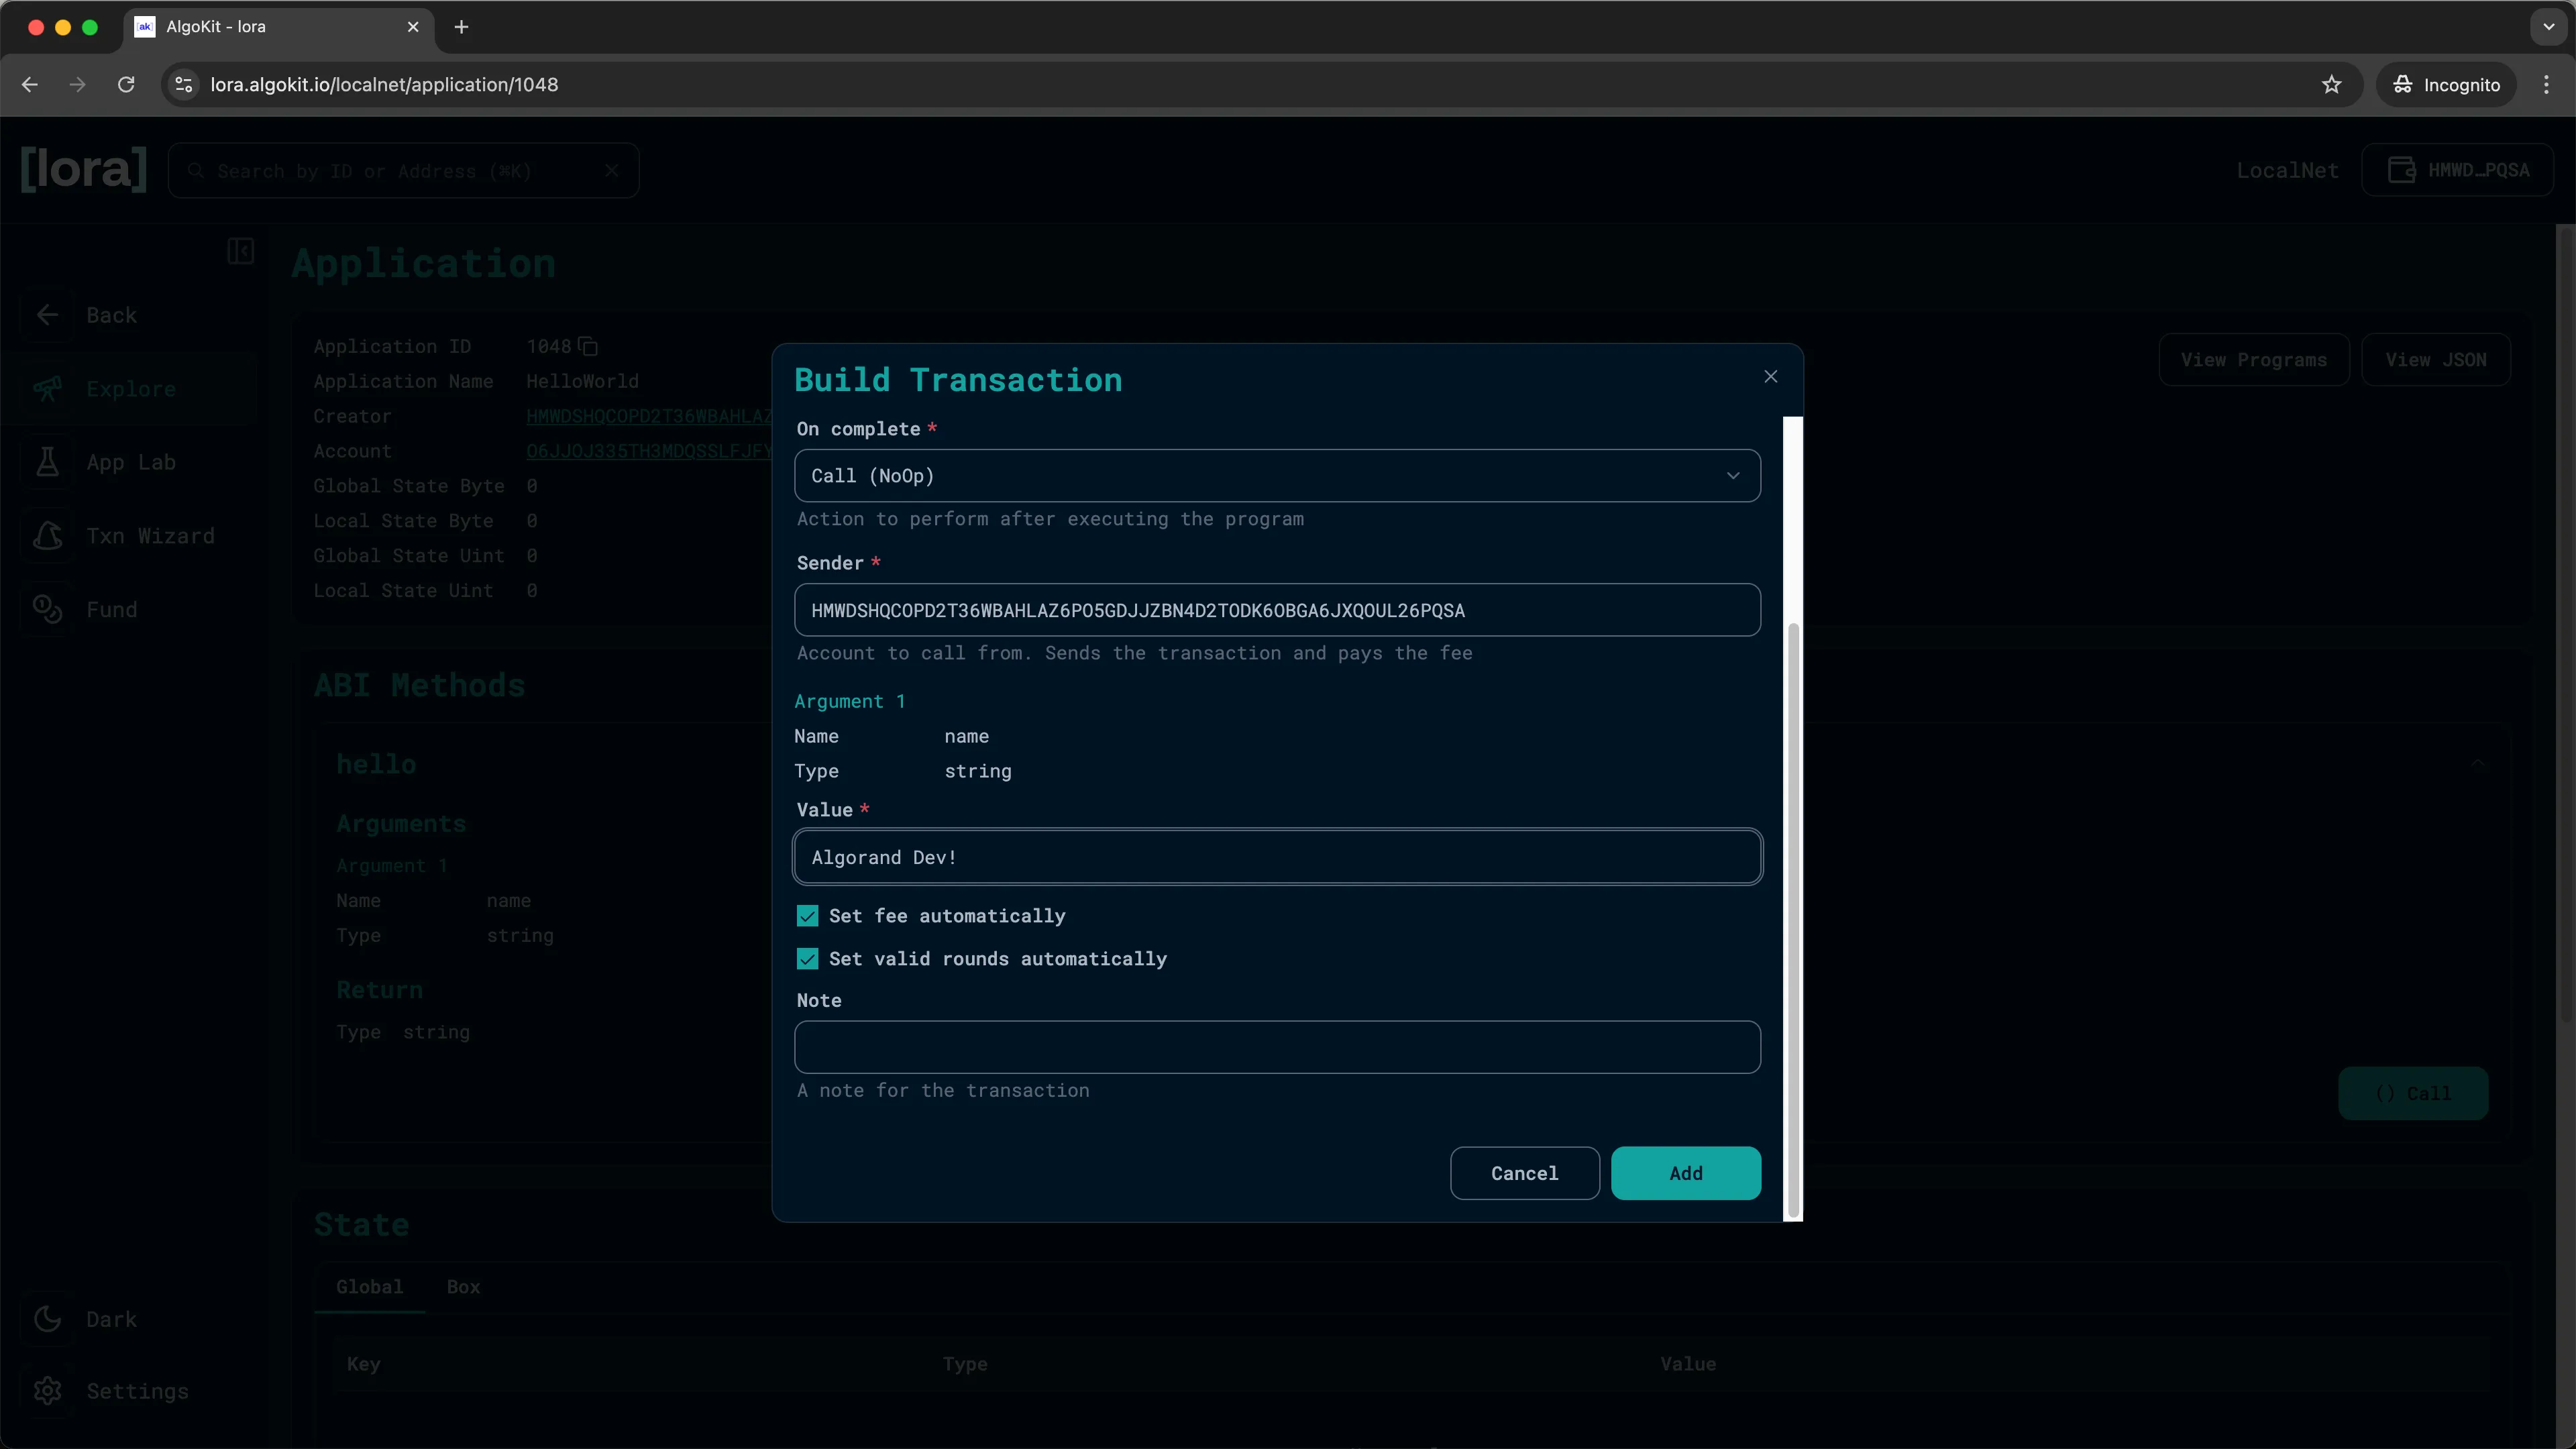
LORA: Method arguments -
You should now see the transaction you just built on the
Applicationpage. ClickSendand sign the transaction with your KMD wallet to execute the transaction.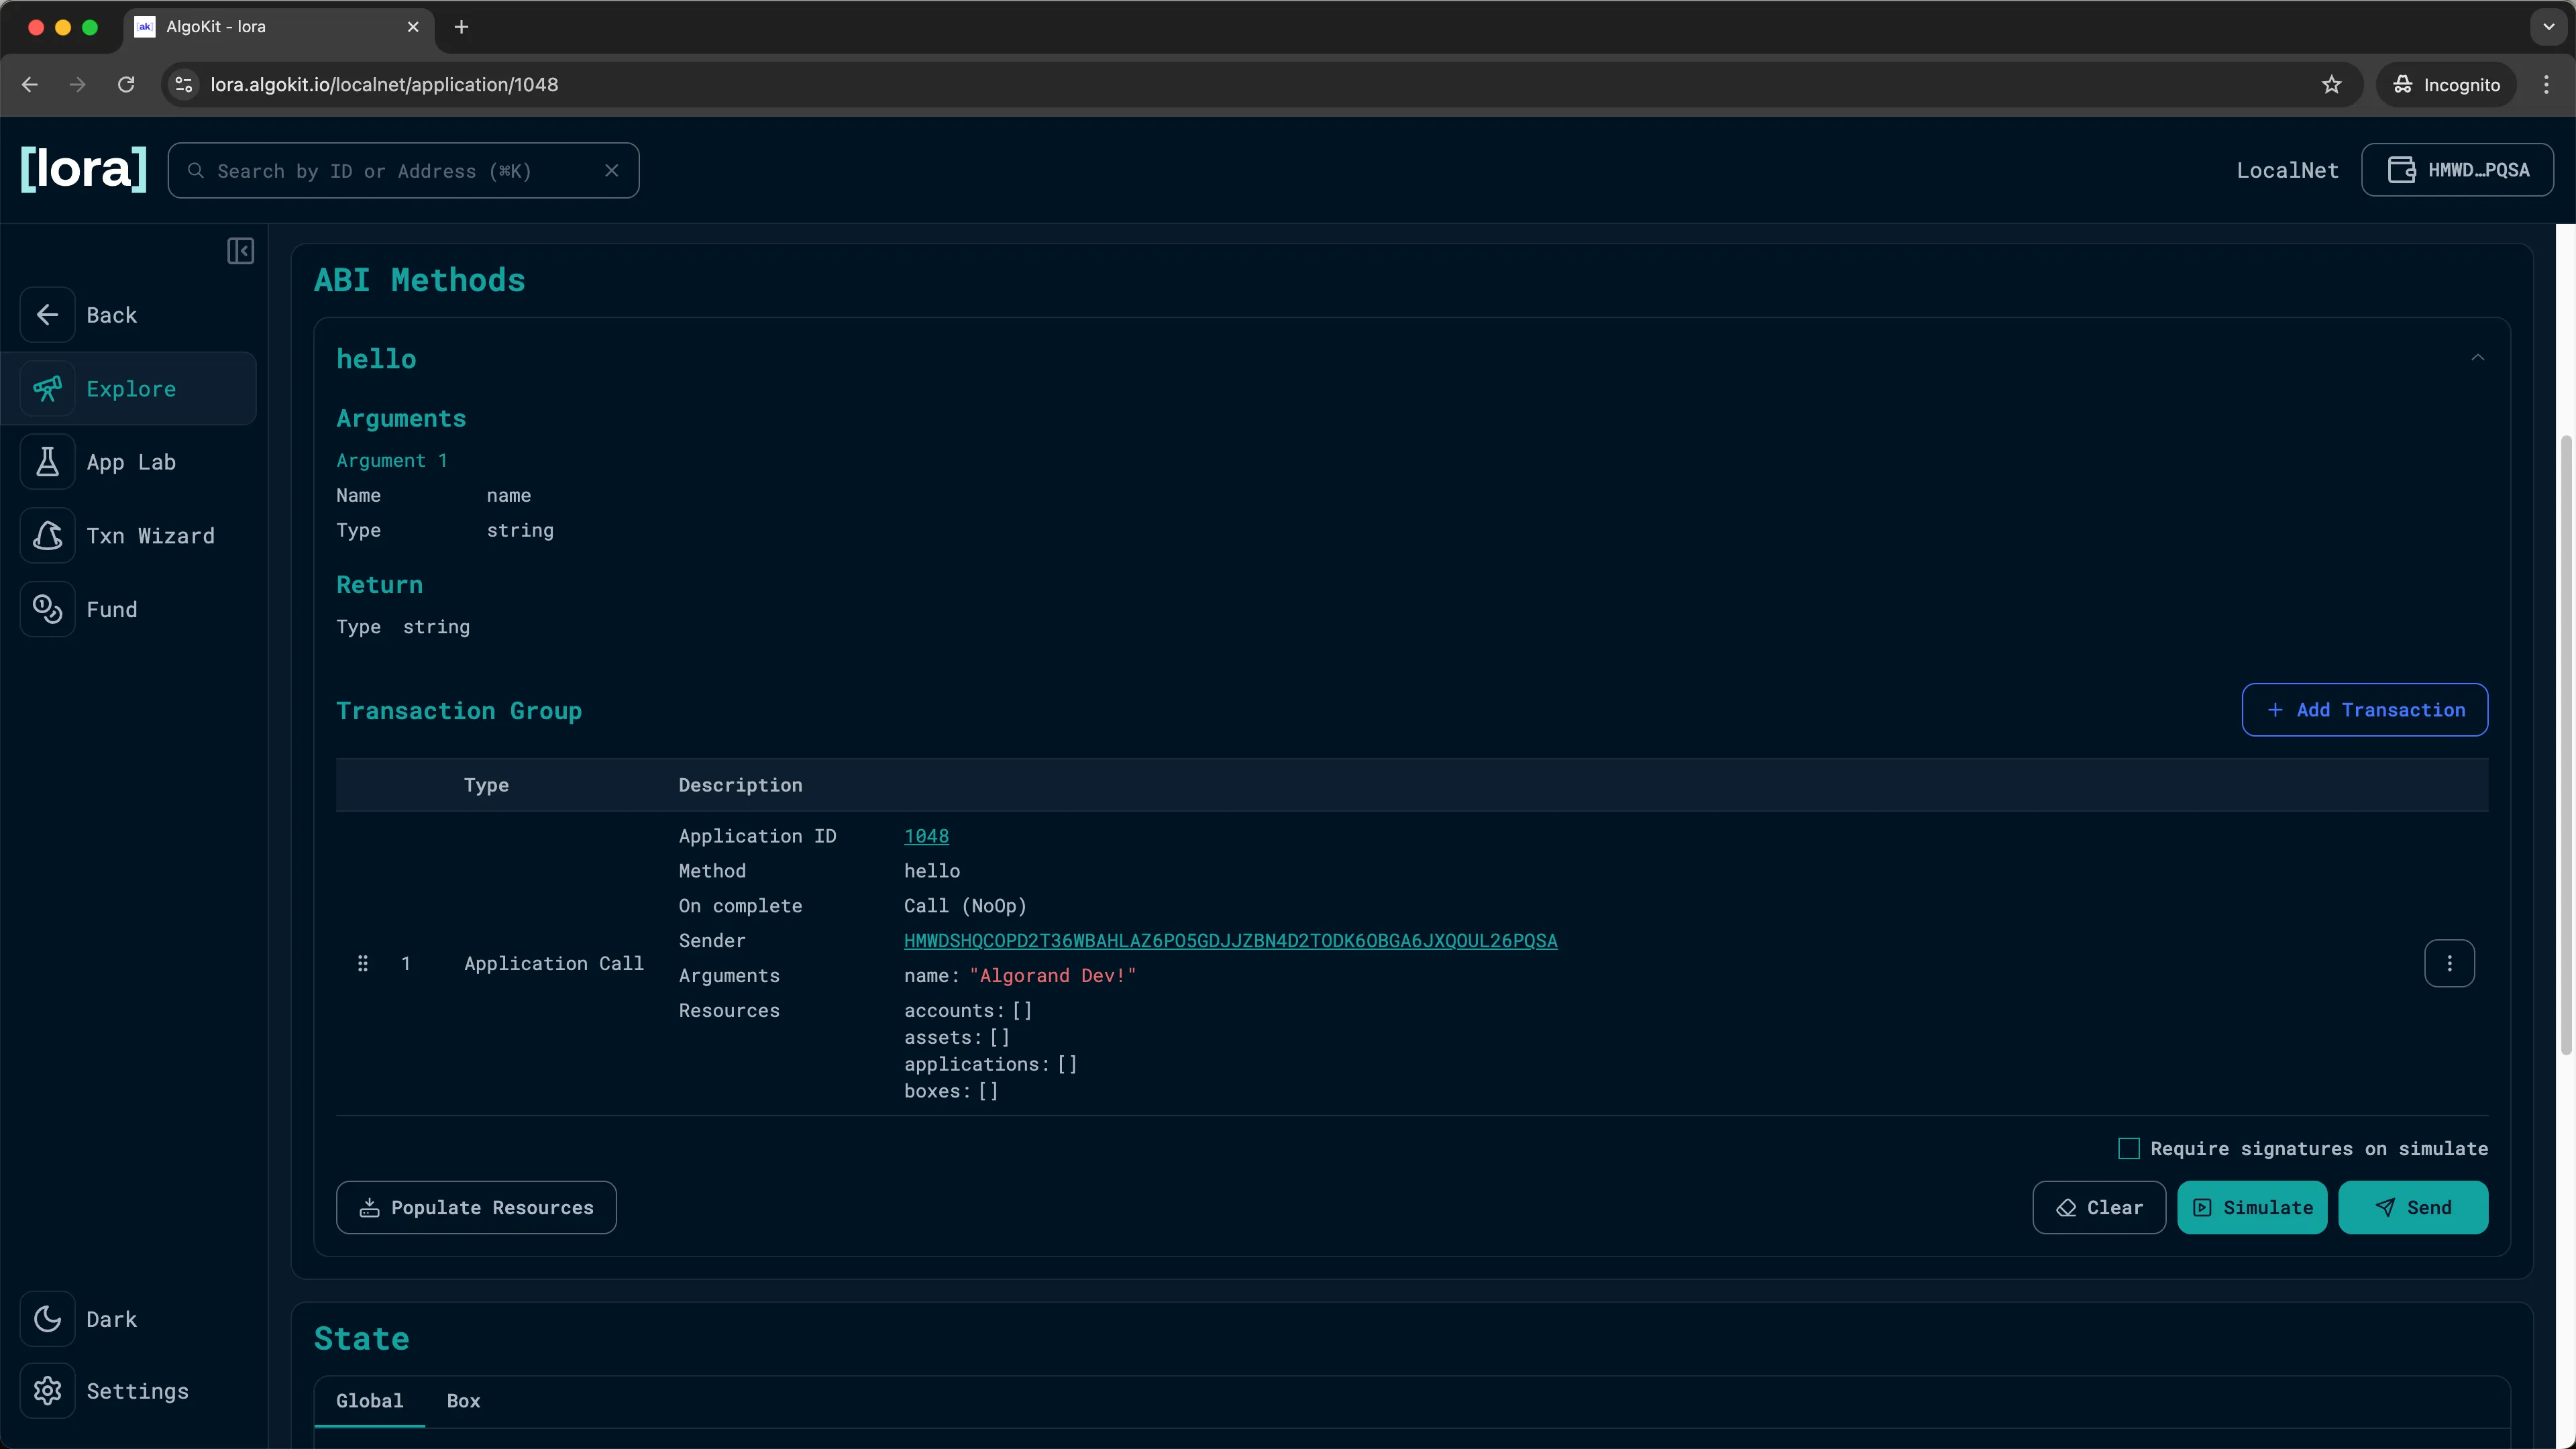
LORA: Sending the transaction -
You should now see the
Send Resultshowing you the details about the transaction you just executed!
LORA: Transaction results -
You can also click on
Transaction IDto go to theTransactionpage and see the full transaction details.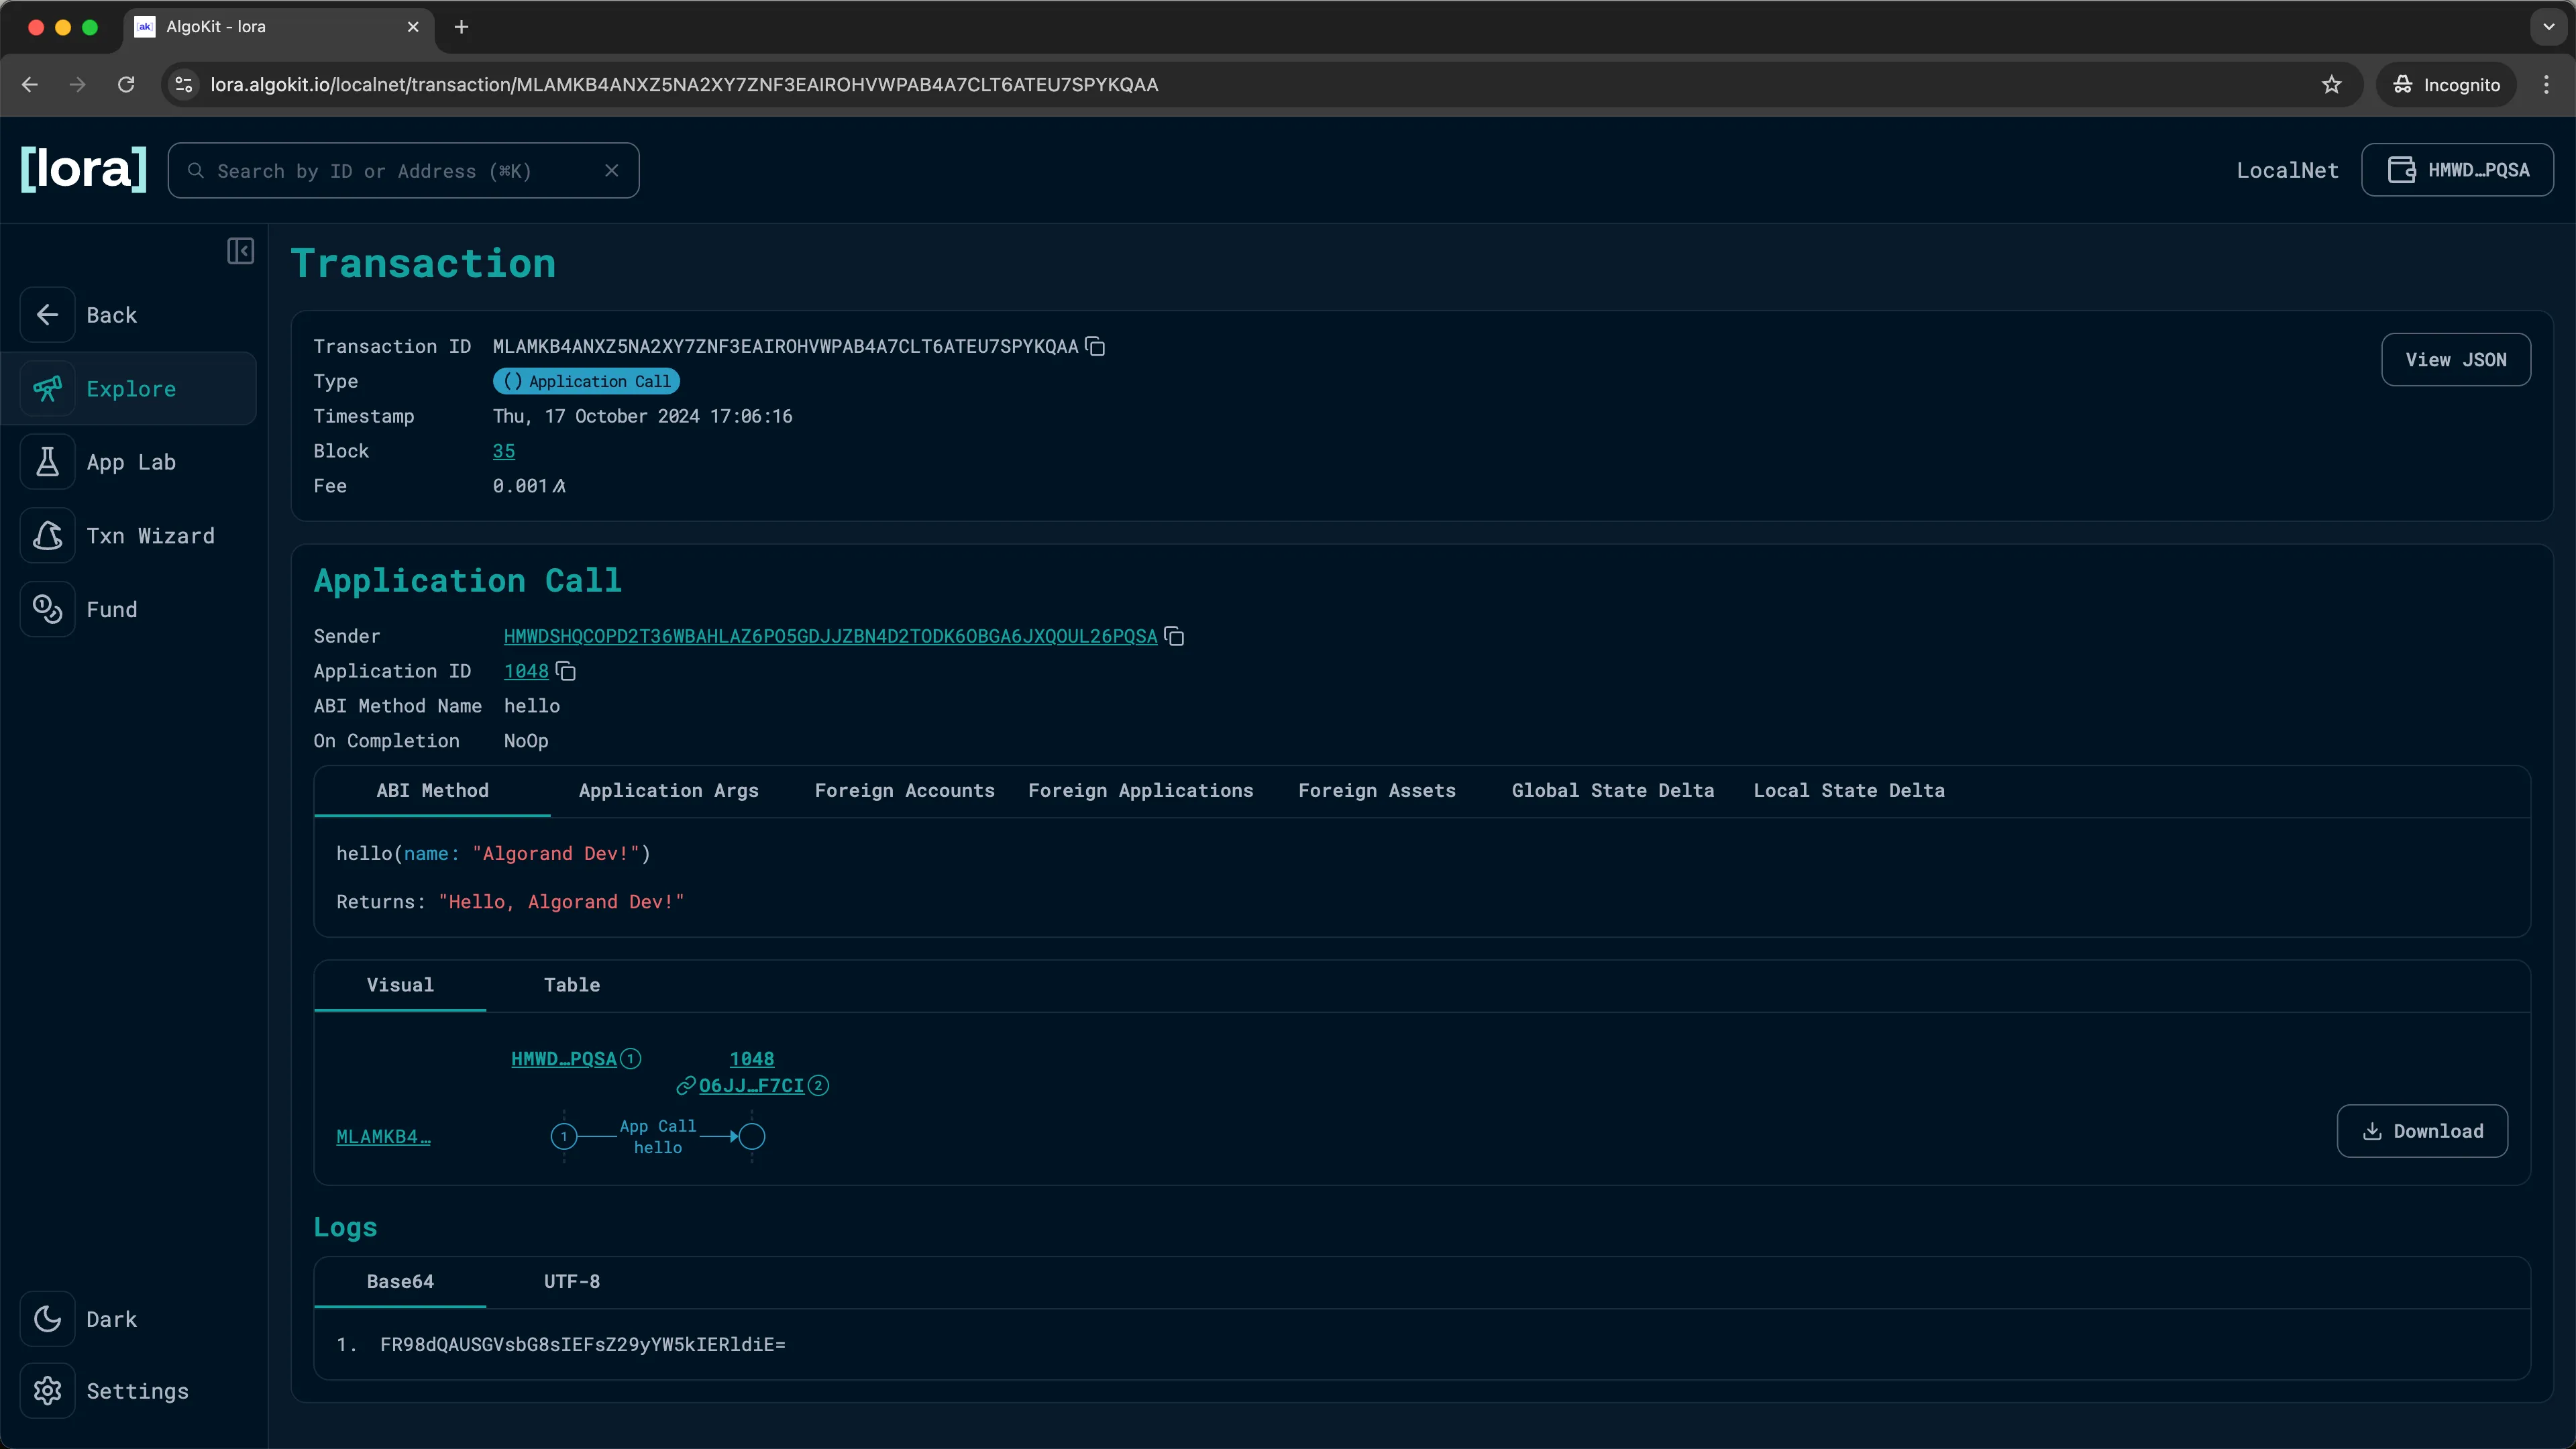
LORA: Inspect transaction details
Next steps
Section titled “Next steps”You have now deployed a smart contract, called one of its methods, and inspected the result in LORA.
You are ready to move beyond the Hello World template and start building your own Algorand applications.