Getting Started with AlgoKit
Hello, Developer! Welcome to Algorand!
This quick start guide will help you set up your development environment, create your first Algorand project with AlgoKit, and deploy your first Algorand smart contract. By the end of this guide, you’ll be ready to build your own decentralized application on the Algorand blockchain.
But first, what is AlgoKit?
AlgoKit is a simple, one-stop tool for developers to quickly and easily build and launch secure, automated, production-ready decentralized applications on the Algorand protocol — now also featuring native support for Python! This empowers developers to write Algorand apps in regular Python, one of the world’s most popular programming languages.
In addition, AlgoKit features:
- A library of smart contract templates to kickstart your build
- All necessary application infrastructure running locally
- Toolchain integrations for languages you love, like Python and TypeScript
- A simplified frontend design experience
Learn more about AlgoKit Here:
Prerequisites
Section titled “Prerequisites”Before you install AlgoKit, you need to install the following prerequisites:
- Python 3.12 or higher
- PipX
- Git
- Docker
- VSCode (recommended)
Recommended IDE Extensions
Section titled “Recommended IDE Extensions”To maximize your Algorand smart contract development experience, install dedicated Visual Studio Code extensions for Python and TypeScript. These extensions work alongside standard language servers to provide Algorand-specific validation, diagnostics, and code automation, so you get instant feedback and fixes as you write contracts.
The Algorand TypeScript language extension brings language server powered capabilities to your smart contract authoring experience in Visual Studio Code. It extends the results from your installed TypeScript language server to provide Algorand TypeScript specific diagnostics and code actions.
Requirements:
Section titled “Requirements:”- Visual Studio Code 1.80.0 or higher
- puya-ts 1.0.1 or higher
Quick Start
Section titled “Quick Start”- Install this Algorand TypeScript language extension 2. Install the puya-ts package on your
system. We recommend installing as a project dev dependency. 3. Enable the Algorand TypeScript
language server (
algorandTypeScript.languageServer.enable) for your workspace (not required if using a new AlgoKit project) 4. Open an Algorand TypeScript smart contract file (.algo.ts)
Configuration
Section titled “Configuration”This extension exposes the following settings:
algorandTypeScript.languageServer.enable: Enables the Algorand TypeScript language server. By default the language server is disabled. 2.algorandTypeScript.languageServer.logLevel: Configures the verbosity of the messages Algorand TypeScript language server displays in the output window.
For more details refer to Typescript - Visual Studio Marketplace
The Algorand Python language extension brings language server powered capabilities to your smart contract authoring experience in Visual Studio Code. It extends the results from your installed Python language server to provide Algorand Python specific diagnostics and code actions.
Requirements:
Section titled “Requirements:”- Visual Studio Code 1.80.0 or higher
- Python extension for Visual Studio Code
- Python 3.12 or higher
- PuyaPy 5.3.0 or higher
Quick Start
Section titled “Quick Start”- Install the Python extension for Visual Studio Code 2. Install this Algorand Python language
extension 3. Install the PuyaPy package on your system. We recommend installing as a project dev
dependency in your project venv. 4. Enable the Algorand Python language server
(
algorandPython.languageServer.enable) for your workspace (not required if using a new AlgoKit project) 5. Open a Python smart contract file (.py)
Configuration
Section titled “Configuration”This extension exposes the following settings:
algorandPython.languageServer.enable: Enables the Algorand Python language server. By default the language server is disabled. 2.algorandPython.languageServer.logLevel: Configures the verbosity of the messages Algorand Python language server displays in the output window. 3.algorandPython.languageServer.debounceInterval: Configures the delay between receiving a code change and refreshing related diagnostics.
For more details refer to Python - Visual Studio Marketplace
Install AlgoKit
Section titled “Install AlgoKit”-
To install AlgoKit, run the following command from a terminal.
pipx install algokit -
If you used AlgoKit before, update it with pipx:
pipx upgrade algokit -
After the installation completes, restart the terminal.
-
Ensure prerequisites are installed
-
Install Python3 using WinGet
- Install python 3.12:
winget install python.python.3.12 -
Restart the terminal to ensure Python and pip are available on the path
-
Install pipx:
pip install --user pipxpython -m pipx ensurepath -
Restart the terminal to ensure pipx is available on the path
-
Install AlgoKit via pipx:
pipx install algokit -
If you used AlgoKit before, update it with pipx:
pipx upgrade algokit -
Restart the terminal to ensure AlgoKit is available on the path
-
Ensure prerequisites are installed
-
Install AlgoKit, with
pipxby running the following command from a terminal.pipx install algokit -
If you used AlgoKit before, update it with pipx:
pipx upgrade algokit -
After the installation completes, restart the terminal.
Verify the Installation
Section titled “Verify the Installation”To verify AlgoKit Installed correctly run the following command:
algokit --versionOutput similar to the following should be displayed:
algokit, version 2.6.0Start a LocalNet
Section titled “Start a LocalNet”When building smart contracts, it is recommended to build and test on a local Algorand blockchain running on your computer first. Deploying and calling smart contracts on mainnet (the live public blockchain for production) costs real money. Deploying on testnet (a replica of mainnet for testing) can be cumbersome. Therefore, it is recommended to first test on the local blockchain. Once everything works, move to testnet for final testing, and then deploy to mainnet to launch your application.
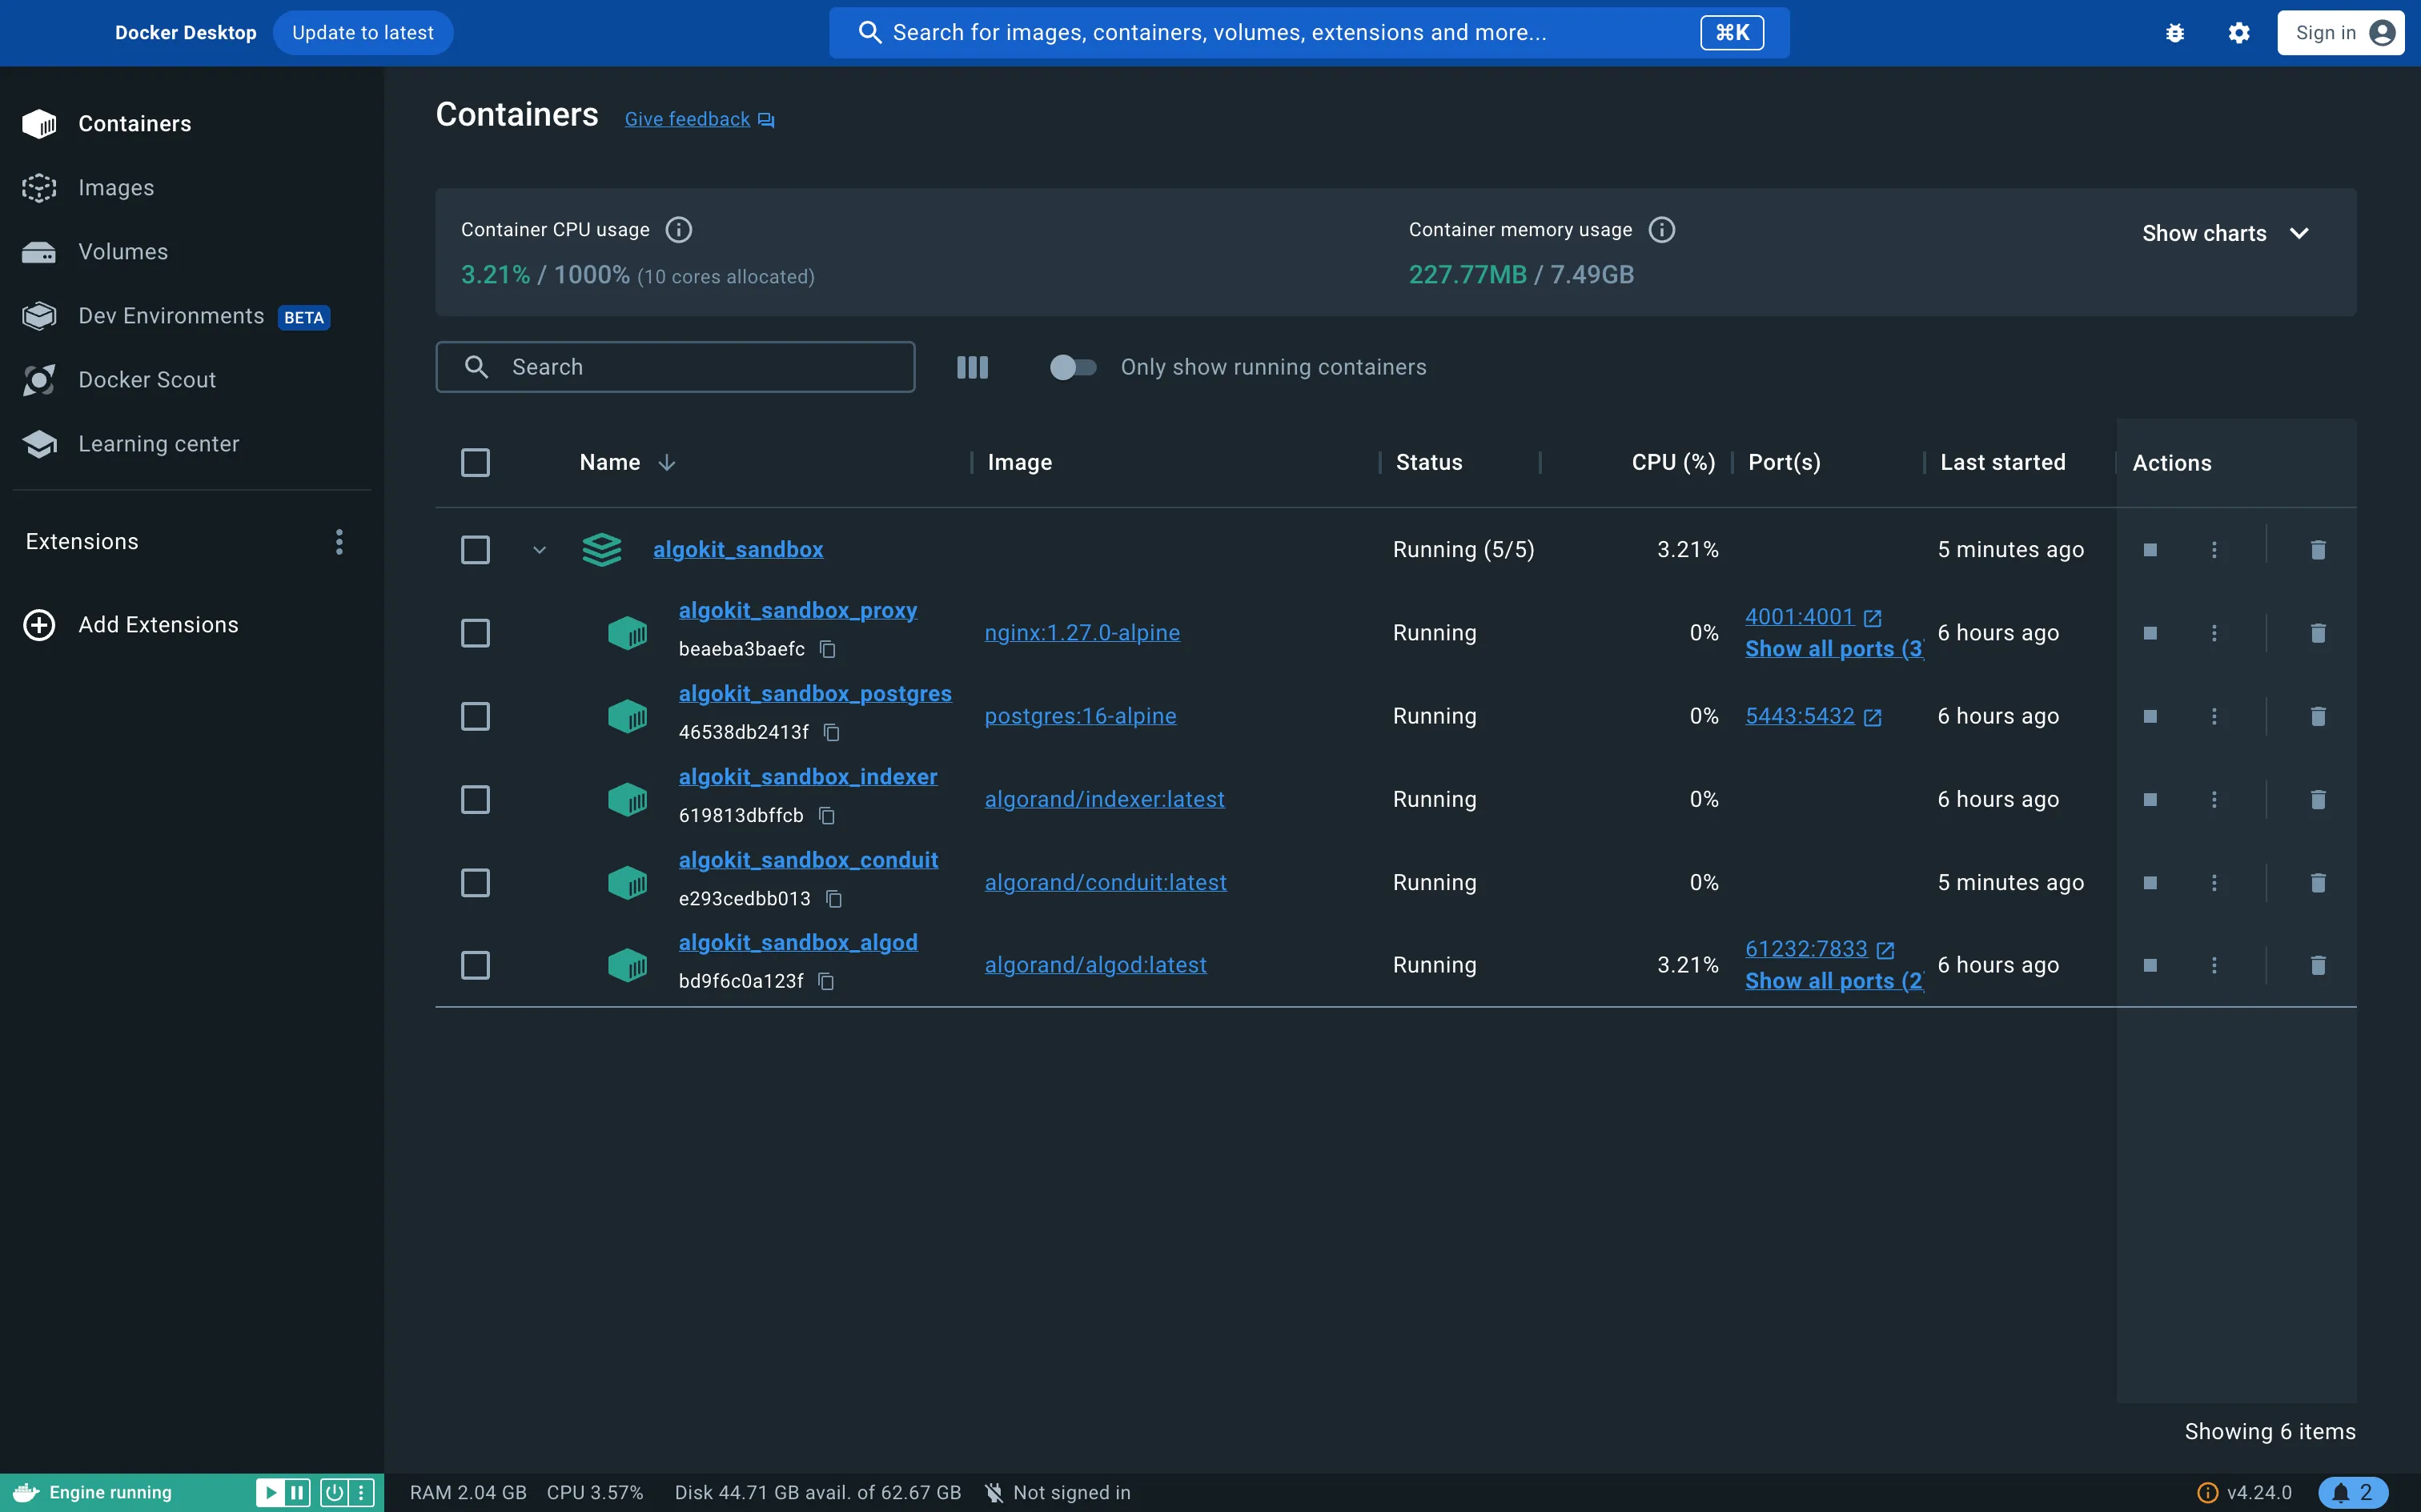
AlgoKit supports using a local version of the Algorand blockchain. To start an instance of this LocalNet first open Docker Desktop on your computer and then run the following command from the terminal:
algokit localnet startThis should start an instance of the LocalNet within docker. If you open the Docker Desktop application you should something similar to the following:
Create an AlgoKit project
Section titled “Create an AlgoKit project”Now, let’s create an Algorand project with AlgoKit. We will refer to these projects as “AlgoKit projects.” AlgoKit provides a series of templates for you to use depending on the type of project you want to create.
This guide will walk you through using either the TypeScript or Python smart contract starter template. Choose the language that you are most comfortable with.
For this guide, we will use the TypeScript smart contract starter template.
-
To create a new AlgoKit project you can easily do so by running:
algokit initThis will launch a guided menu system to create a specific project tailored to your needs. You will first be prompted to select the type of project you want to create. For this quick start guide, we will use the TypeScript smart contract template, so select the Smart Contracts option.

AlgoKit Init: Select project template -
Next, AlgoKit will ask you what programming language you want to use for the smart contract. With AlgoKit 3.0, you can now write Algorand smart contracts with native TypeScript. Let’s select TypeScript as our smart contract language by pressing enter.

AlgoKit Init: Select smart contract language -
Then AlgoKit will ask you for the name of the project. Let’s name it hello-algorand, but if you want to name it differently, feel free to do so! After writing the name, press enter to continue.

AlgoKit Init: Specifying folder name -
Next you can set the name of the smart contract. We will keep it as it is for now.

AlgoKit Init : Naming the smart contract app -
Next, you can select the template preset. The Starter preset is for quickly implementing and testing certain features whereas the Production preset is for production-ready applications. For this guide, let’s select Starter.
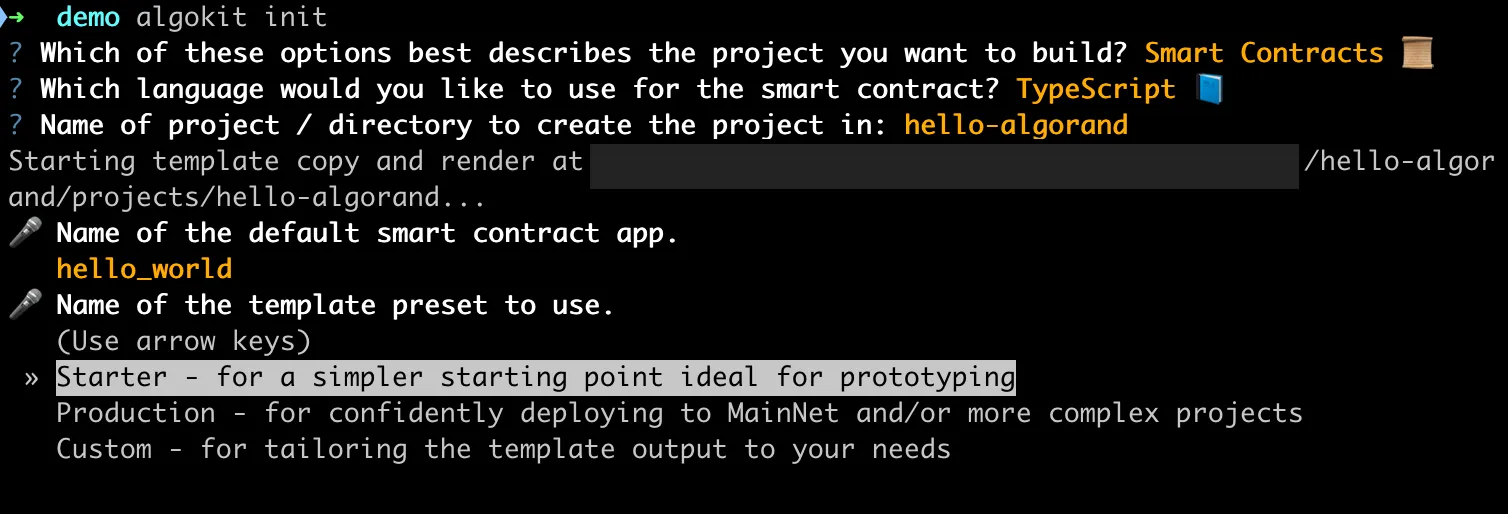
AlgoKit Init: Select template preset -
Next, AlgoKit will ask you if you want to run the
algokit project bootstrapcommand to install the necessary dependencies. Say yes by pressing “y” This process can take a few minutes.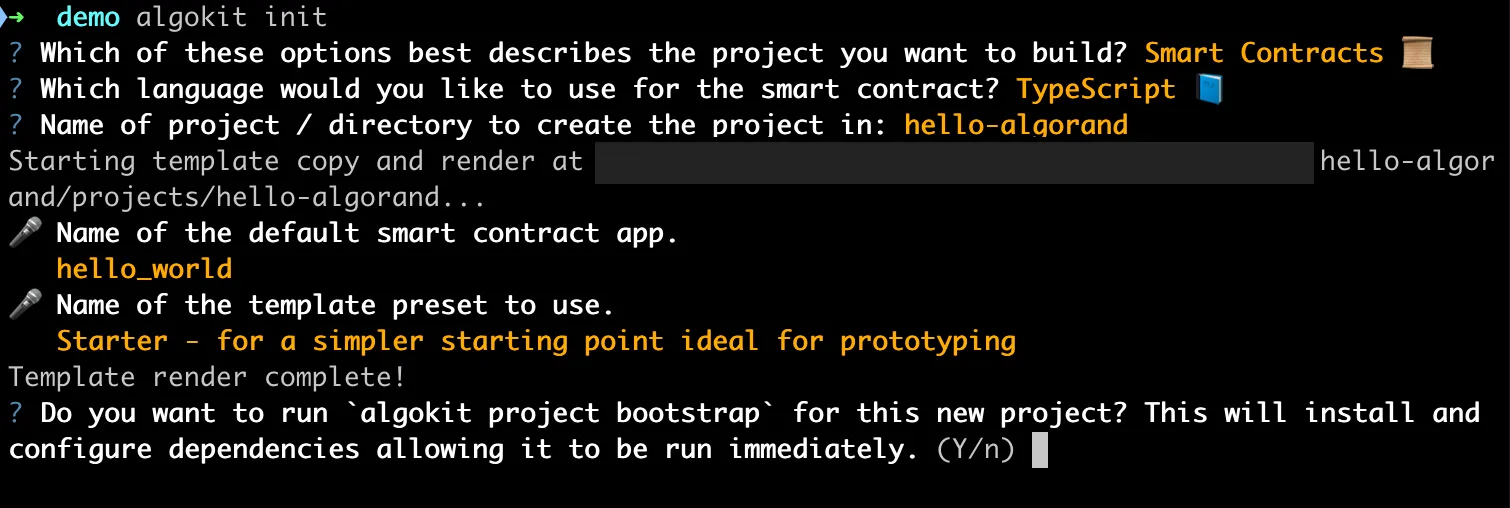
AlgoKit Init: Running the bootstrap command -
Finally, AlgoKit will ask you if you want to initialize a git repository. Let’s say yes by pressing “y” so that we can easily push our AlgoKit project to Github.

AlgoKit Init: Initialize git repository -
Once finished, VS Code should automatically be opened with the initialized project if VS Code is set as your default editor. If not,
cdinto the project directory and open the project in your IDE of choice. -
This starter app contains one smart contract written in Algorand TypeScript named
HelloWorldin thesmart_contracts/hello_world/contract.algo.tsfile. The contract has a method calledhellothat takes in aStringand returns aString.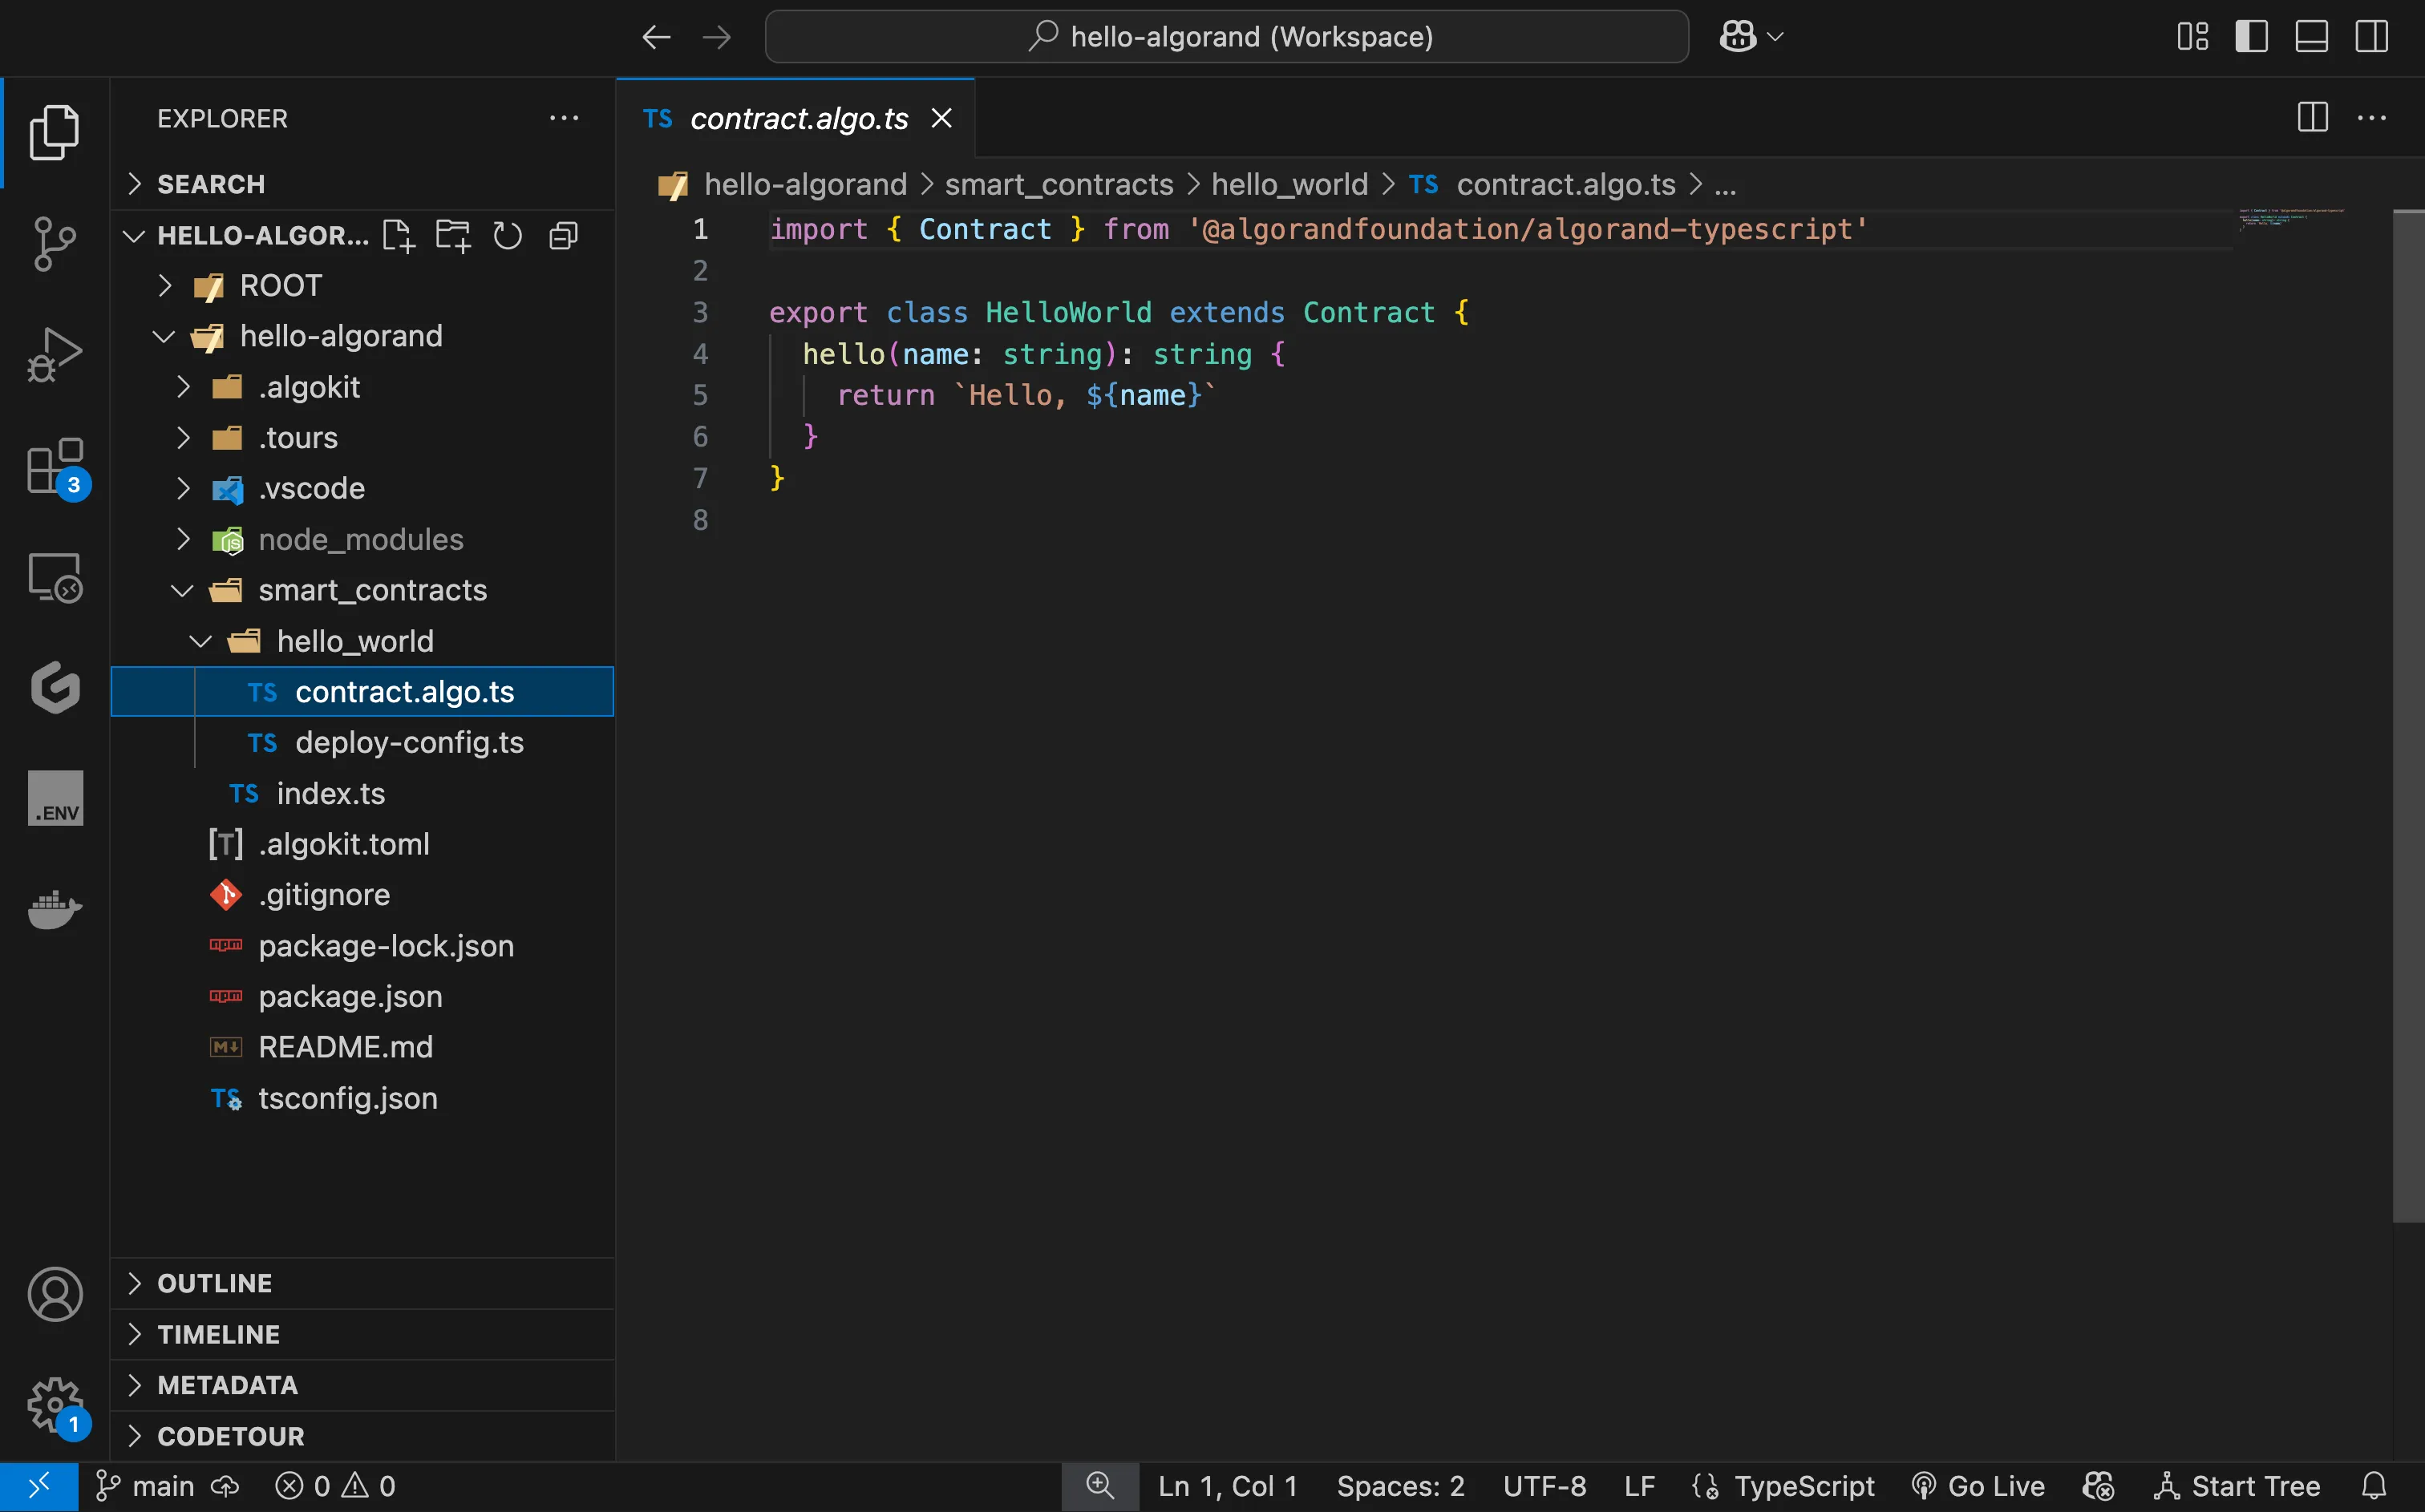
AlgoKit Starter Contract
For this guide, we will use the Python smart contract starter template.
-
To create a new AlgoKit project you can easily do so by running:
algokit initThis will launch a guided menu system to create a specific project tailored to your needs. You will first be prompted to select the type of project you want to create. For this quick start guide, we will use the Python smart contract template, so select the Smart Contracts option.
AlgoKit Init: Select project template -
Next, AlgoKit will ask you what programming language you want to use for the smart contract. With AlgoKit 2.0, you can now write Algorand smart contracts with native Python. Let’s select Python as our smart contract language by pressing enter.

AlgoKit Init: Select smart contract language -
Then AlgoKit will ask you for the name of the project. Let’s name it hello-algorand, but if you want to name it differently, feel free to do so! After writing the name, press enter to continue.

AlgoKit Init: Specifying folder name -
Next you can set the name of the smart contract. We will keep it as it is for now.
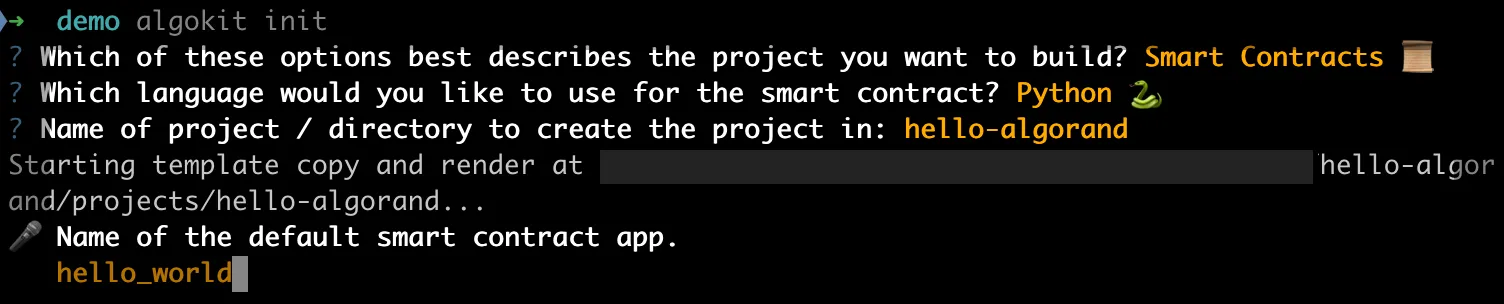
AlgoKit Init : Naming the smart contract app -
Next, you can select the template preset. The Starter preset is for quickly implementing and testing certain features whereas the Production preset is for production-ready applications. For this guide, let’s select Starter.
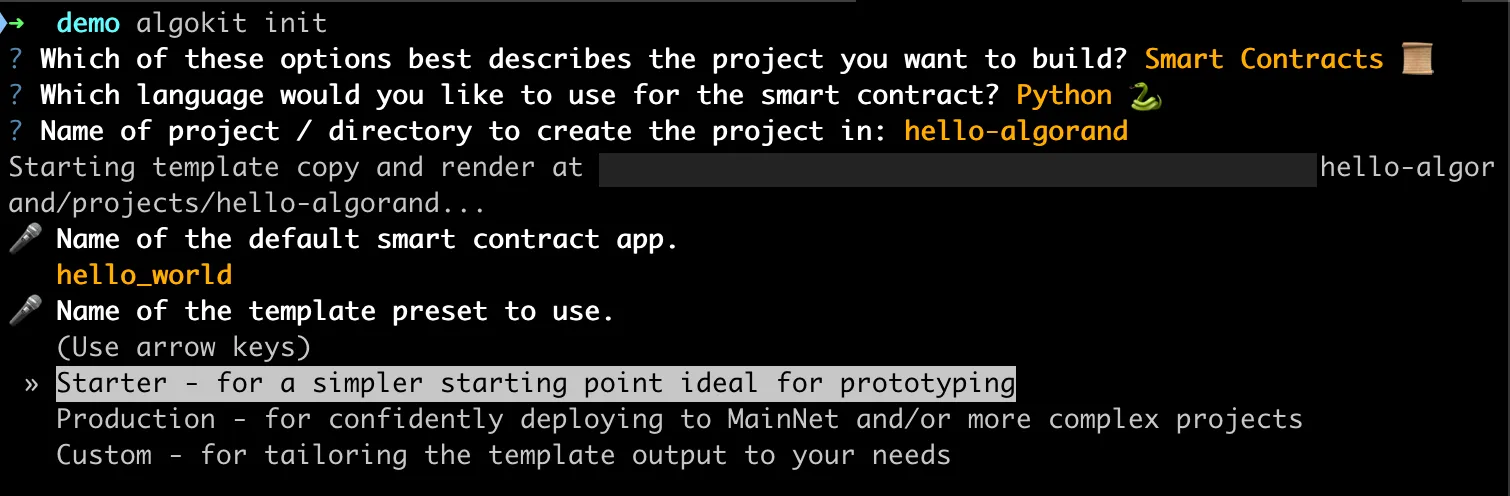
AlgoKit Init: Select template preset -
Next, AlgoKit will ask you what language you want to use for contract deployment. After writing your smart contract you need to deploy and call the contract either from your frontend or backend. Since most frontend frameworks are in Python, let’s select Python for this guide.

AlgoKit Init: Selecting language for contract deployment script -
Next, AlgoKit will ask you if you want to run the
algokit project bootstrapcommand to install the necessary dependencies. Say yes by pressing “y” This process can take a few minutes.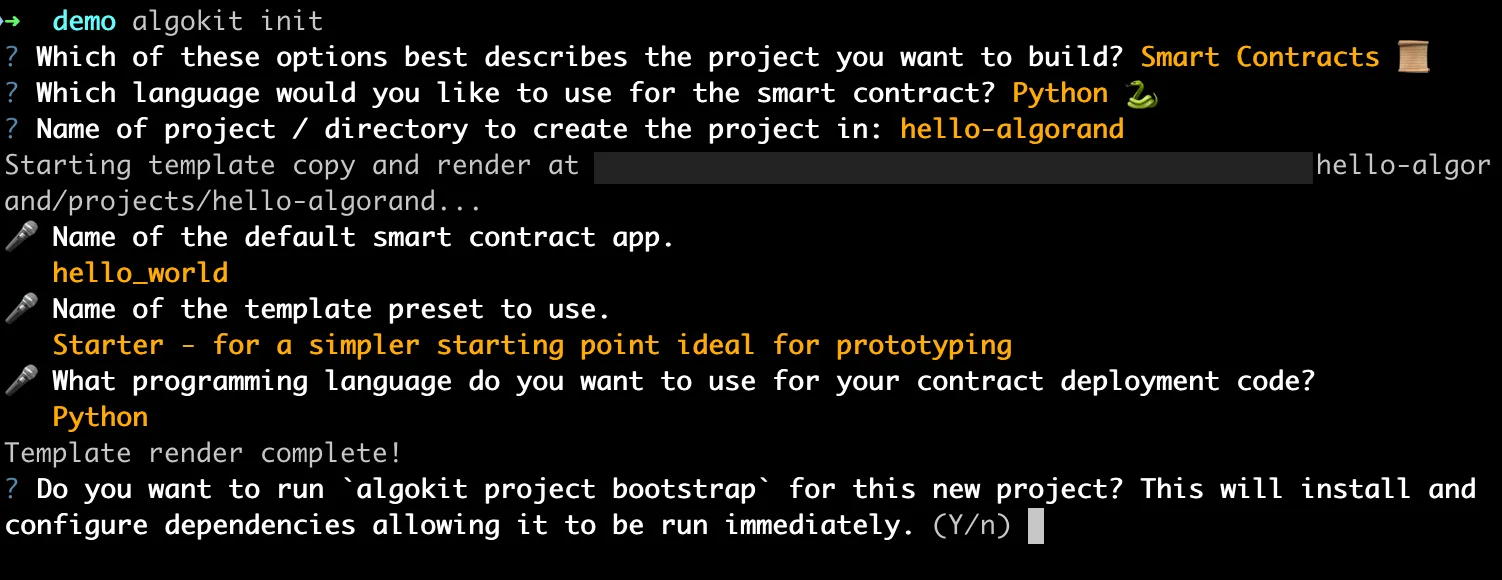
AlgoKit Init: Running the bootstrap command -
Finally, AlgoKit will ask you if you want to initialize a git repository. Let’s say yes by pressing “y” so that we can easily push our AlgoKit project to Github.

AlgoKit Init: Initialize git repository -
Once finished, VS Code should automatically be opened with the initialized project if VS Code is set as your default editor. If not,
cdinto the project directory and open the project in your IDE of choice. -
This starter app contains one smart contract written in Algorand Python named
HelloWorldin thesmart_contracts/hello_world/contract.pyfile. The contract has a method calledhellothat takes in aStringand returns aString.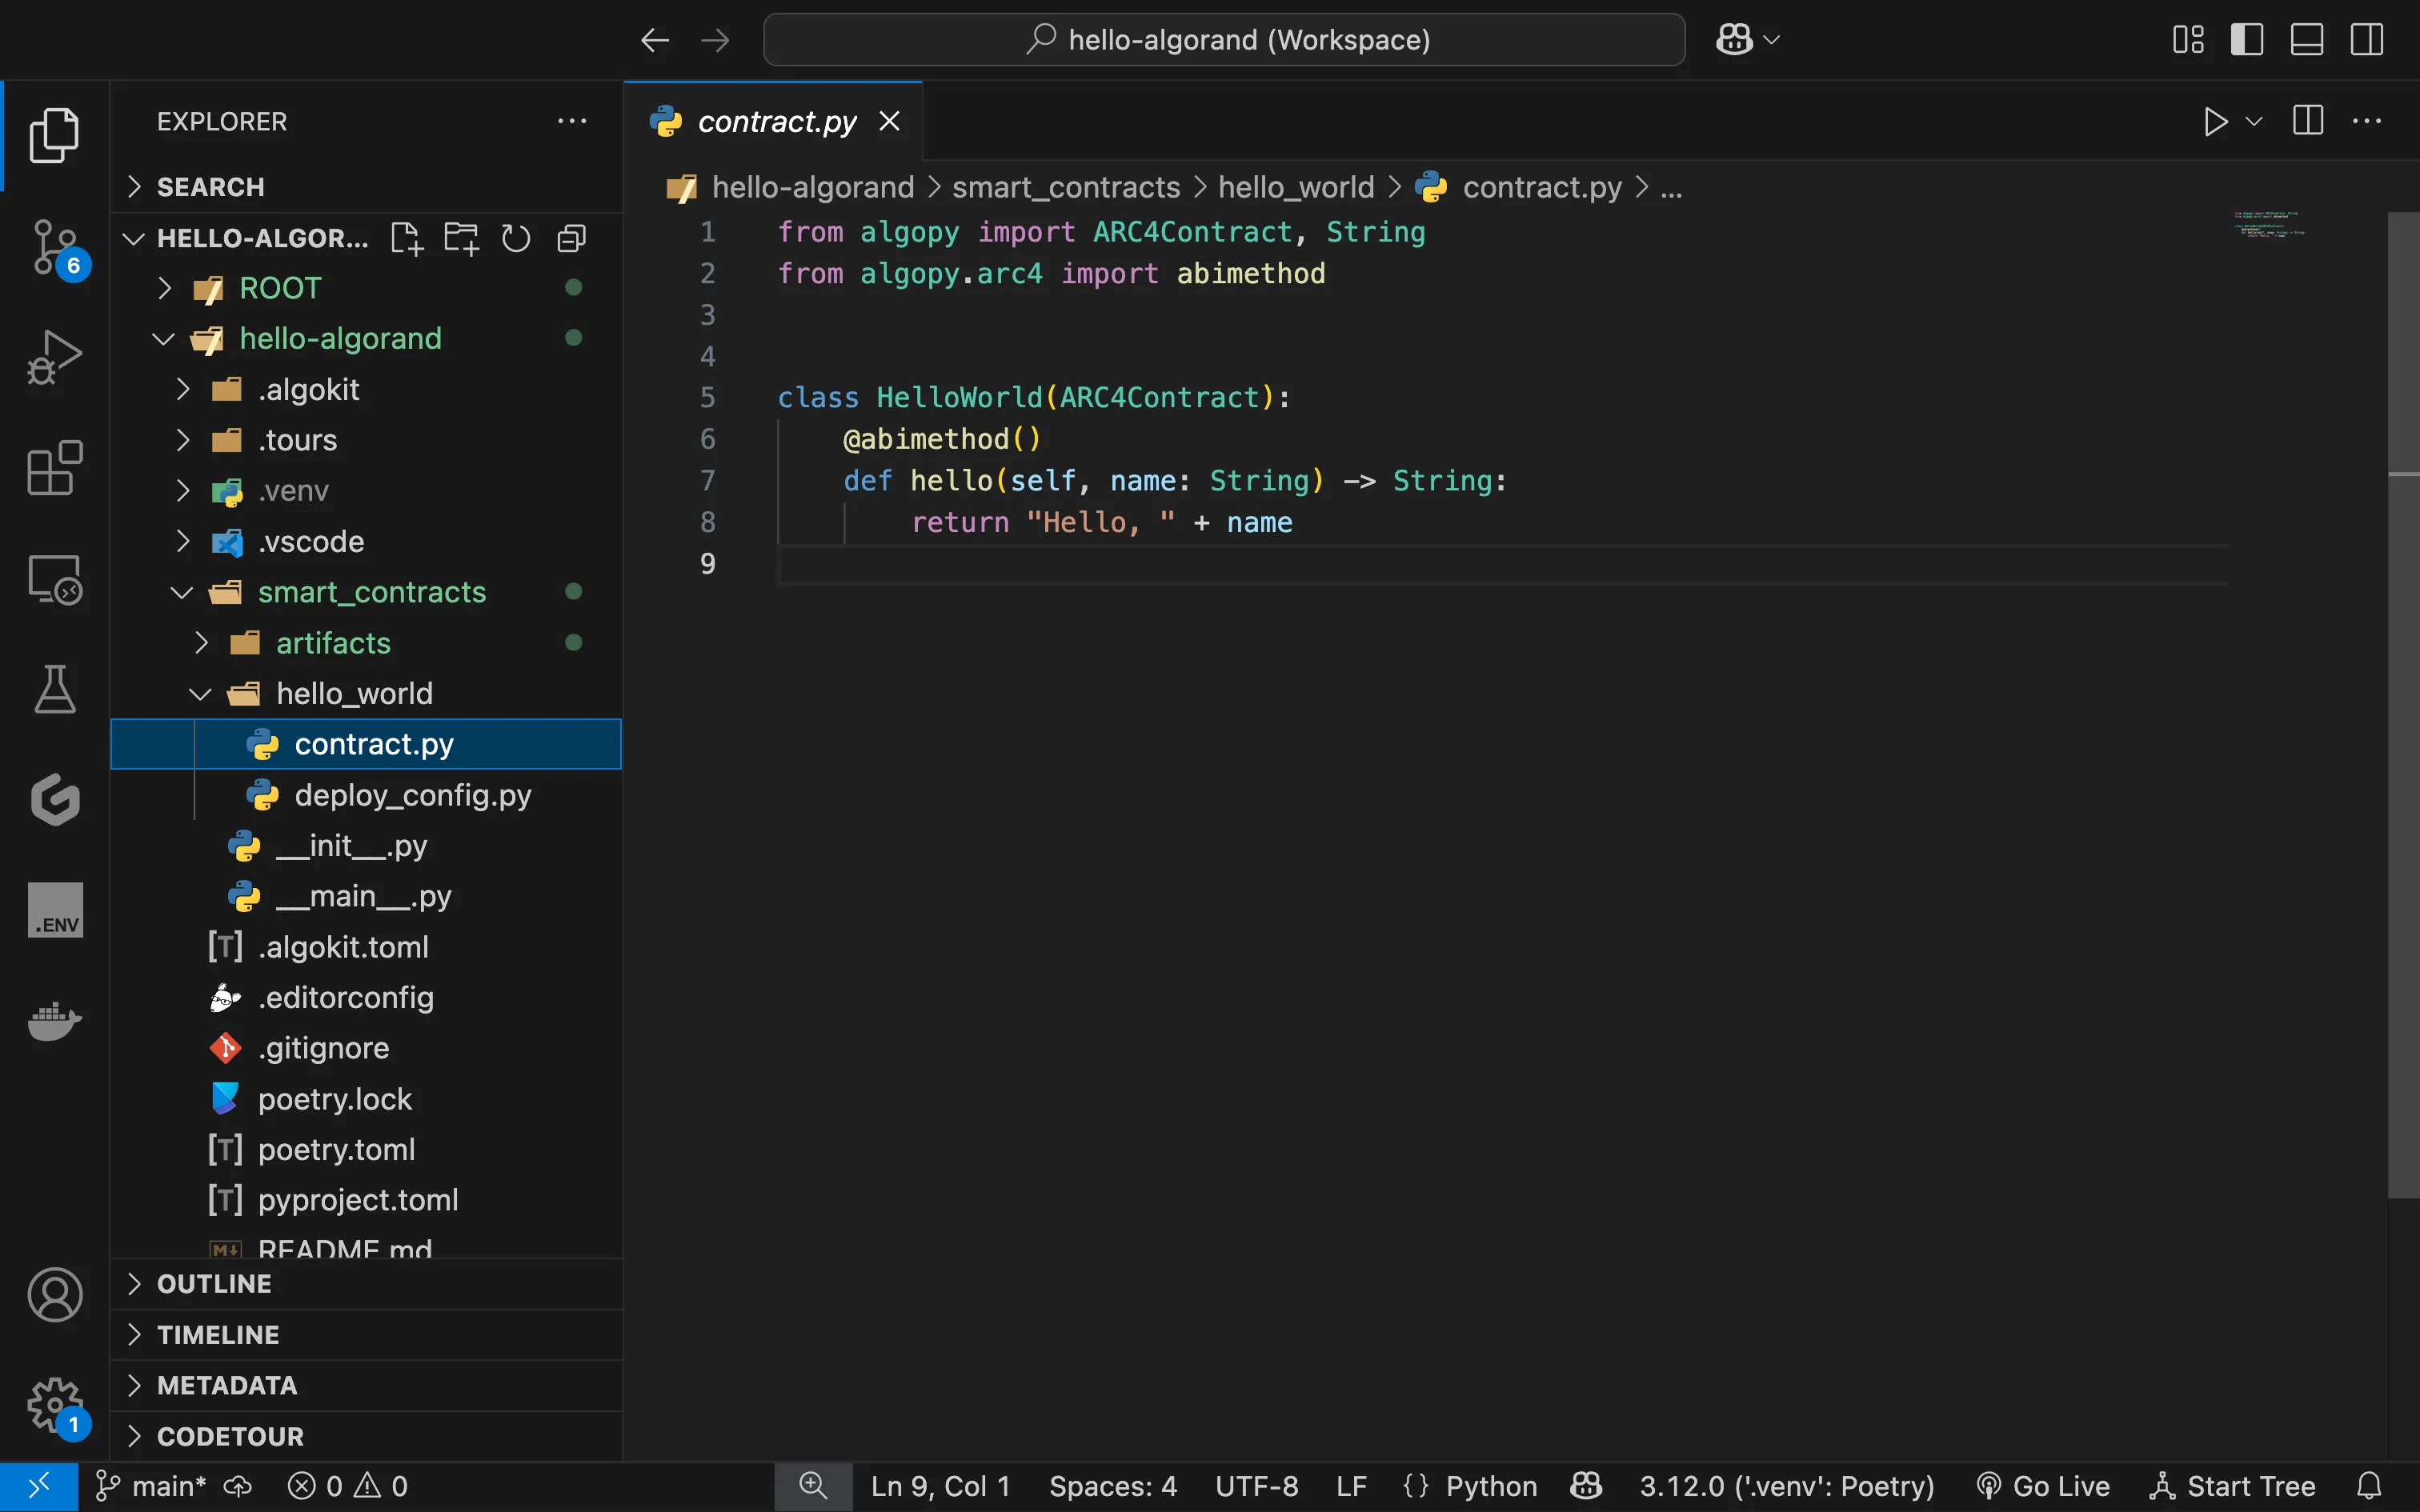
AlgoKit Starter Contract
Run the Demo Application
Section titled “Run the Demo Application”Once the starter project is created, you will notice in the smart_contracts/hello_world folder a file named deploy_config.ts which is a simple example of using AlgoKit to deploy the HelloWorld smart contract in contract.algo.ts on the Local Algorand blockchain started earlier and then call the hello method.
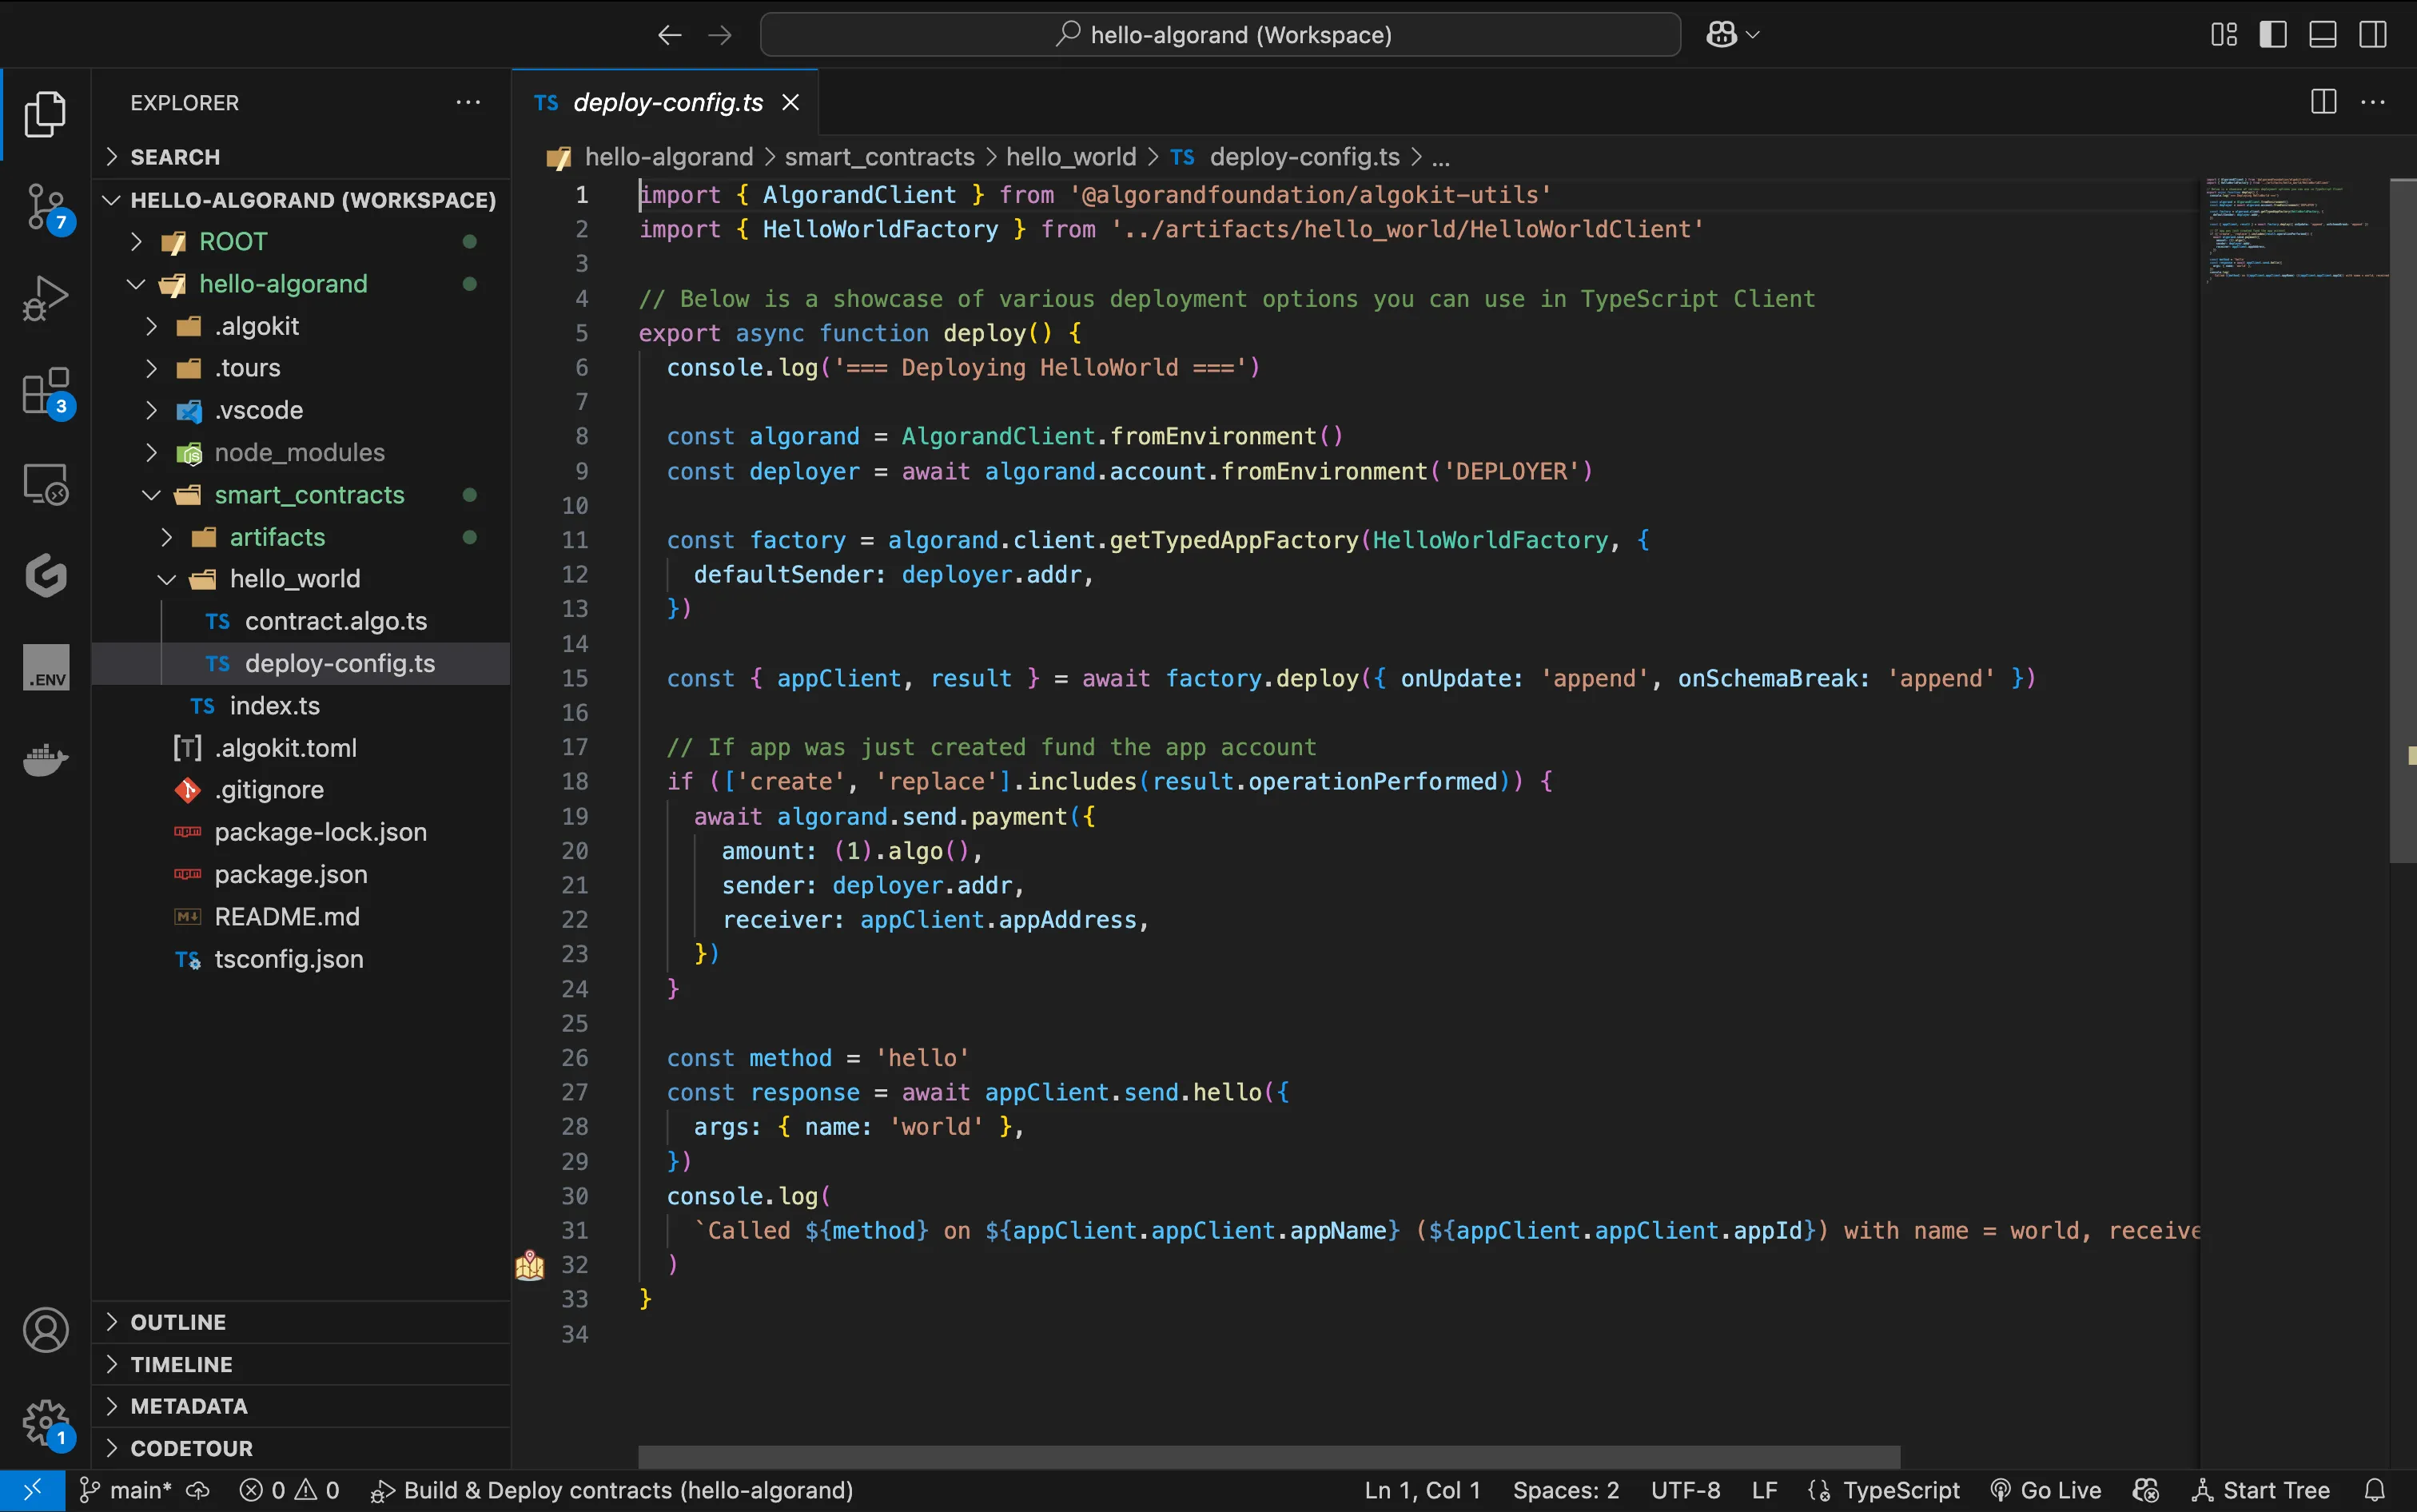
Now there are two ways to run the deploy-config.ts file to deploy and call the smart contract:
-
By hitting
F5it will start LocalNet, build the smart contract, deploy and call the smart contractcontract.algo.tsby running thedeploy-config.tsfile. -
Alternatively, you can run the following commands from the terminal to build the contract and run the
deploy-config.tsfile:algokit project run buildalgokit project deploy localnet
The output should look similar to the following:
=== Deploying HelloWorld ===Idempotently deploying app "HelloWorld" from creator RQGFSWXL2RKDBO53MN3ZRWCO3CP2HCZ6T4D5DMNJSIXRV76XAEBUJNHOMY using 86 bytes of AVM bytecode and 4 bytes of AVM bytecodeApp HelloWorld not found in apps created by RQGFSWXL2RKDBO53MN3ZRWCO3CP2HCZ6T4D5DMNJSIXRV76XAEBUJNHOMY; deploying app with version 1.0.App created by RQGFSWXL2RKDBO53MN3ZRWCO3CP2HCZ6T4D5DMNJSIXRV76XAEBUJNHOMY with ID 2225 via transaction PSO2XD77YINZRSNH5X76EN6QZYC2I3P6NITJQCCSDS7IC2PJ4RYASending 1000000 µALGO from RQGFSWXL2RKDBO53MN3ZRWCO3CP2HCZ6T4D5DMNJSIXRV76XAEBUJNHOMY to JM7DKIZGR3M4EGZYYR7LXUDX3R7X6QLRV4S2YVLTSDZP73XLX5A6ZDAQLE via transaction T66O4VNOD5CV6RZ75J53PHFMIIX2DCGT2Q3VM7W3W4CJ7DJQK6MAApp 2225 called with hello(world) by RQGFSWXL2RKDBO53MN3ZRWCO3CP2HCZ6T4D5DMNJSIXRV76XAEBUJNHOMY via transaction W2ZQYBEAFXDKHWDBBKJ6WC56ASAQ267ZEHYESWYLZP3YT3AACMGQCalled hello on HelloWorld (2225) with name = world, received: Hello, worldThe App ID of of the deployed contract and its Algorand address is displayed, followed by the message returned from the smart contract call.
Additionally, by building the smart contract, AlgoKit generates various artifacts in the artifacts folder. These artifacts include:
- Native TEAL smart contract code:
HelloWorld.approval.teal,HelloWorld.clear.teal - Contract ABI:
HelloWorld.arc56.json - Auto-generated typed application client:
HelloWorldClient.ts
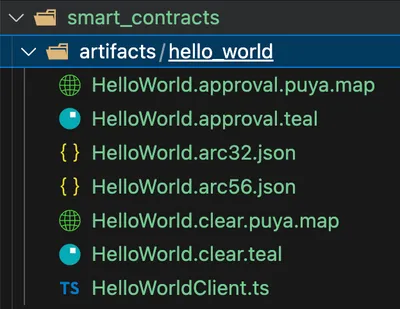
These artifacts can be used by tools like Lora and goal to deploy your smart contract to various Algorand networks.
Once the starter project is created, you will notice in the smart_contracts/hello_world folder a file named deploy_config.py which is a simple example of using AlgoKit to deploy the HelloWorld smart contract in contract.py on the Local Algorand blockchain started earlier and then call the hello method.
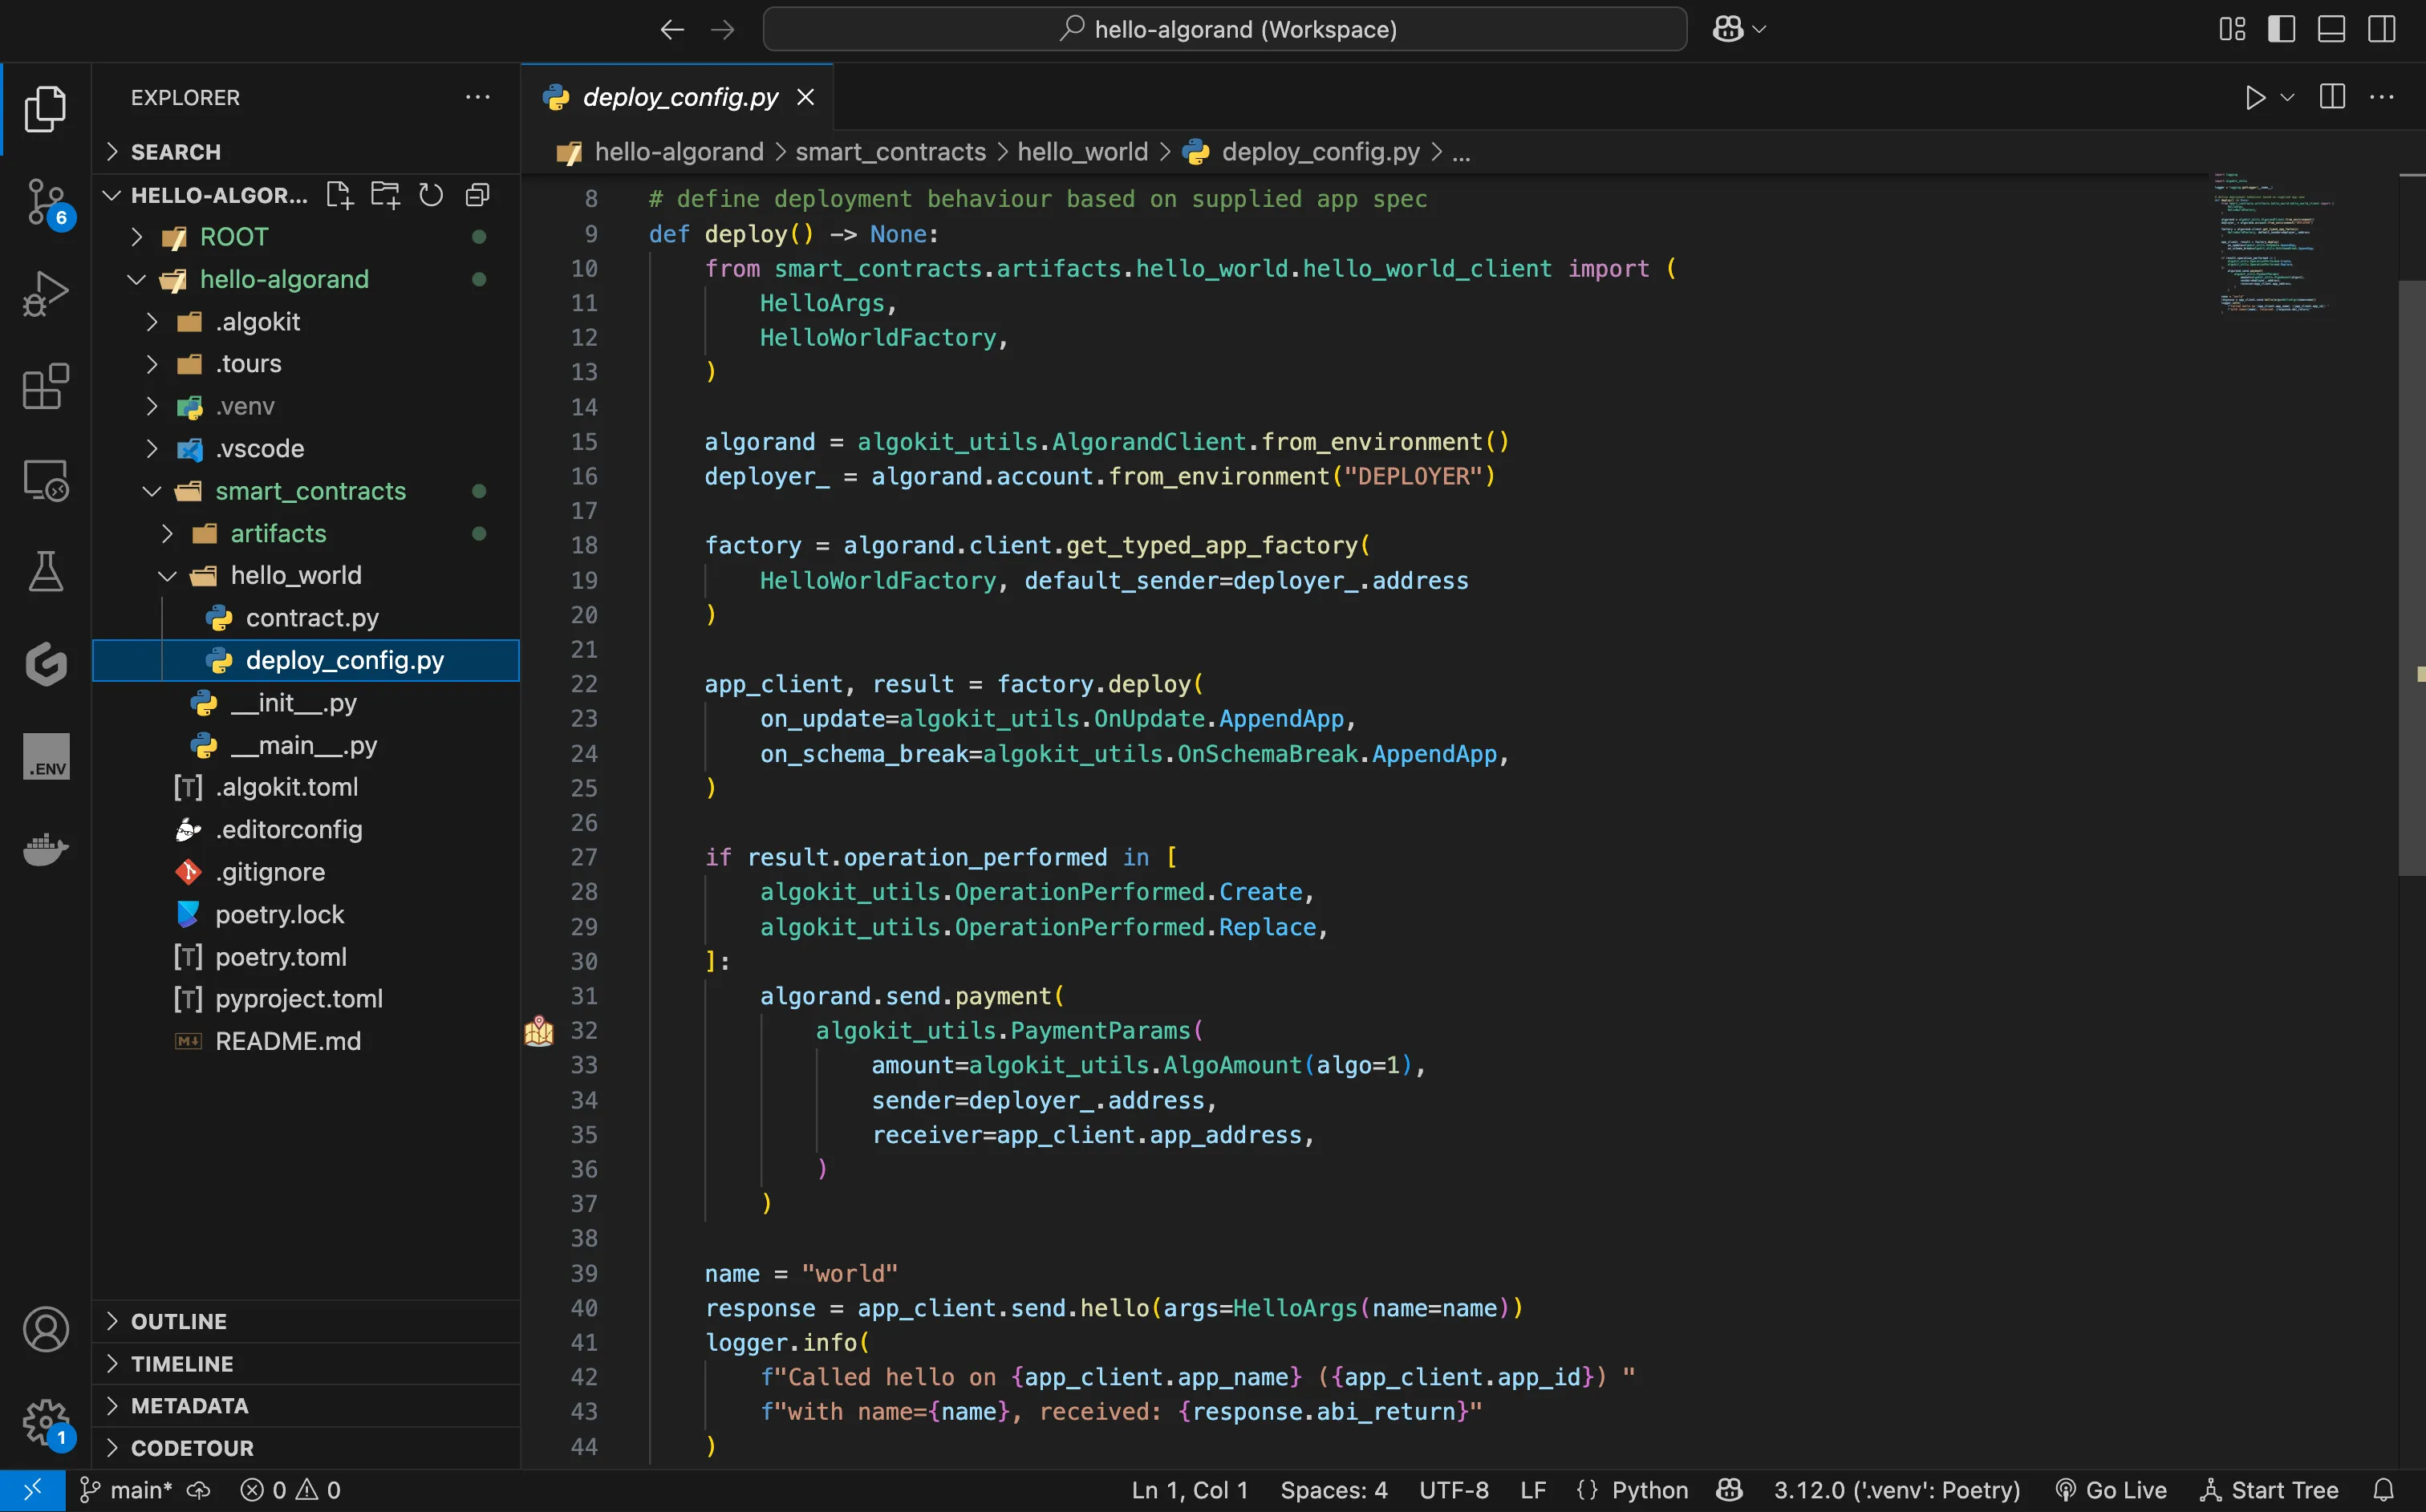
Now there are two ways to run the deploy-config.py file to deploy and call the smart contract:
-
By hitting
F5it will start LocalNet, build the smart contract, deploy and call the smart contractcontract.pyby running thedeploy-config.pyfile. -
Alternatively, you can run the following commands from the terminal to build the contract and run the
deploy-config.pyfile:algokit project run buildalgokit project deploy
The output should look similar to the following:
Deploying hello_worldCalled hello on HelloWorld (2225) with name=world, received: Hello, worldThe App ID of of the deployed contract is displayed, followed by the message returned from the smart contract call.
Additionally, by building the smart contract, AlgoKit generates various artifacts in the artifacts folder. These artifacts include:
- Native TEAL smart contract code:
HelloWorld.approval.teal,HelloWorld.clear.teal - Contract ABI:
HelloWorld.arc56.json - Auto-generated typed application client:
hello_world_client.py
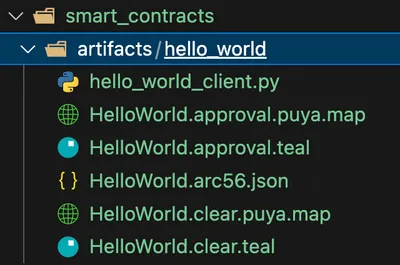
These artifacts can be used by tools like Lora and goal to deploy your smart contract to various Algorand networks.
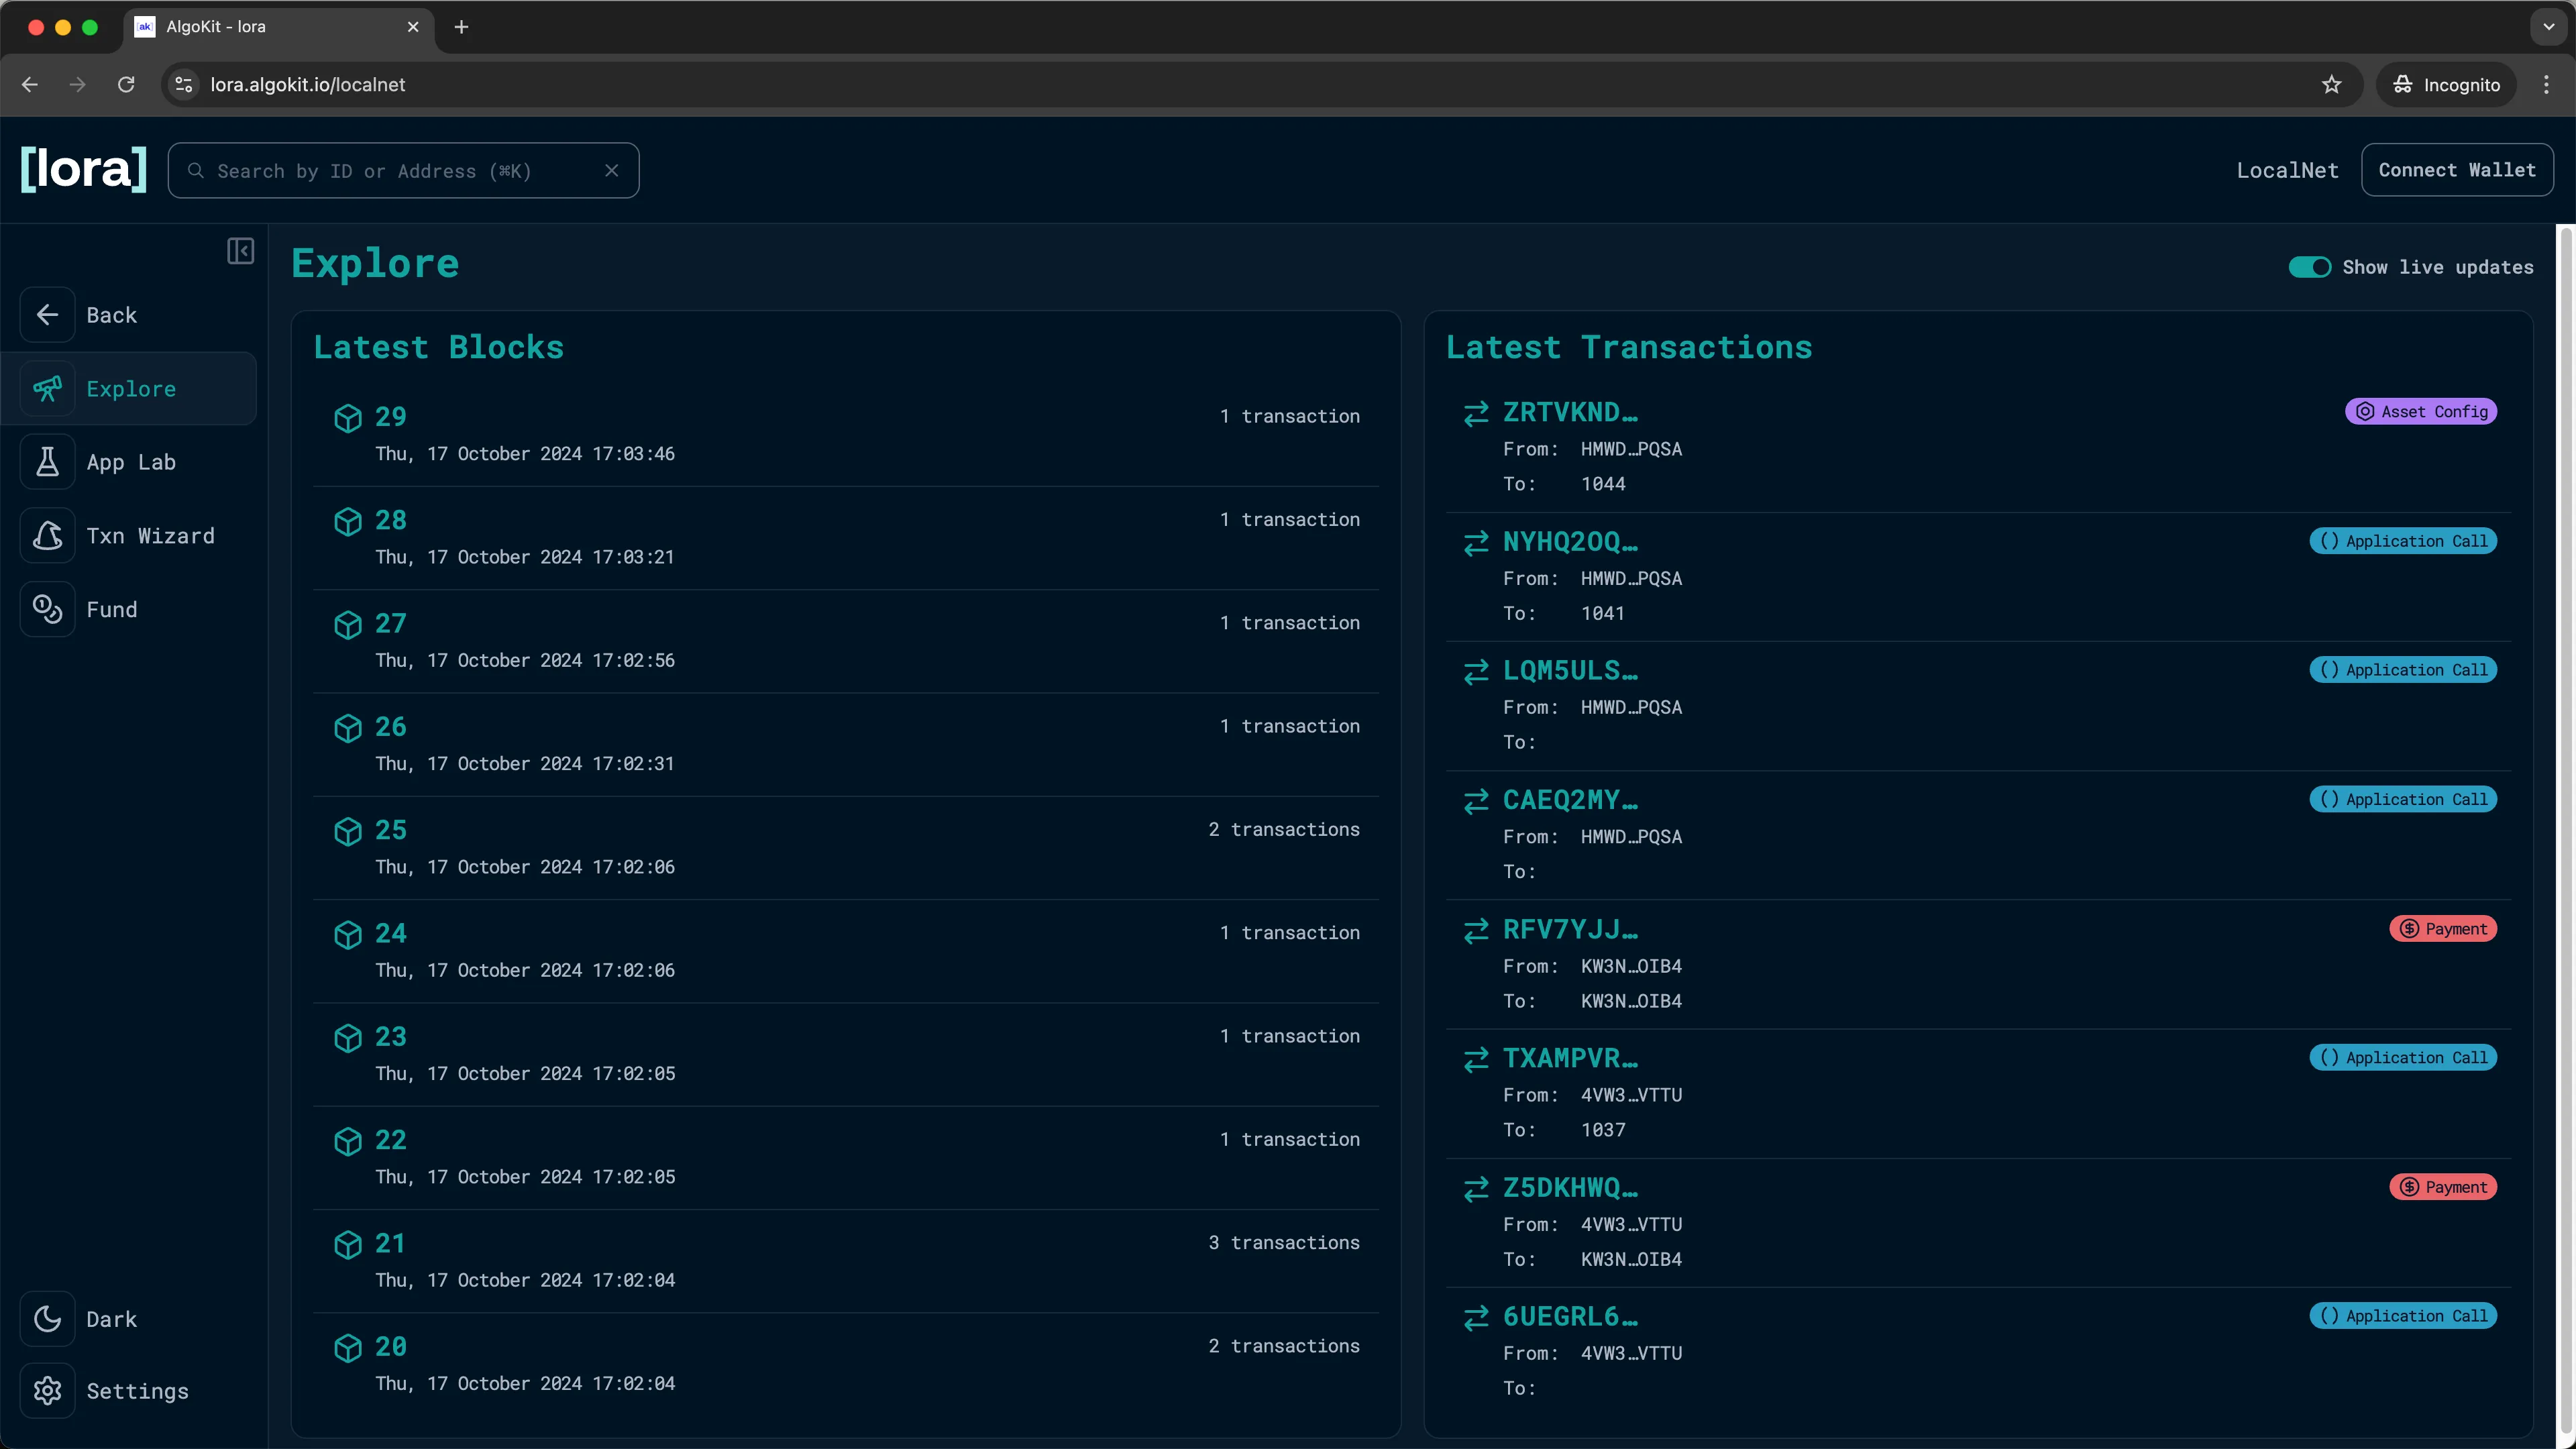
Using Lora
Section titled “Using Lora”Lora is a web-based user interface that let’s you visualize accounts, transactions, assets and applications on an Algorand network and also provides ability to deploy and call smart contracts. This works for TestNet, MainNet and also LocalNet. While AlgoKit surfaces both a programming interface and a command line interface for interacting with Algorand, it also allows you to quickly open Lora so you can see what’s happening visually.
Lora can be launched from AlgoKit by running the following command from the terminal.
algokit exploreBy default it will open Lora and point to LocalNet (It will be displayed as LocalNet in the upper right hand corner), but you can pass in parameters to point it to TestNet and MainNet too.
This command will launch your default web browser and load the Lora web application.
Create / Connect local account for testing
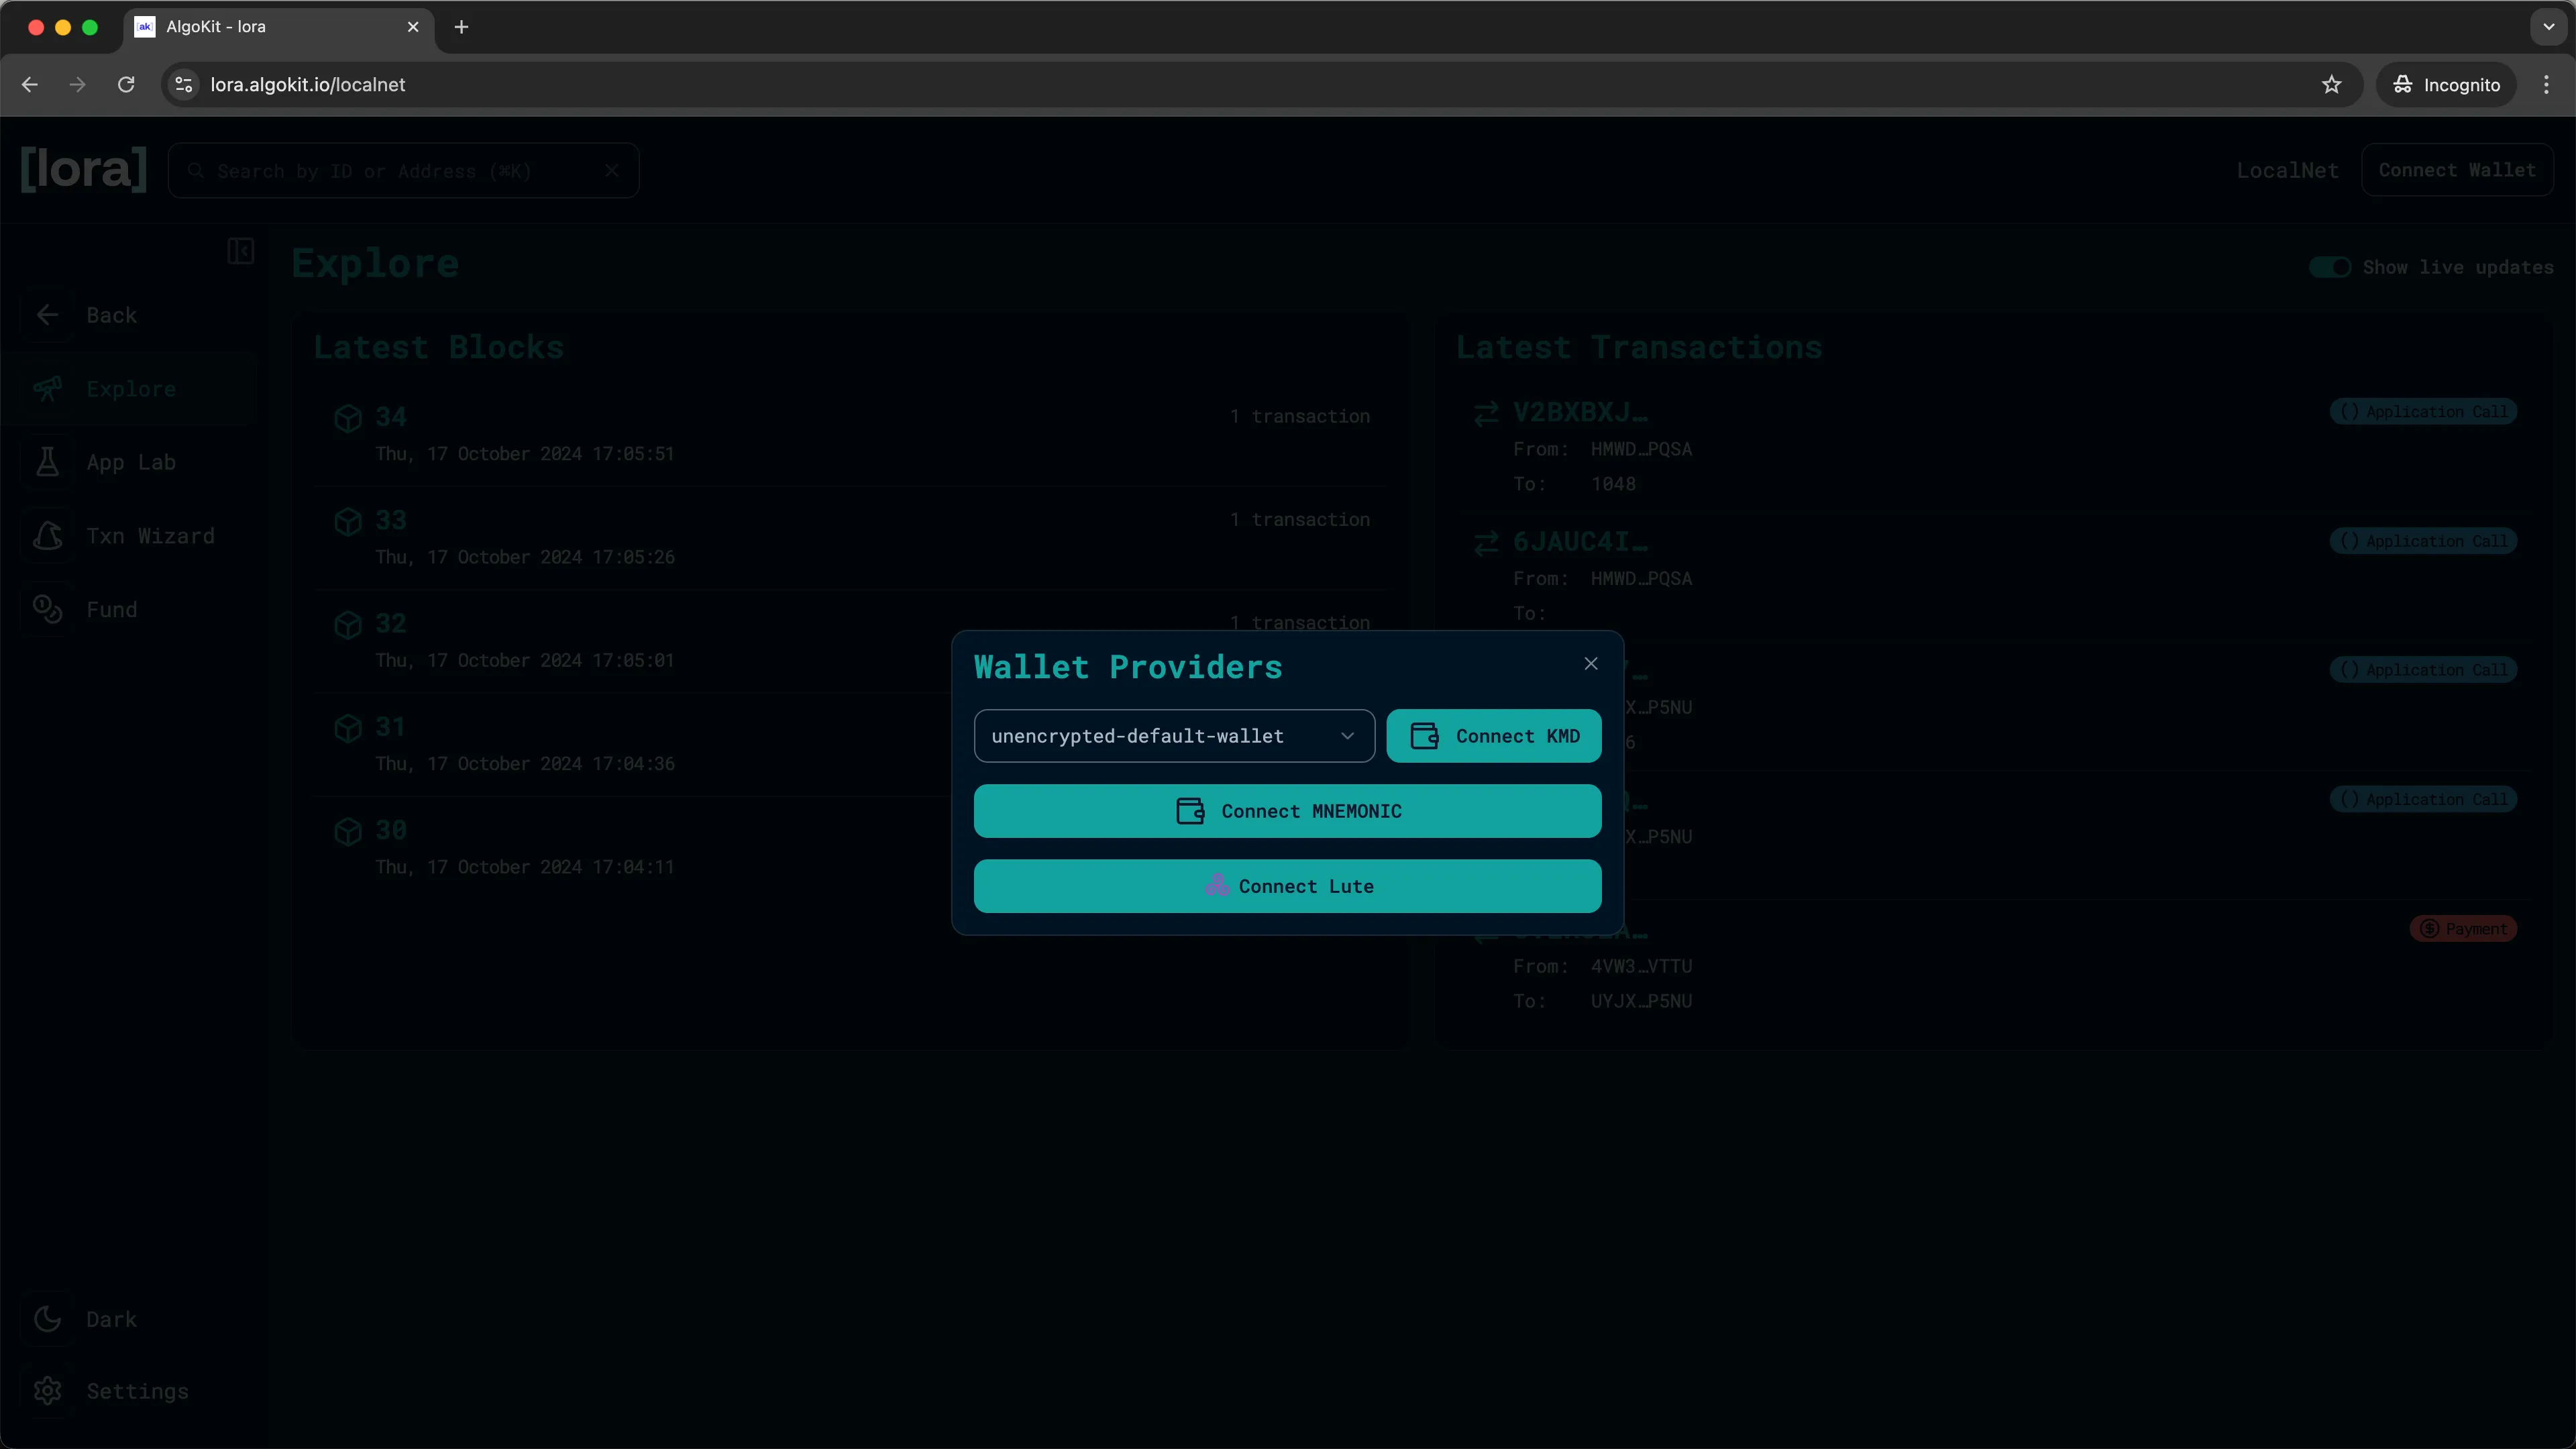
Section titled “Create / Connect local account for testing”To issue commands against the LocalNet network you need an account with ALGO in it. Lora gives you three options for connecting to a local wallet: Connect KMD, Connect MNEMONIC, and Connect Lute
-
Connect KMD: Lora will automatically import KMD wallet. -
Connect MNEMONIC: You can manually input a MNEMONIC for an account you own. -
Connect Lute: You can create local accounts from Lute and connect to them.
In this guide, we will use the KMD wallet.
Select Connect wallet located at top right hand side of the webpage and you will be prompted with the three wallet choices. Choose the Connect KMD option. This will prompt you to enter the KMD password. If this is your first time building on Algorand, you do not have a KMD password so leave it blank and click OK. This will connect the KMD account to Lora so you can use that account for signing transactions from the Lora user interface.
Deploy the Hello World application
Section titled “Deploy the Hello World application”-
To deploy your smart contract application, select the
App Labmenu and click on theCreatebutton.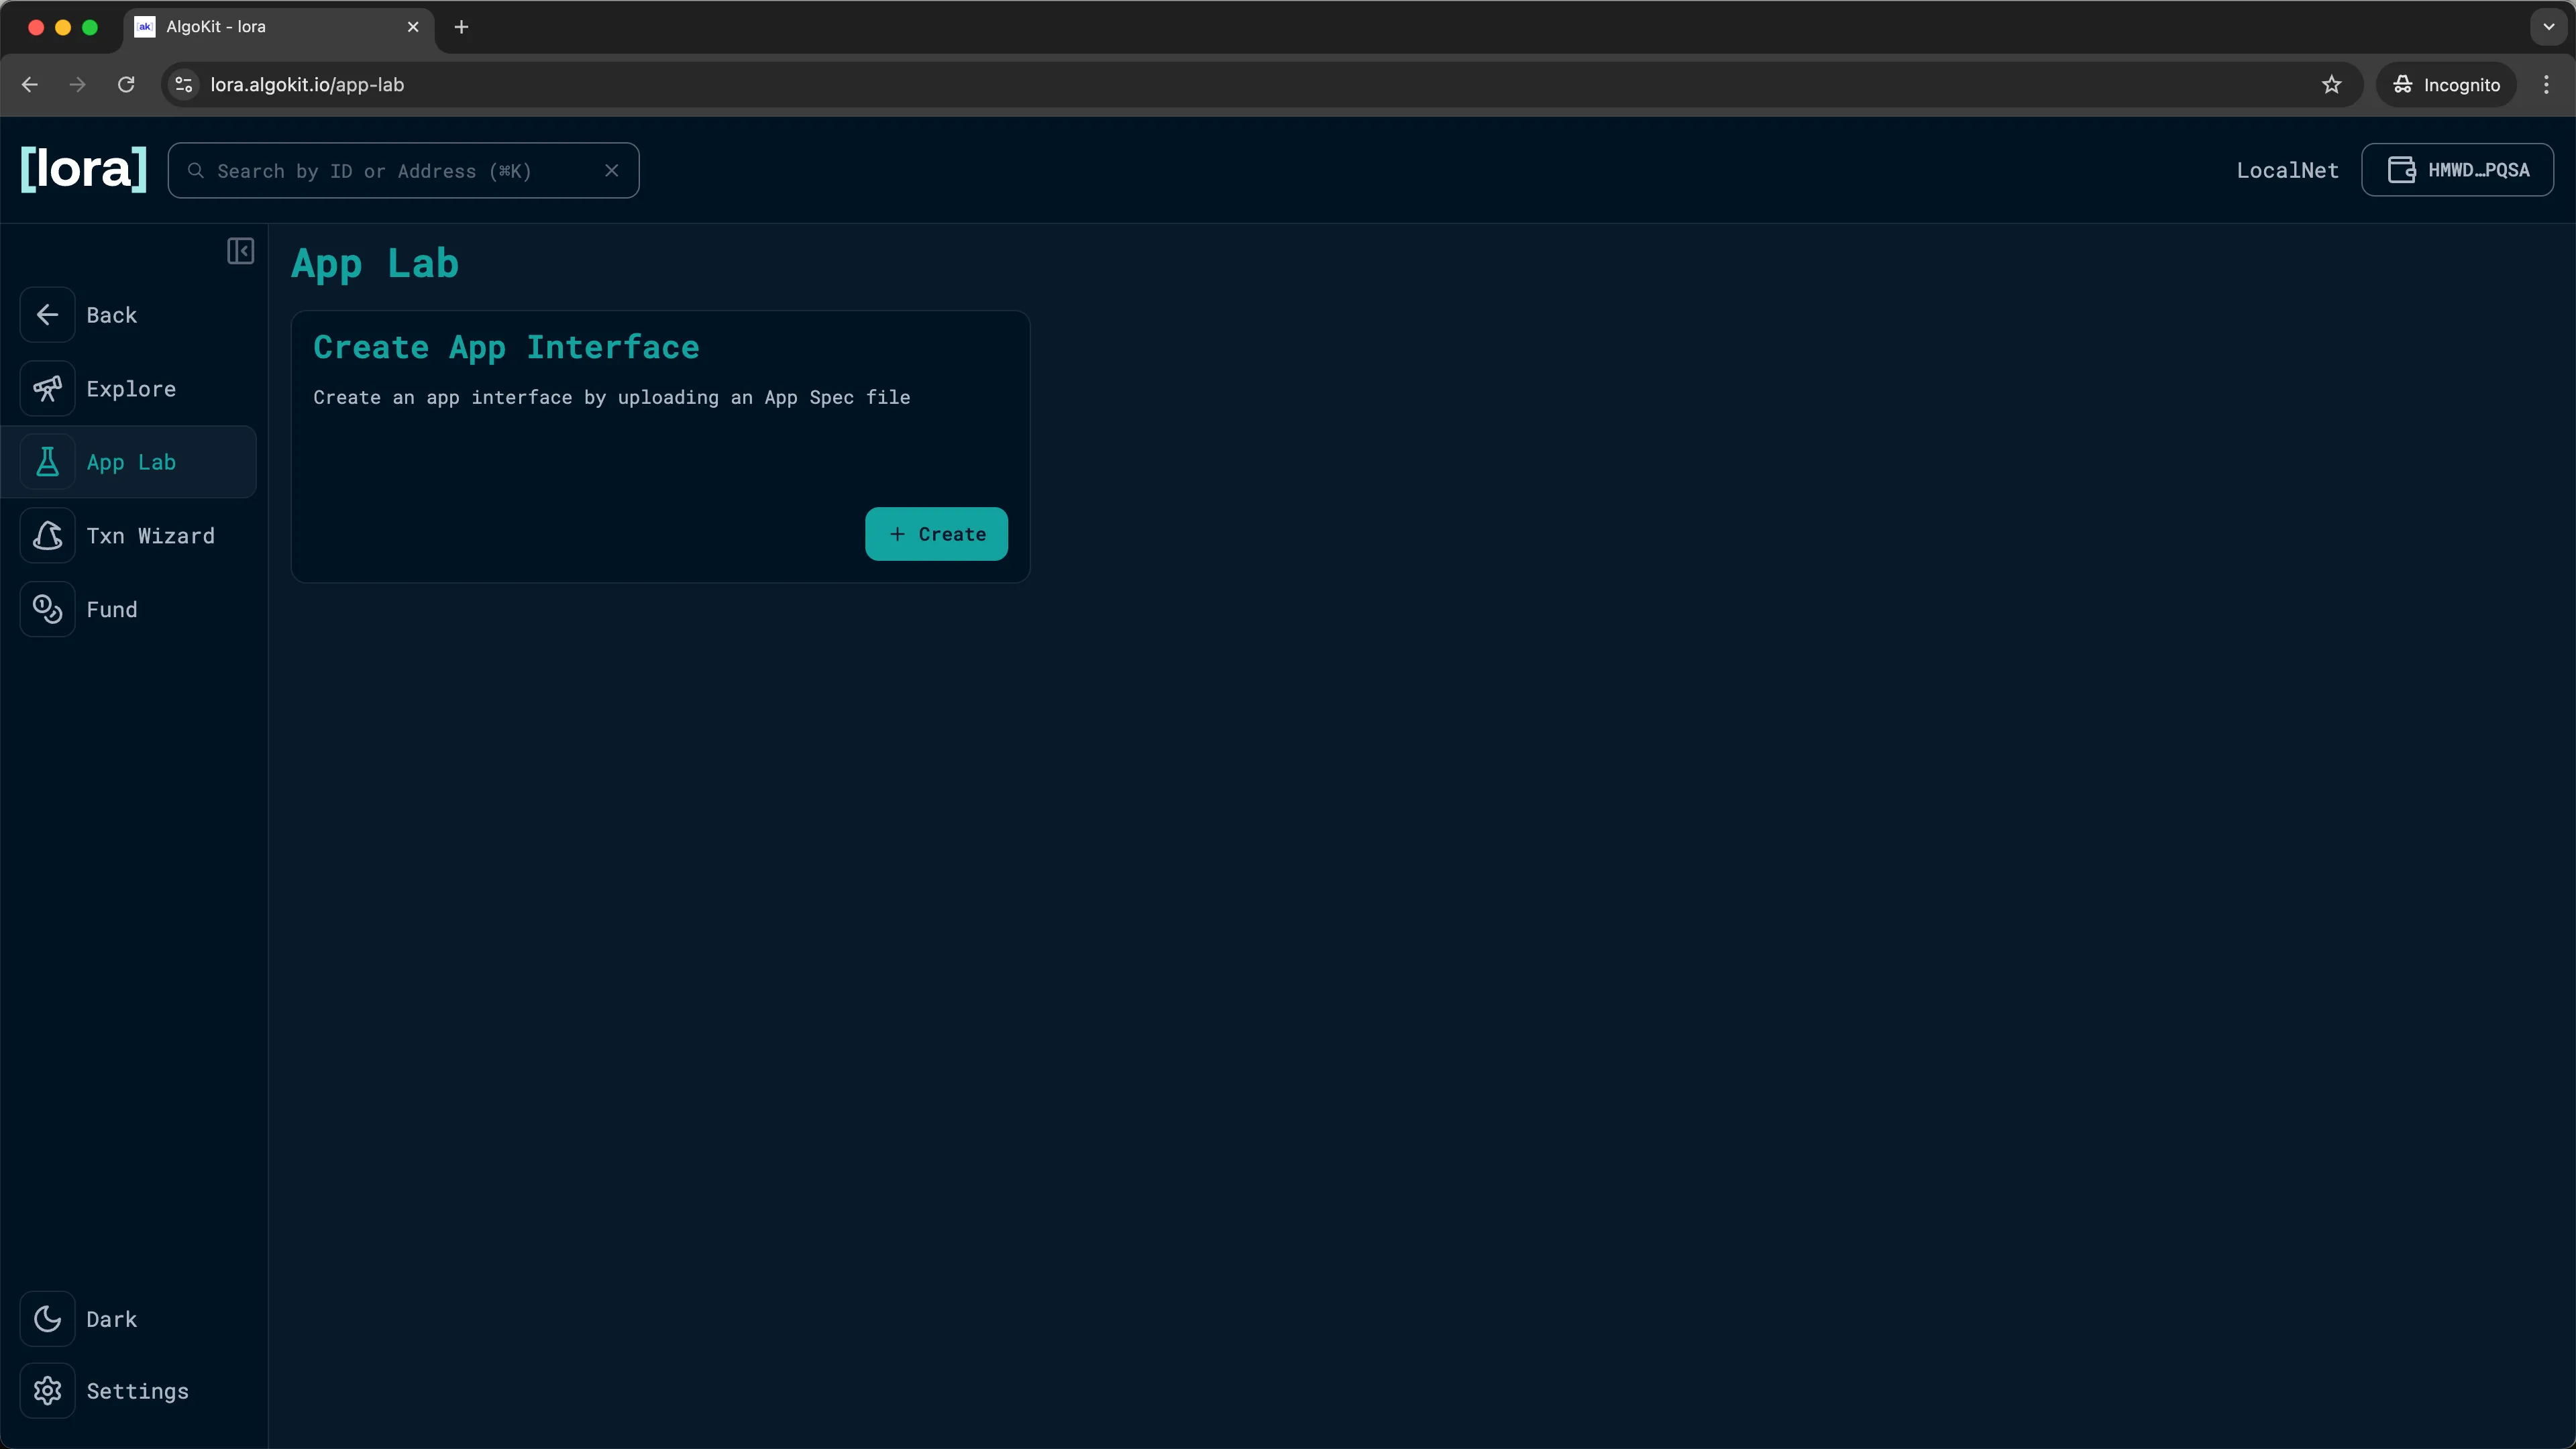
Lora: App Lab -
Click
Deploy newandSelect an ARC-32 JSON app spec fileto browse to the artifacts created in the previous section of this guide. Select theHelloWorld.arc32.jsonmanifest file.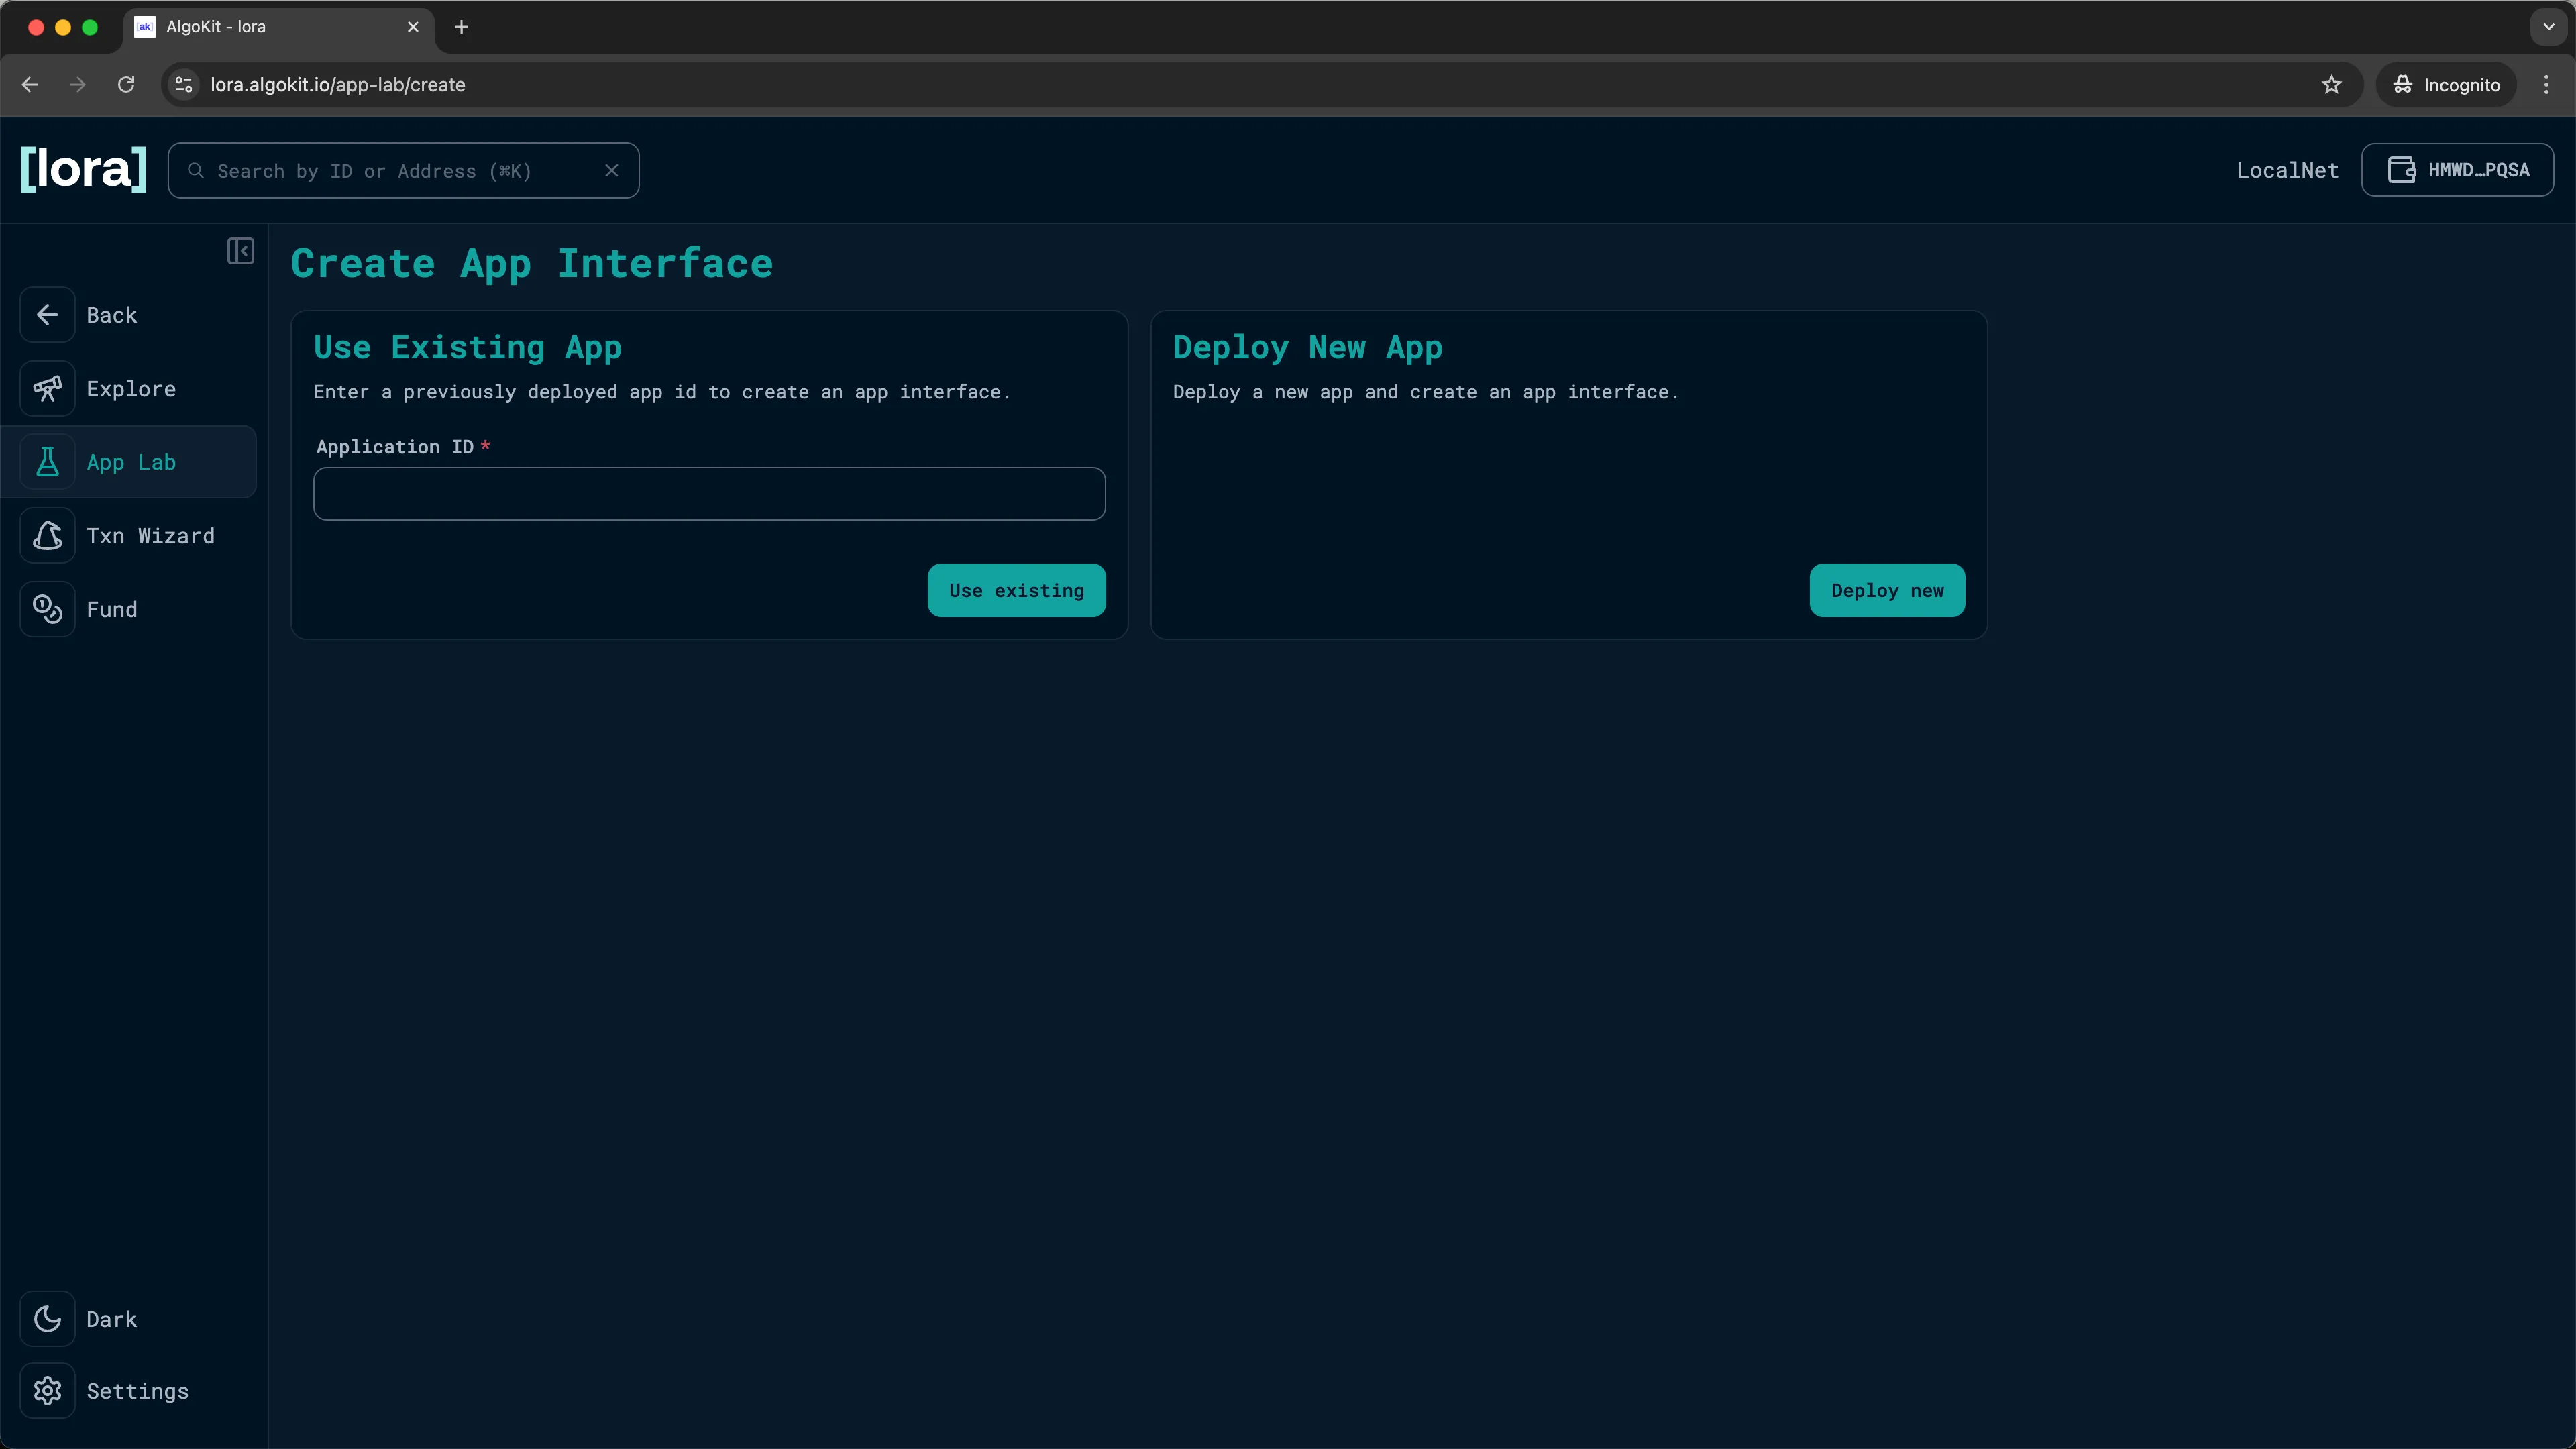
Lora: Deploying your app 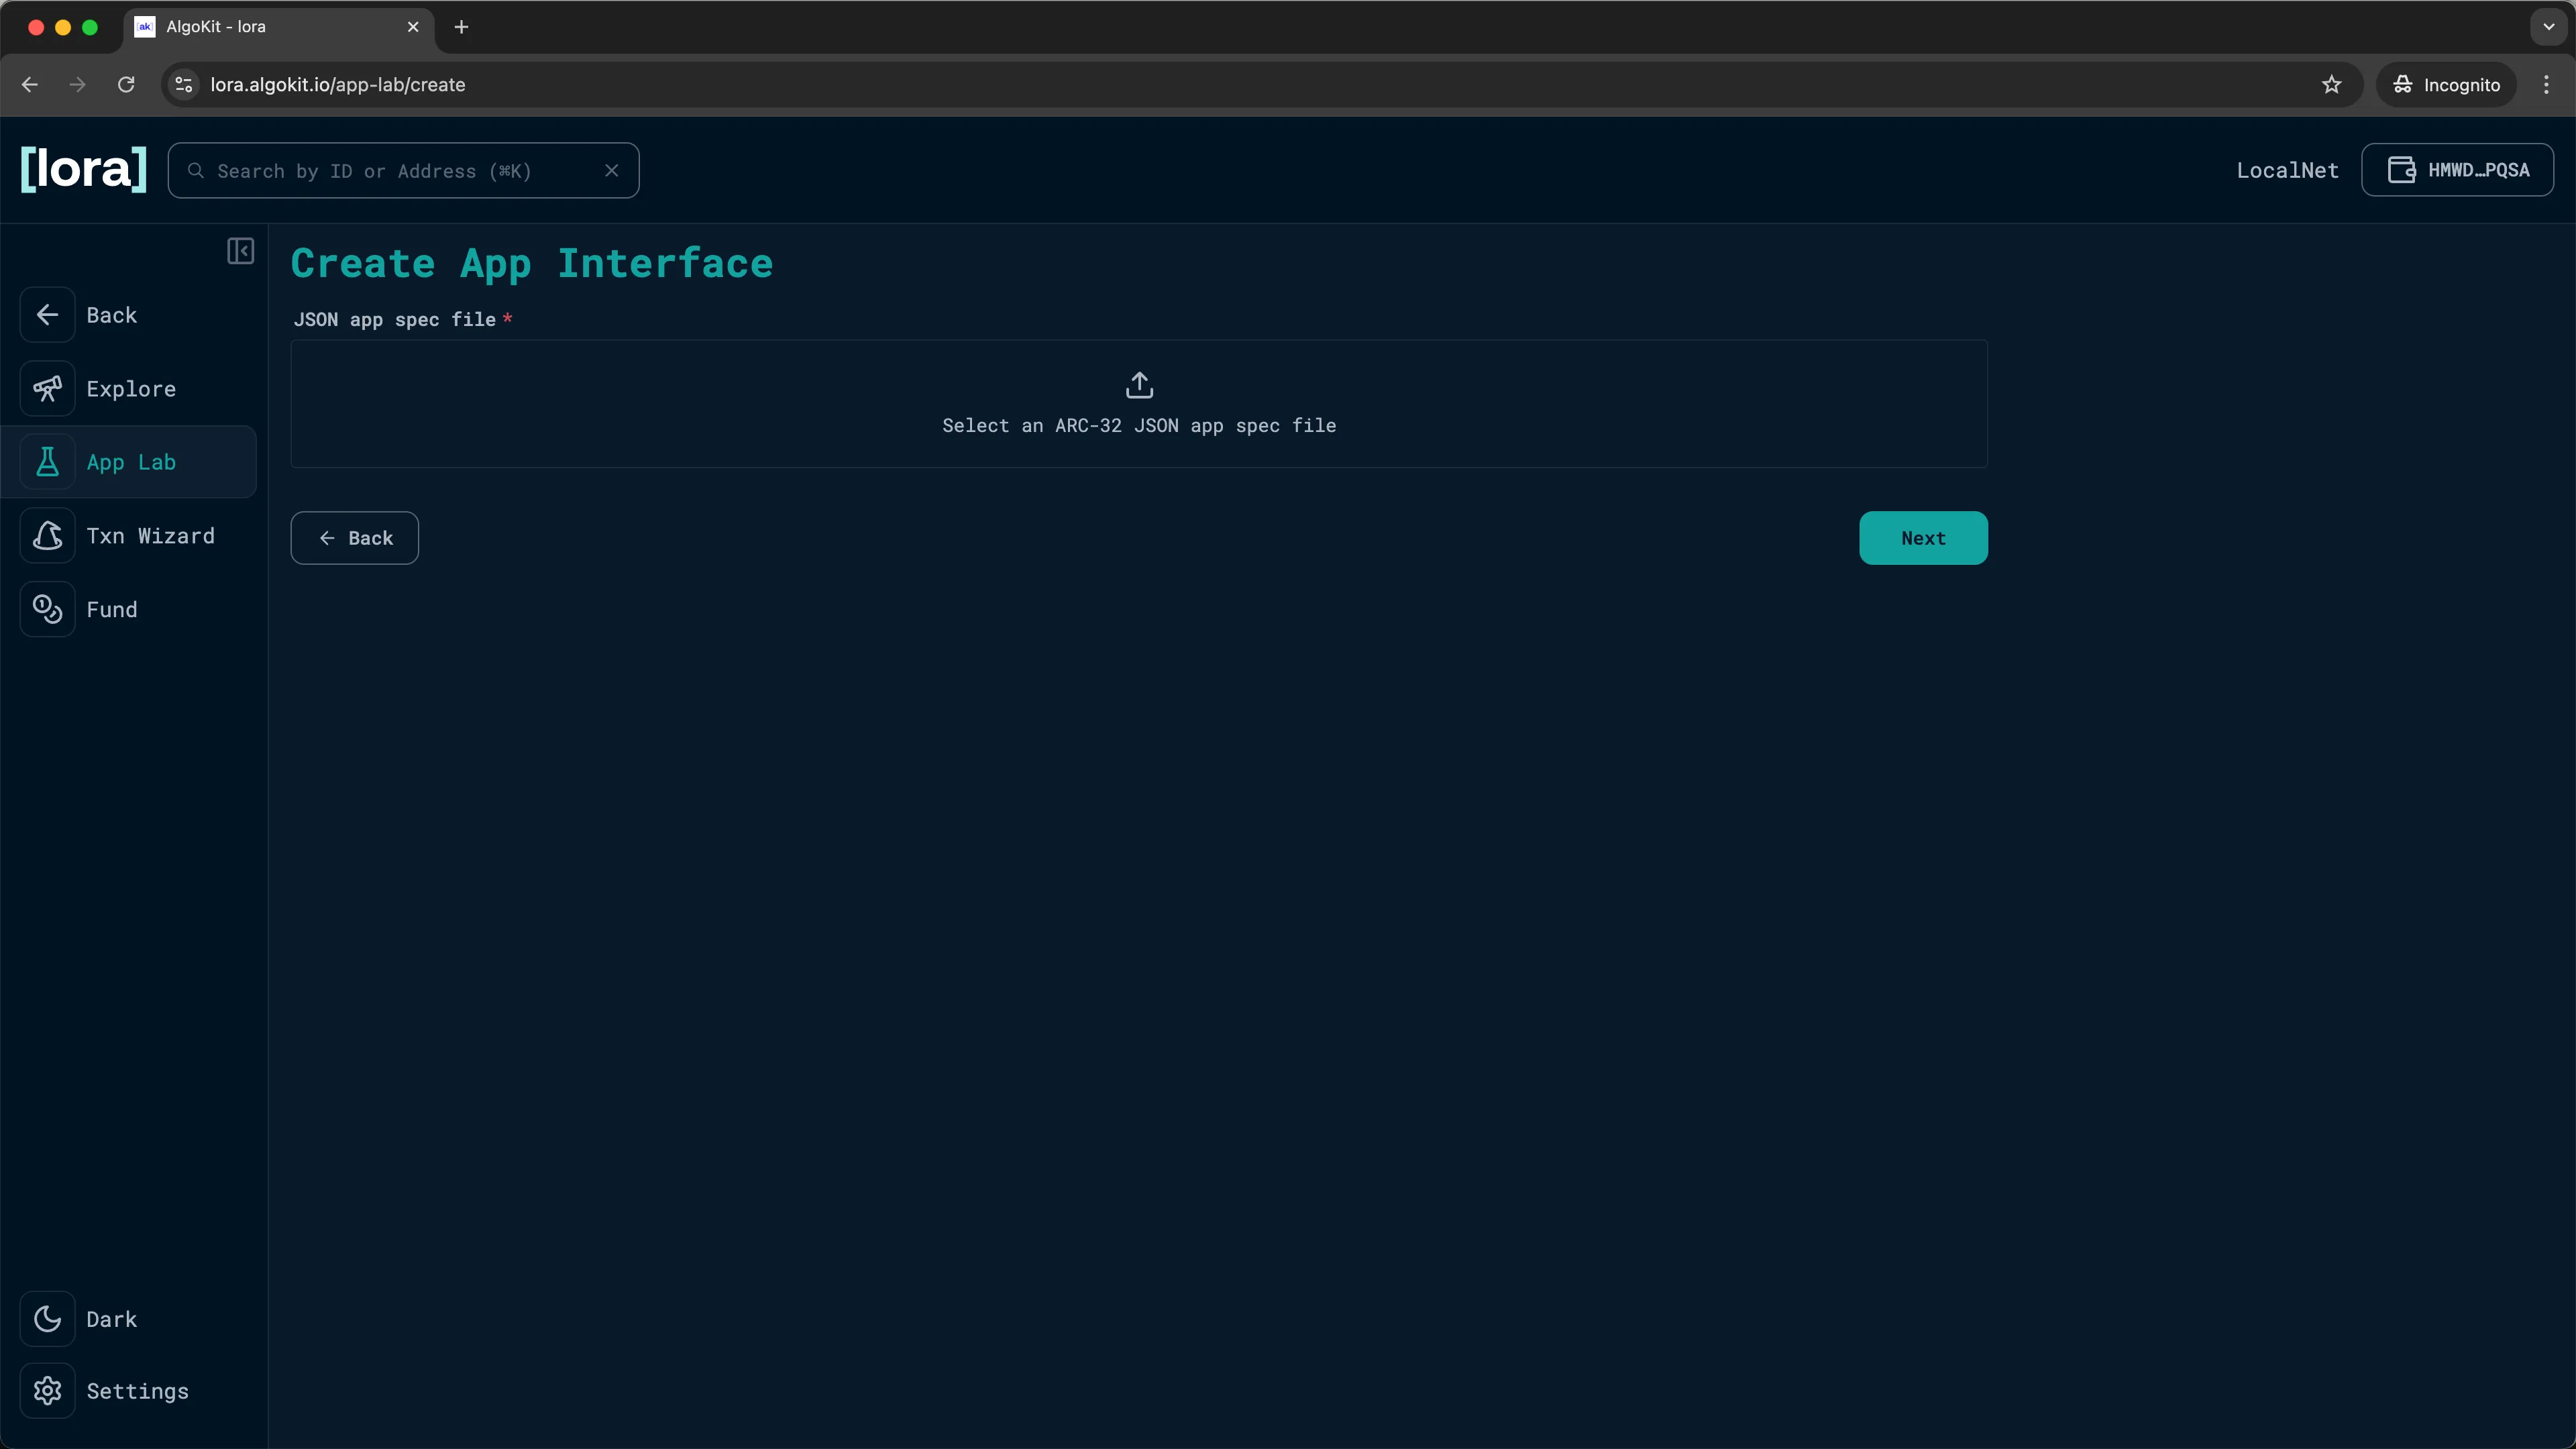
Lora: ARC-32/ARC-56 App Spec 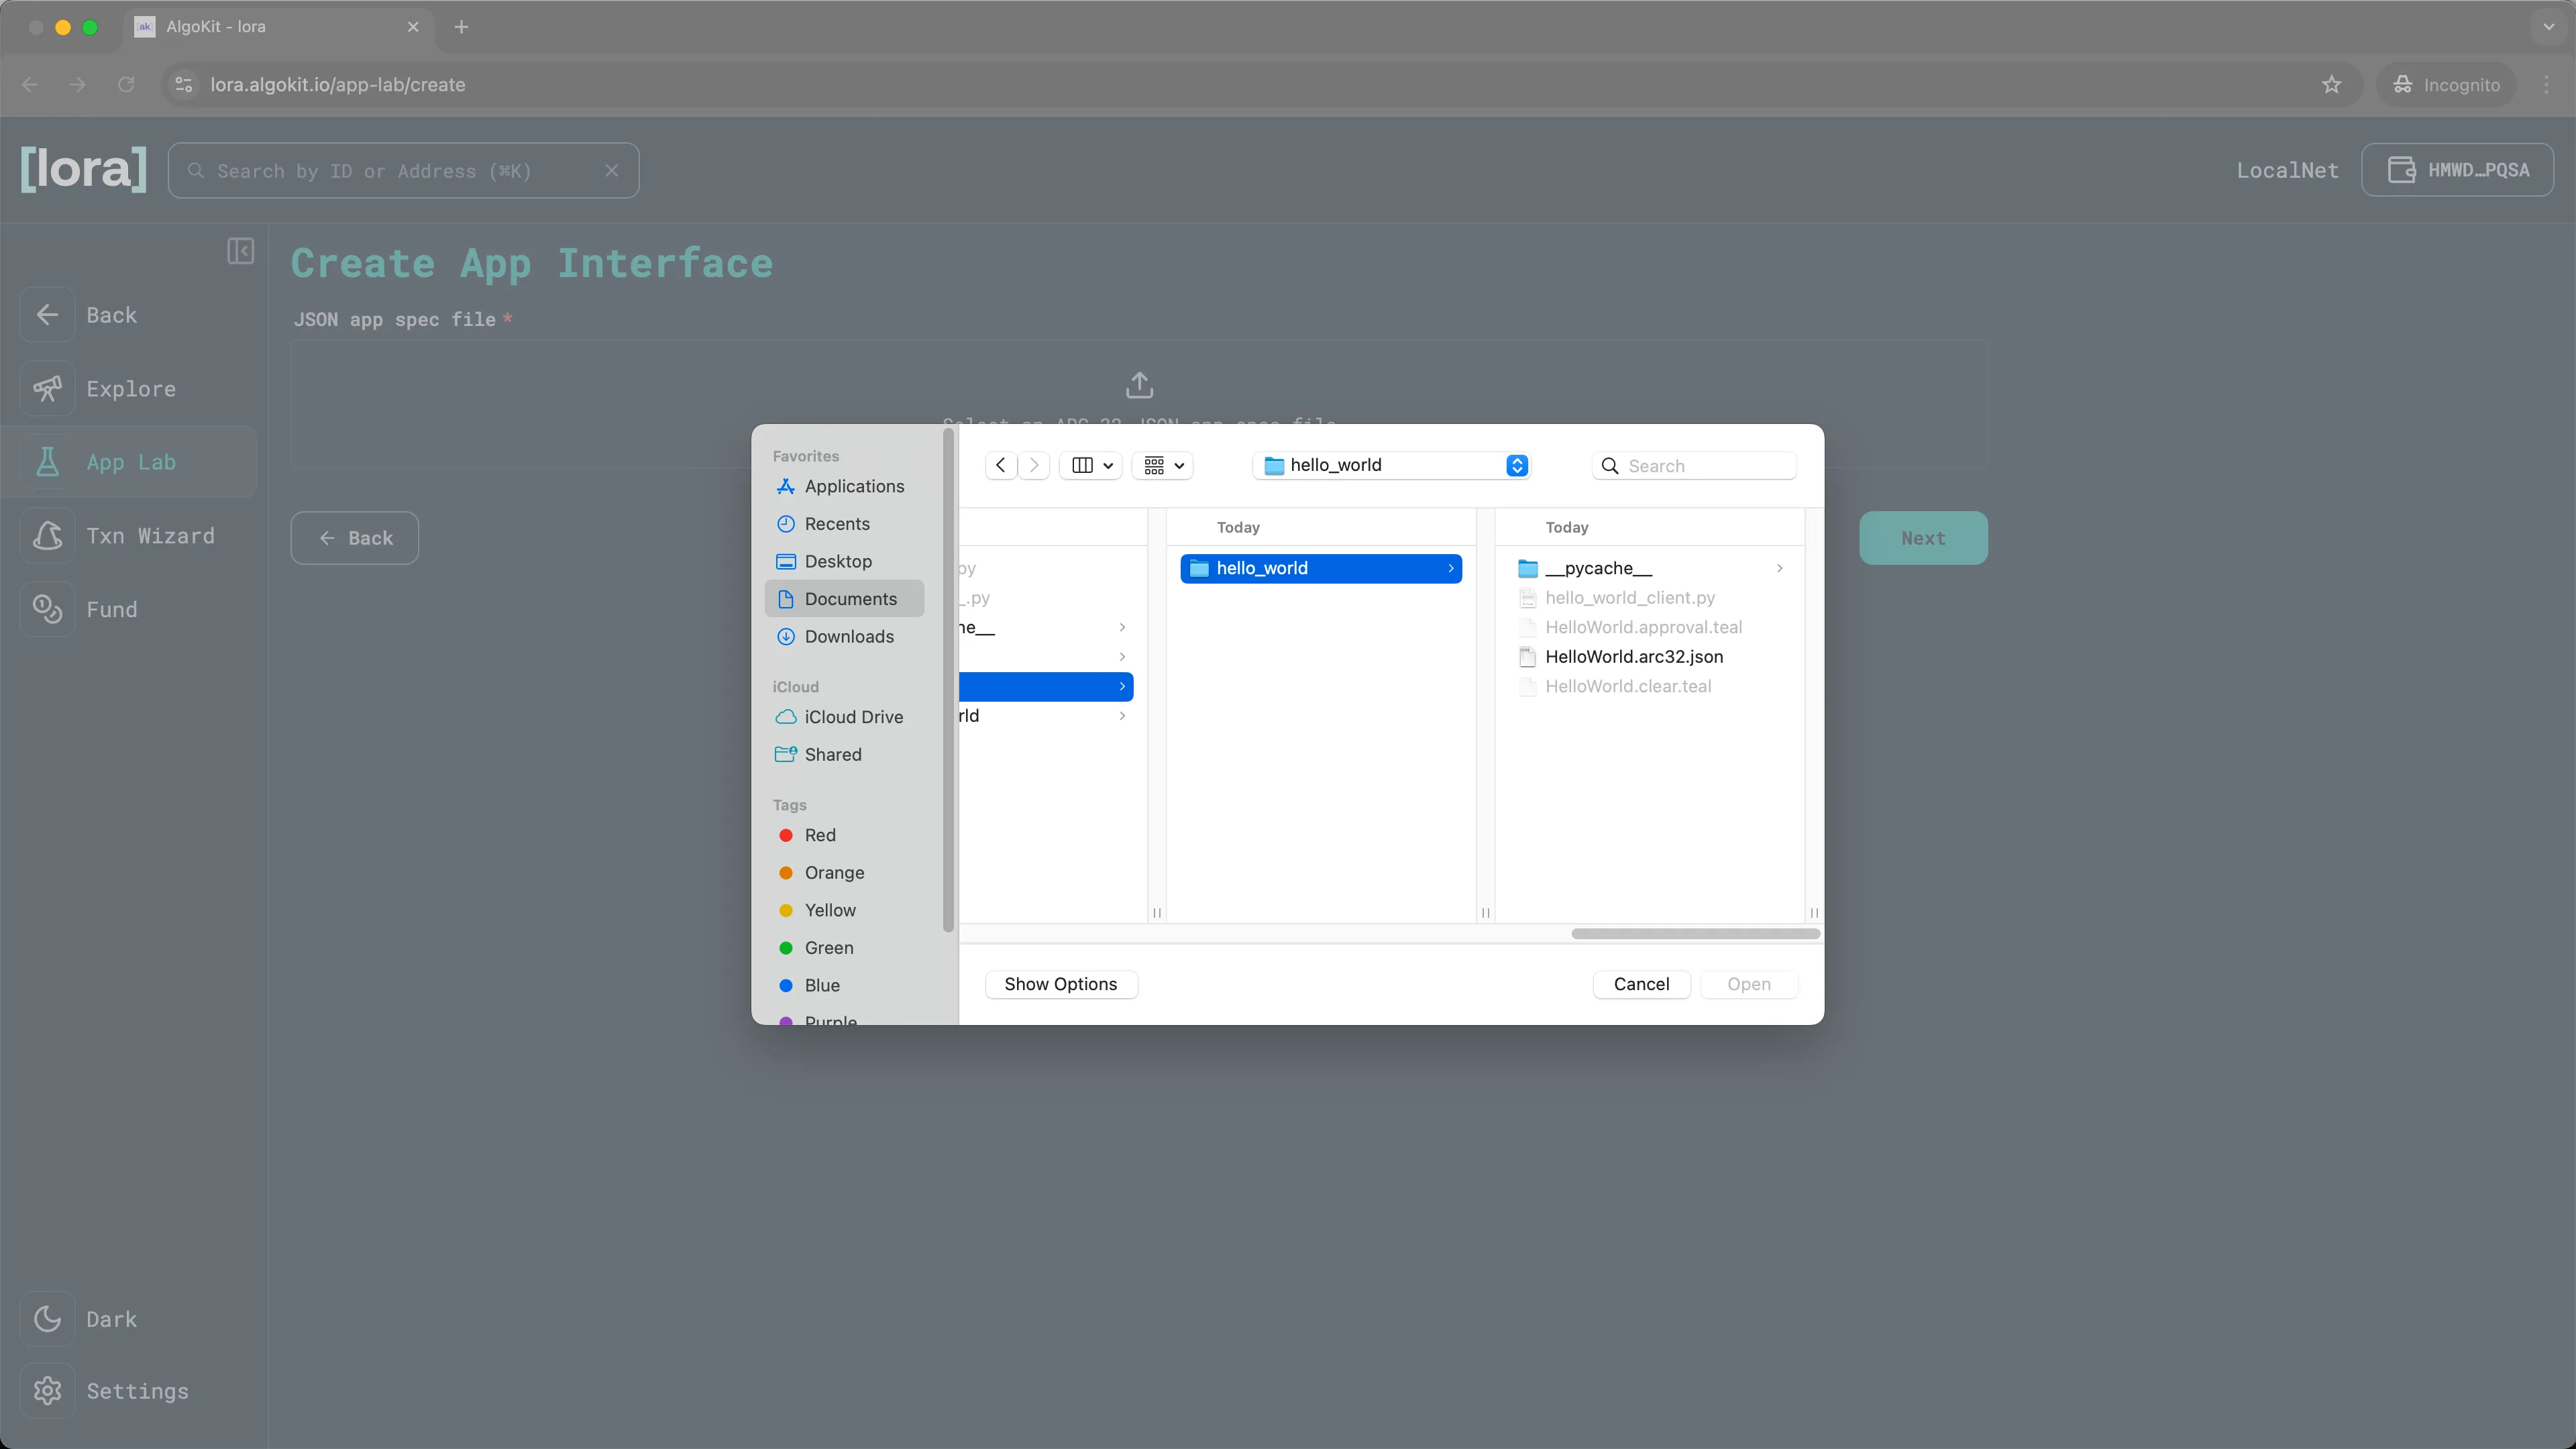
Lora: Uploading generated app spec -
This will load the specific manifest file for the Hello World sample application. Click
Next.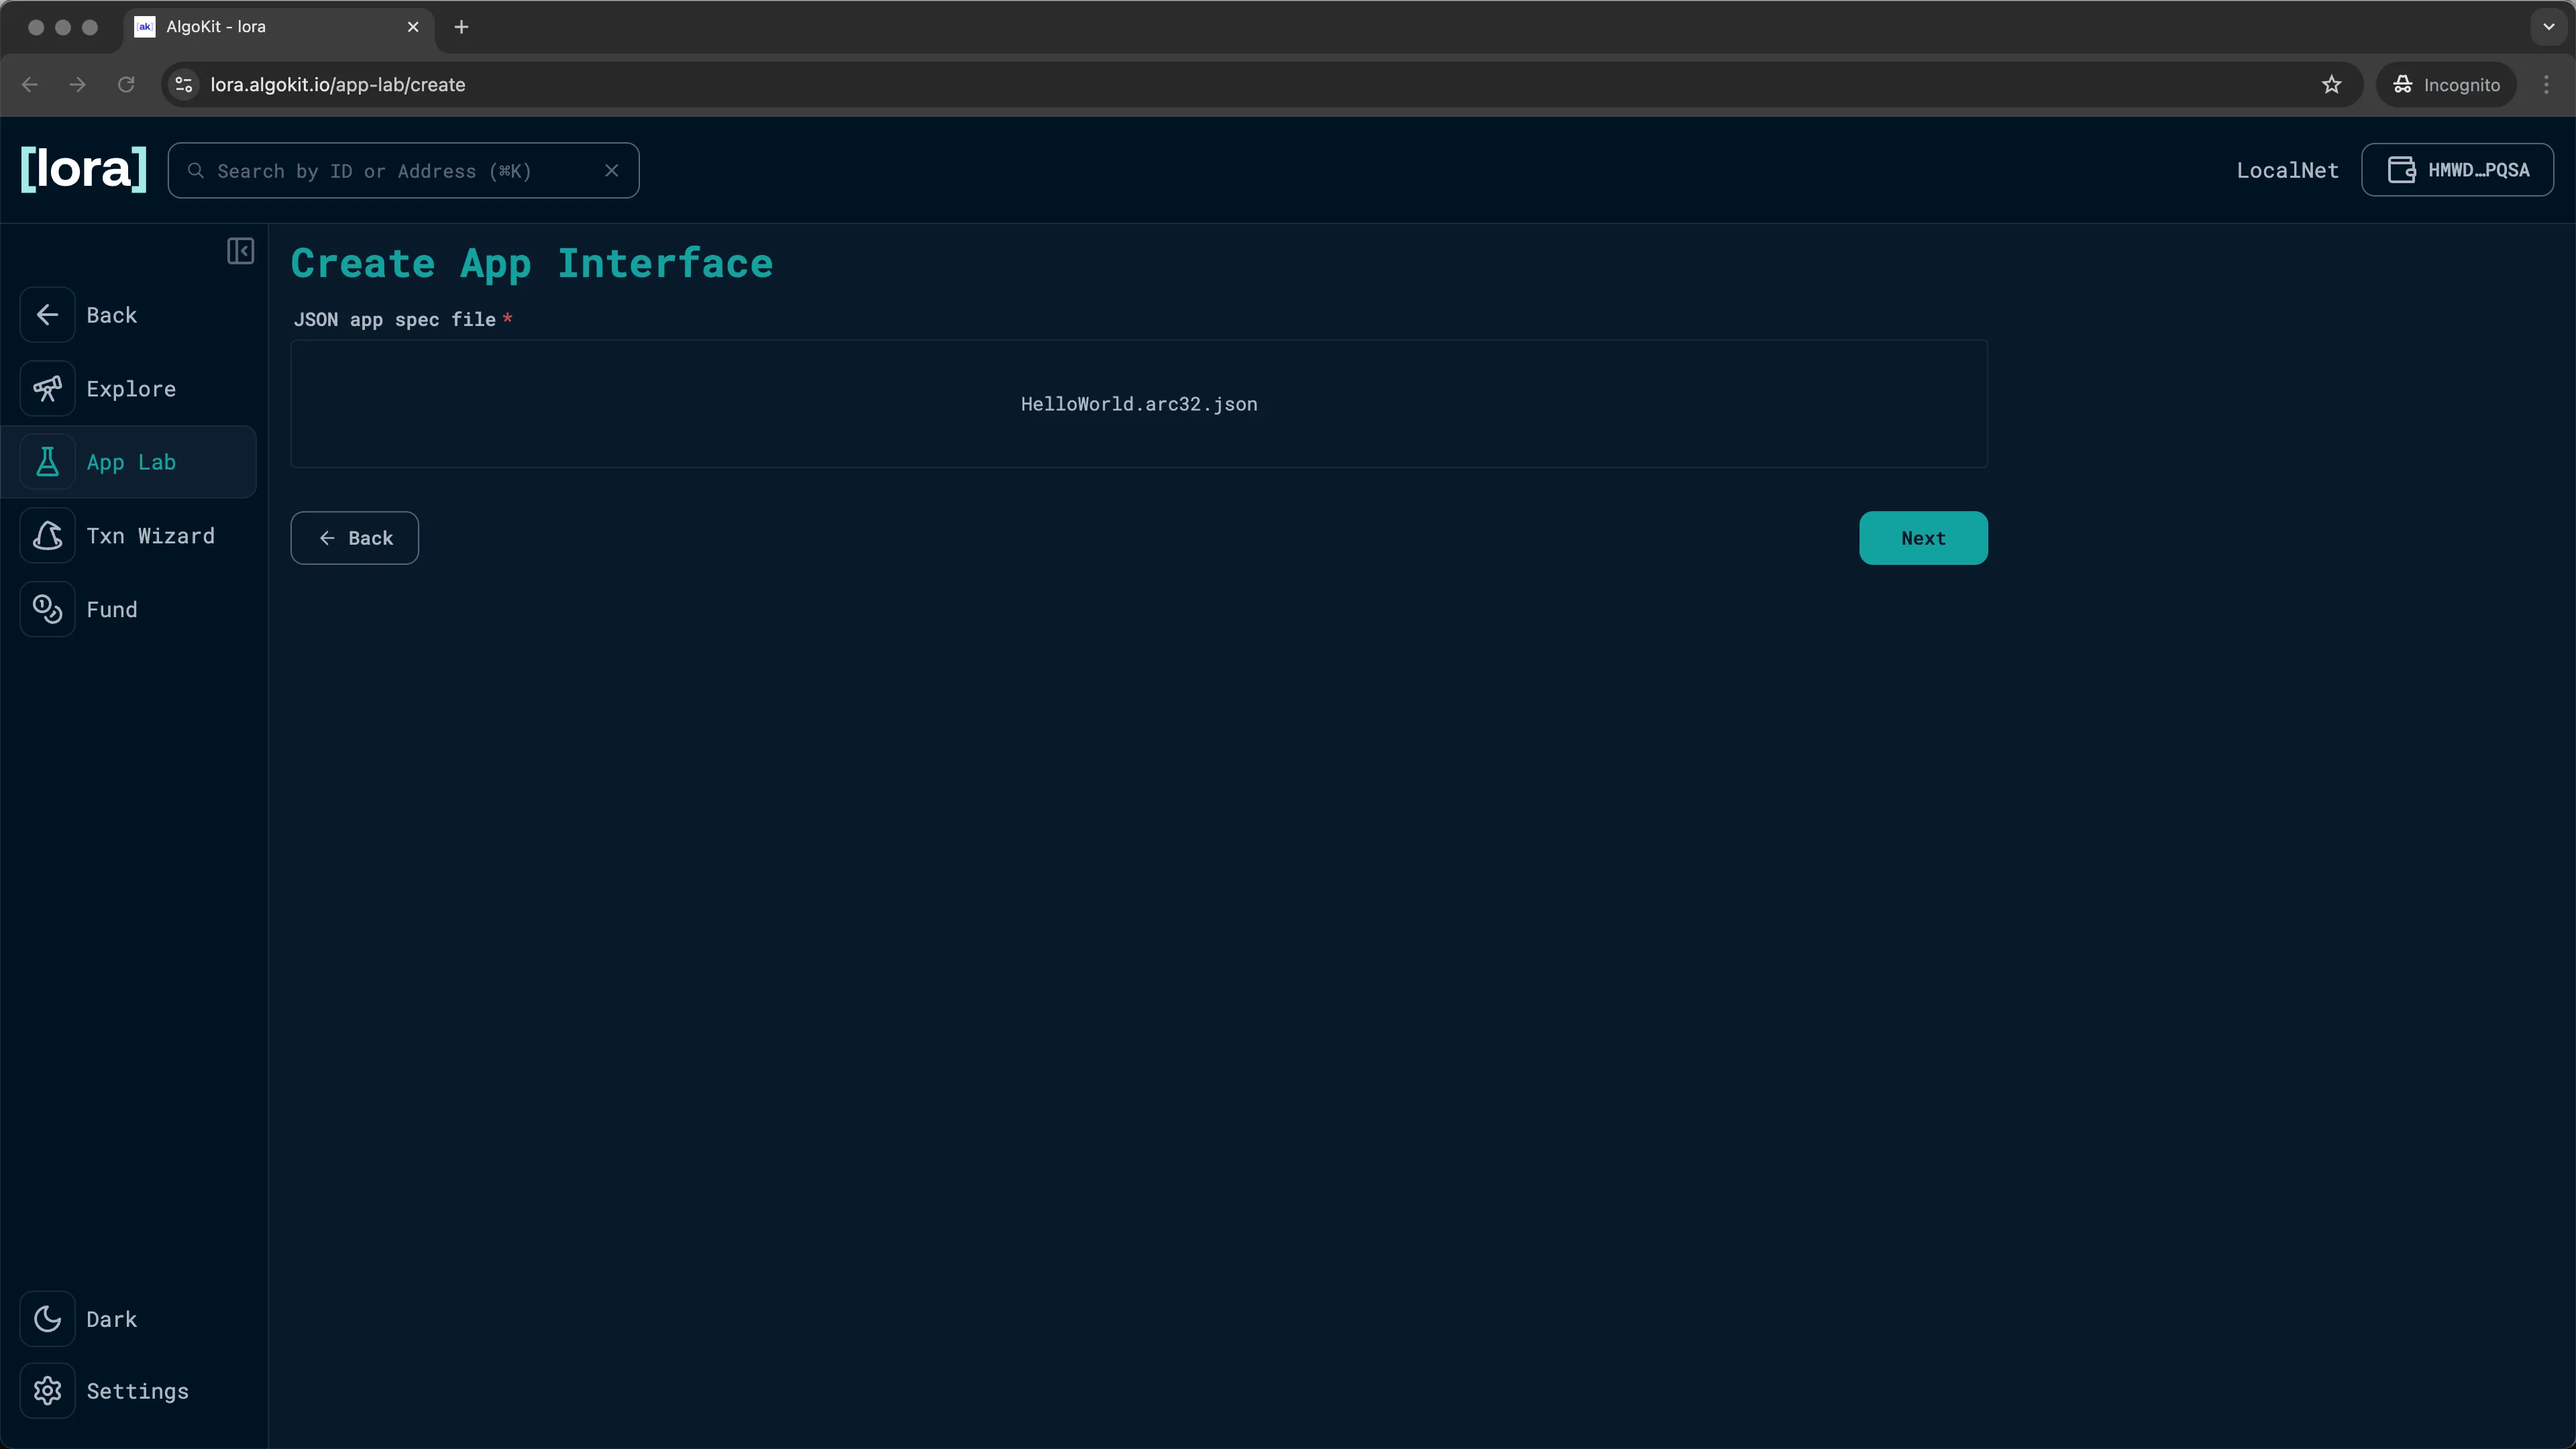
Lora: App spec uploaded successfully -
You can change the
Nameand theVersionof your app. We will keep it as it is. ClickNext.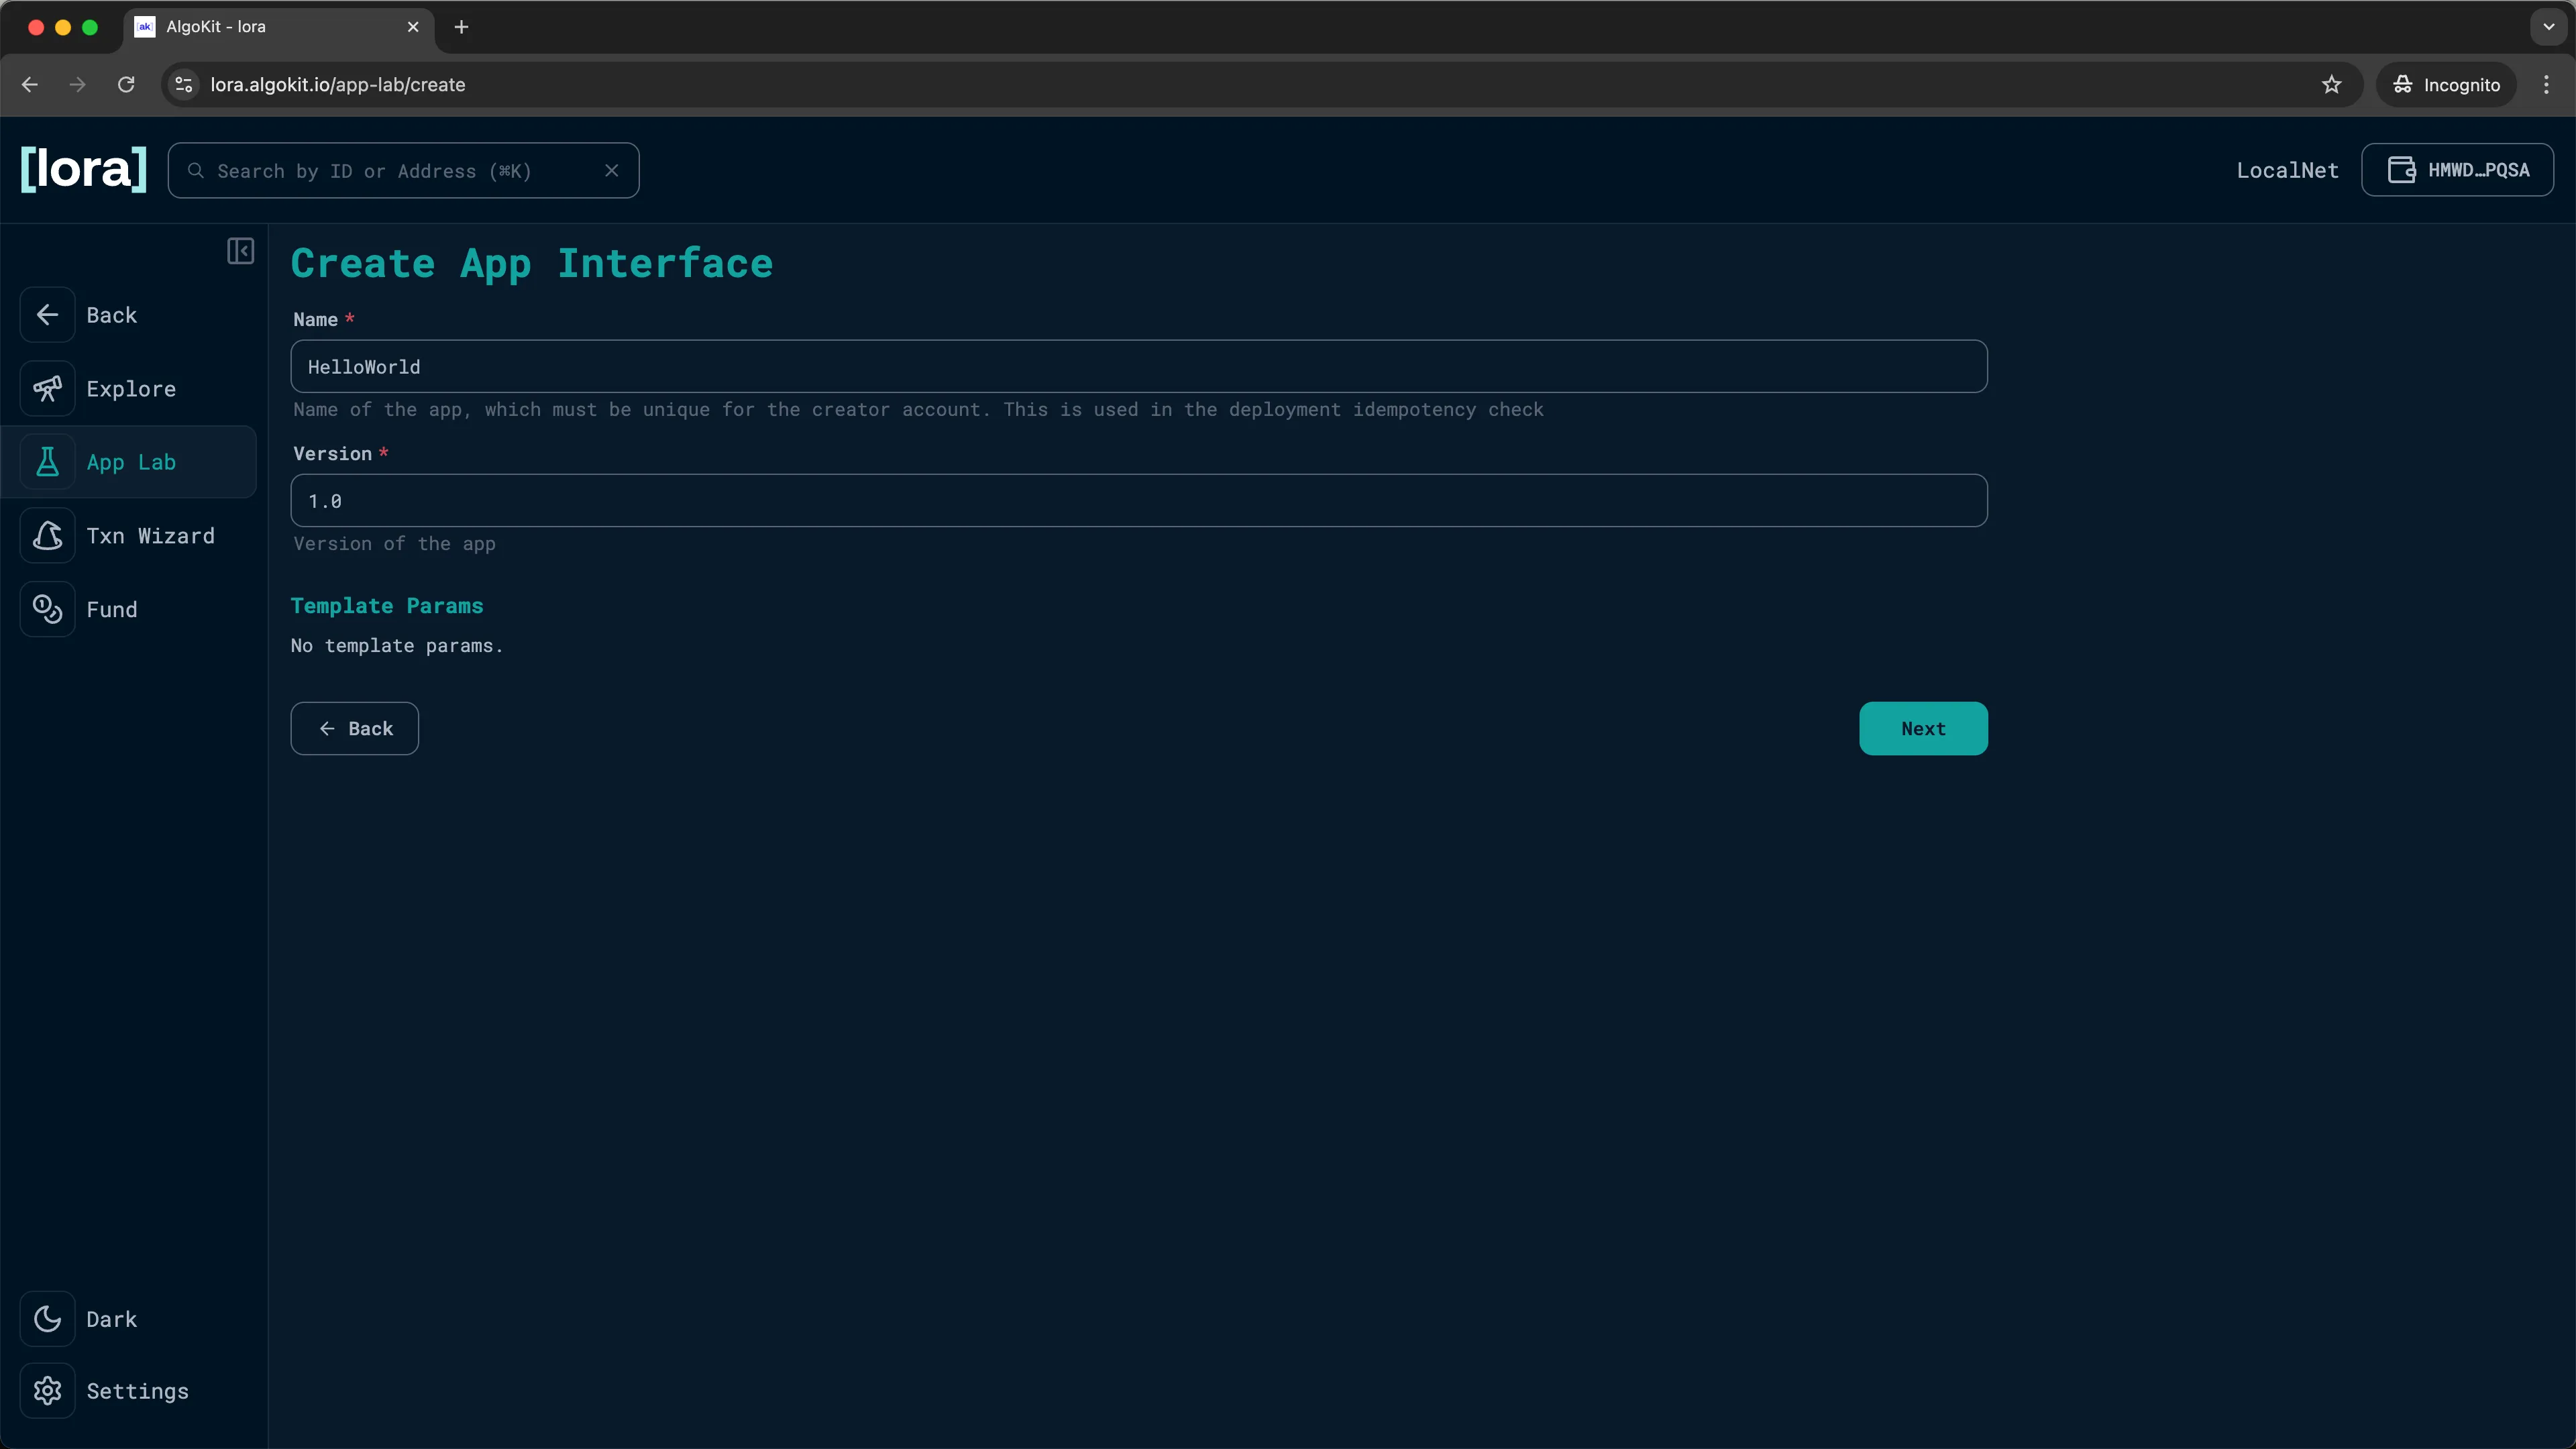
Lora: Specify app name and version -
Click the
() Callbutton. Then build and add the create transaction by clickingAdd.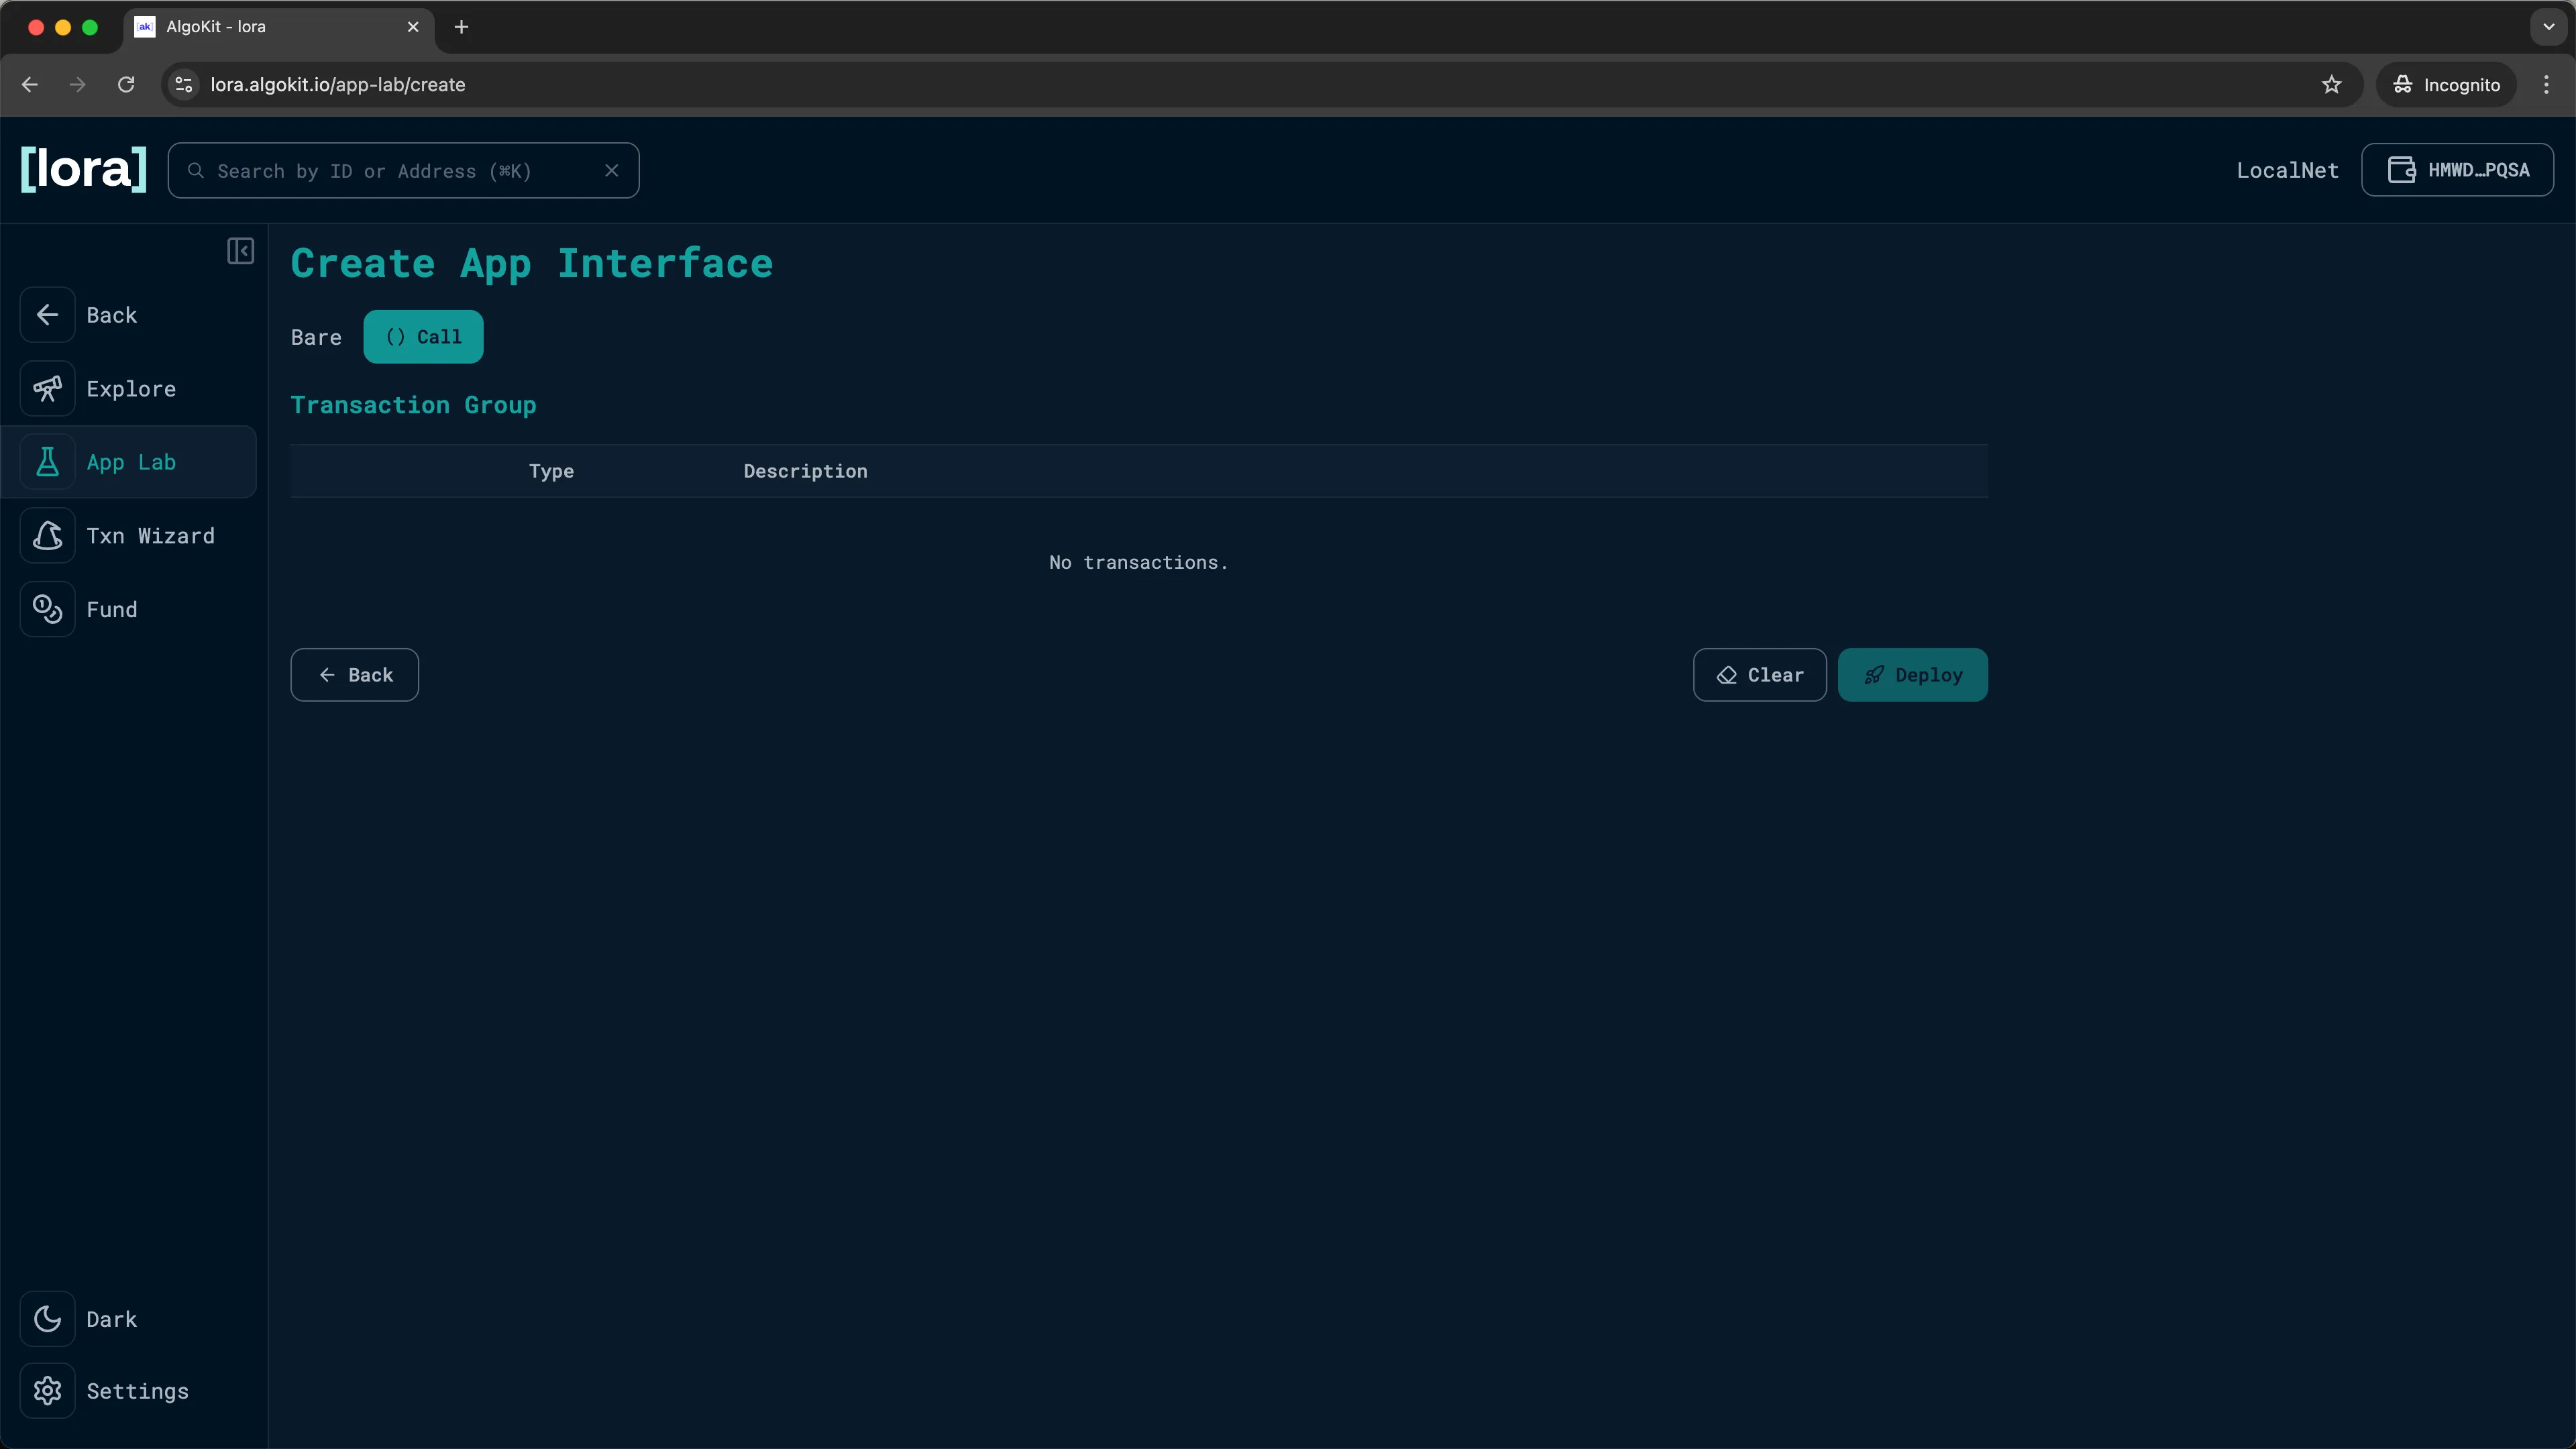
Lora: Transaction builder 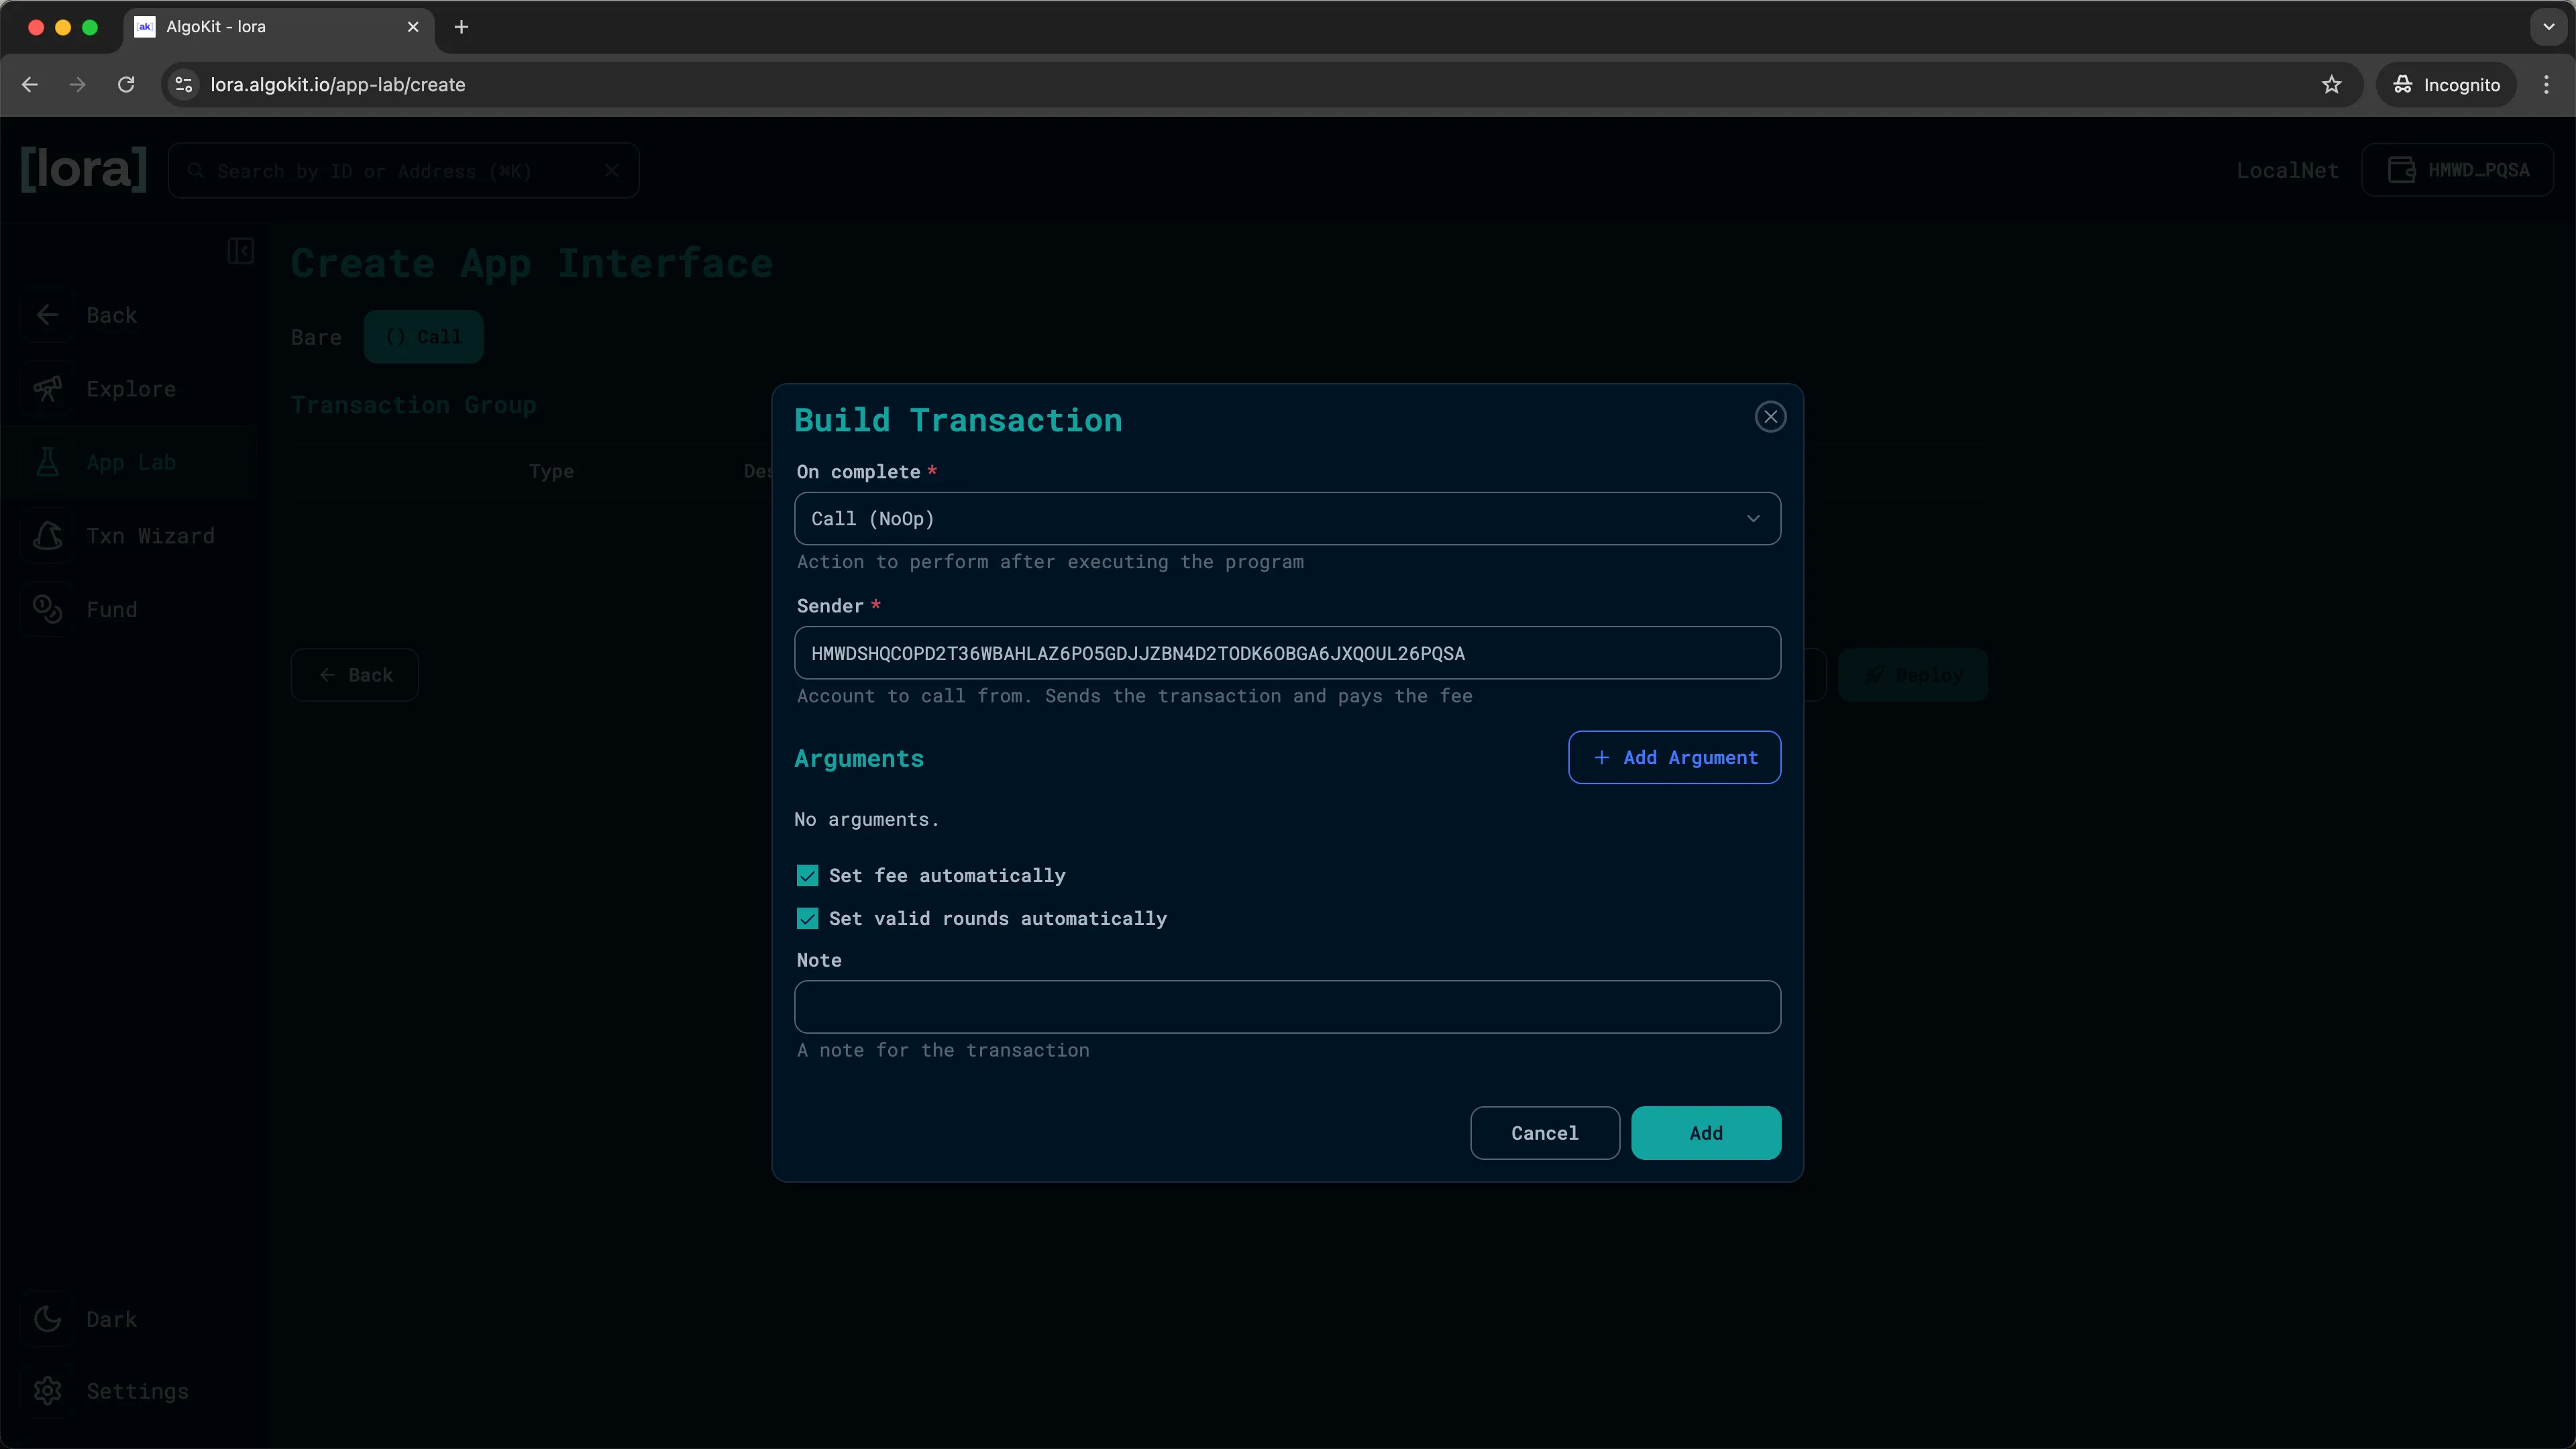
Lora: Create new transaction -
Click
Deployand sign the transaction by clickingOKin the KMD pop up to deploy the smart contract to the local Algorand network.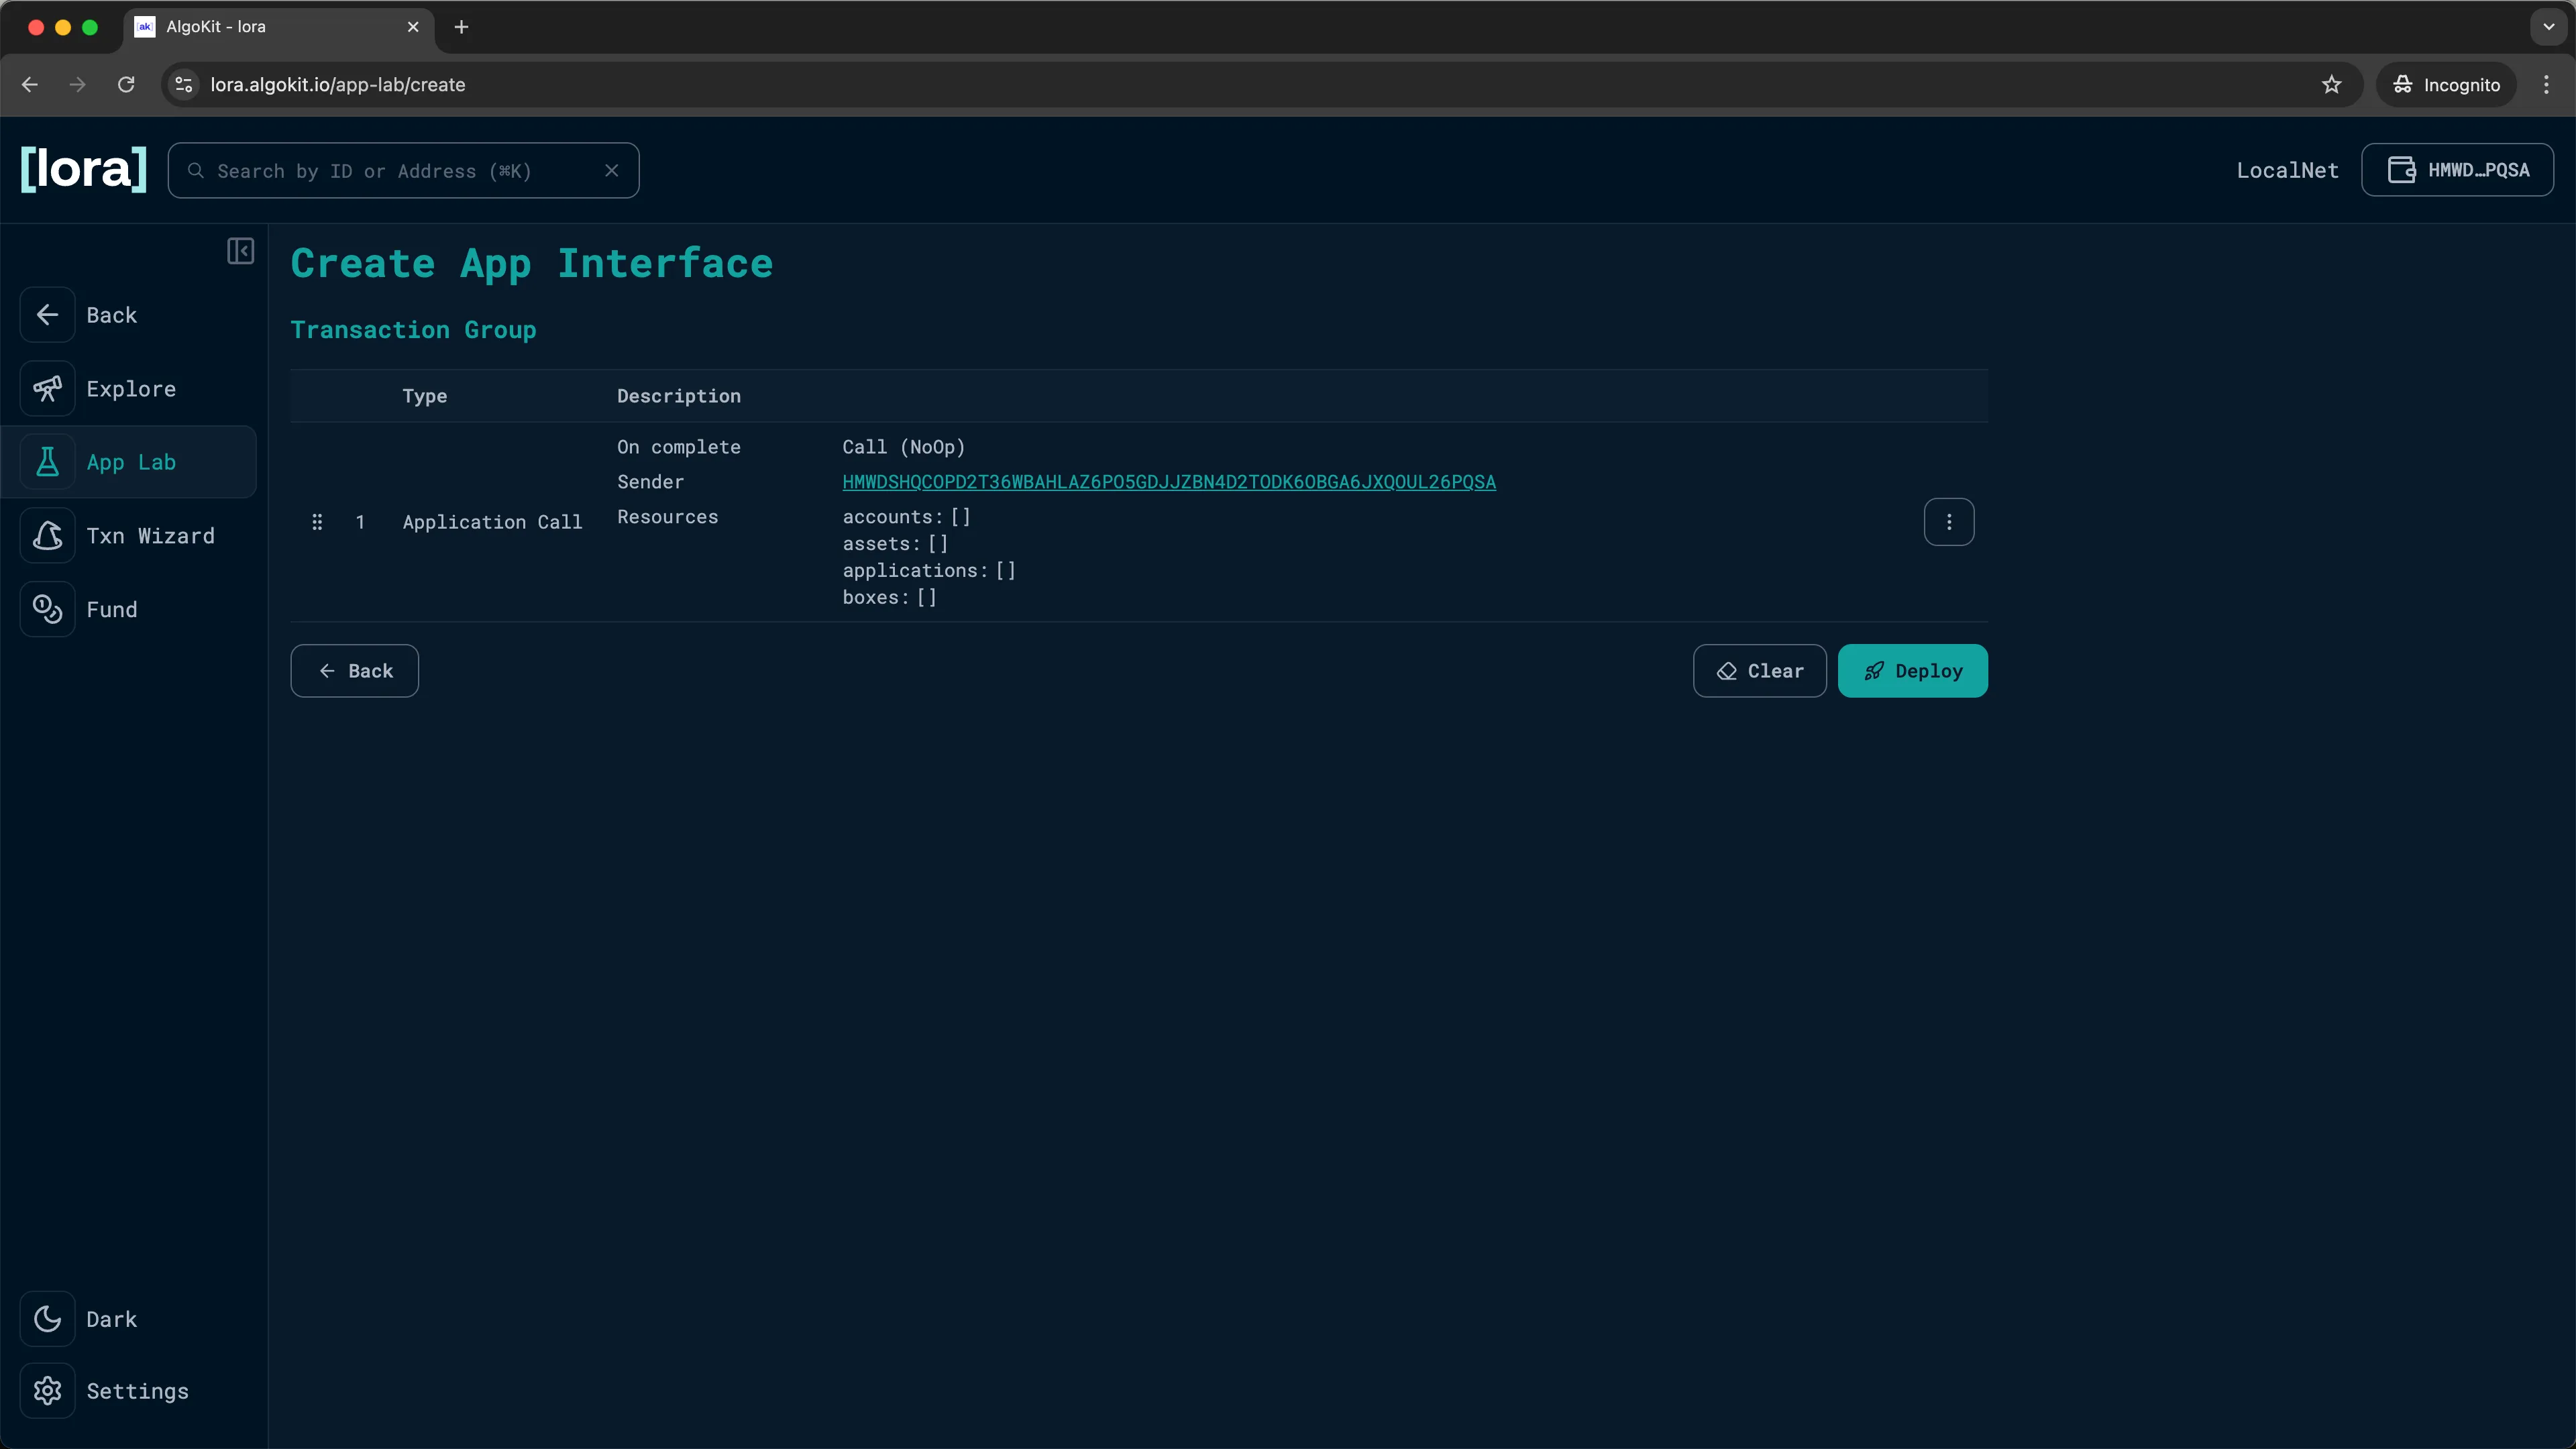
Lora: Transaction created -
You should now see the deployed
HelloWorldcontract on theApp Labpage.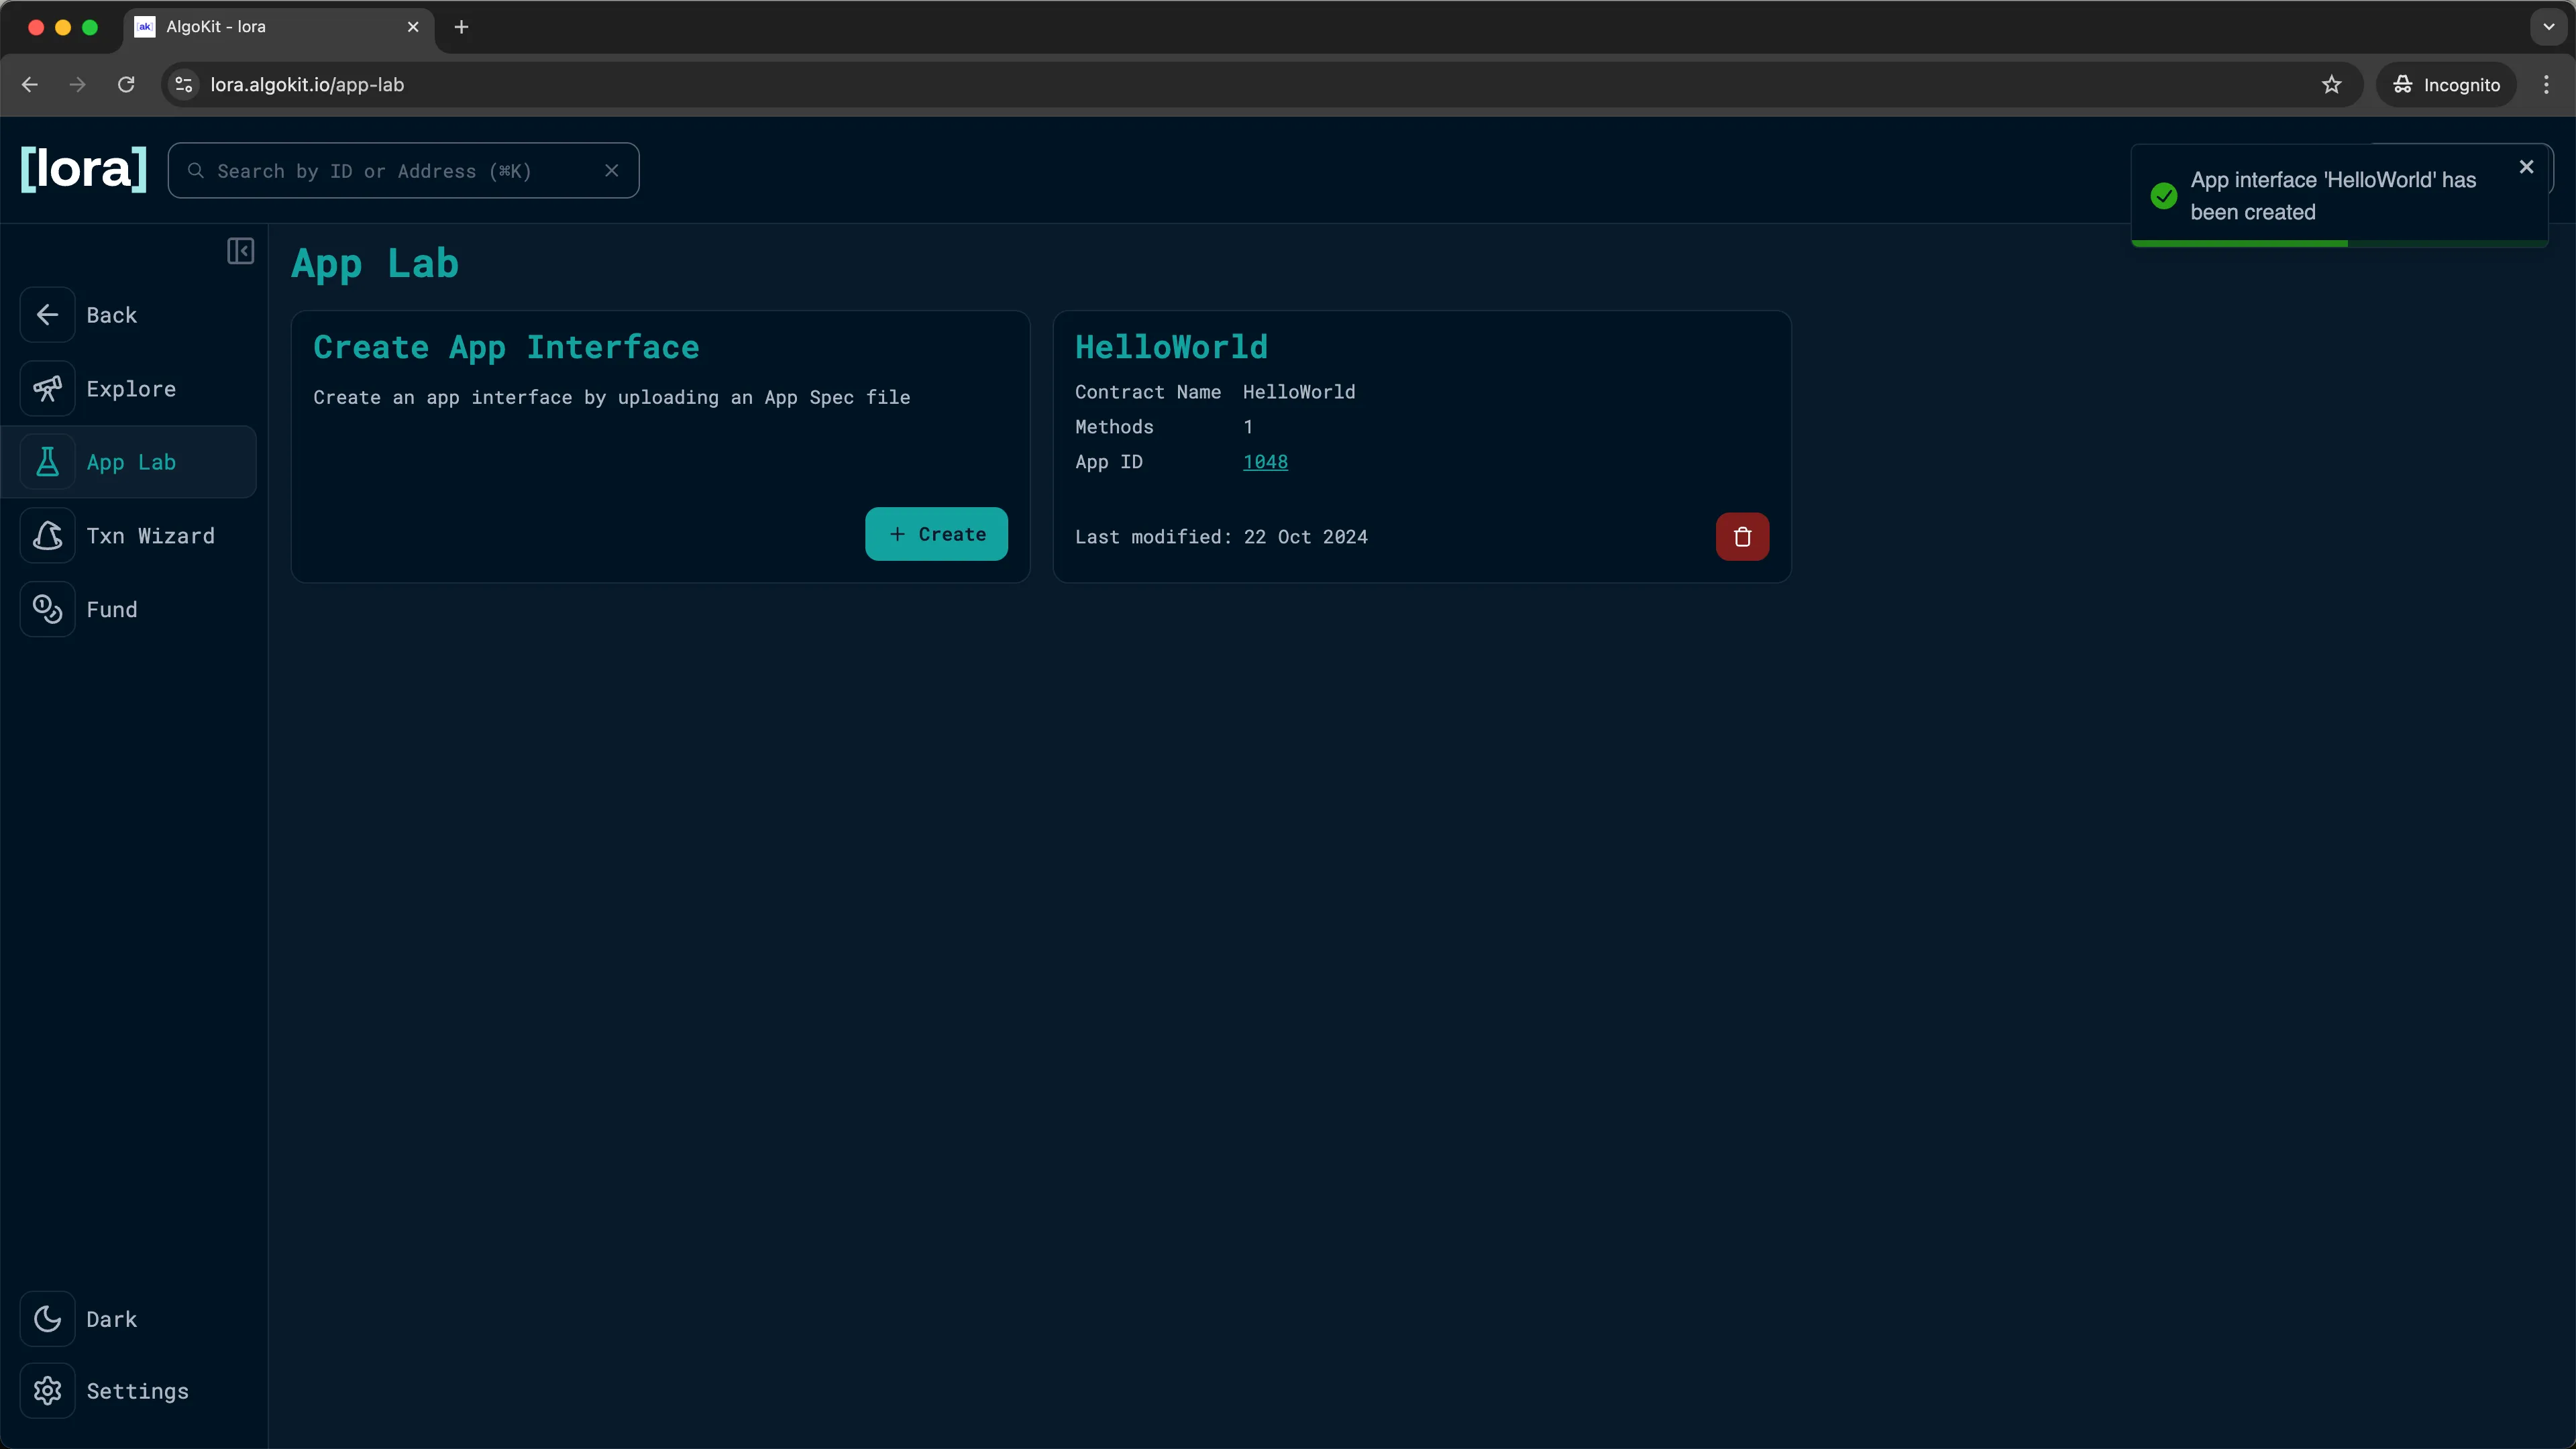
Lora: Your app is now deployed -
Now click on the
App IDinside of theHelloWorldcard to go to theApplicationpage.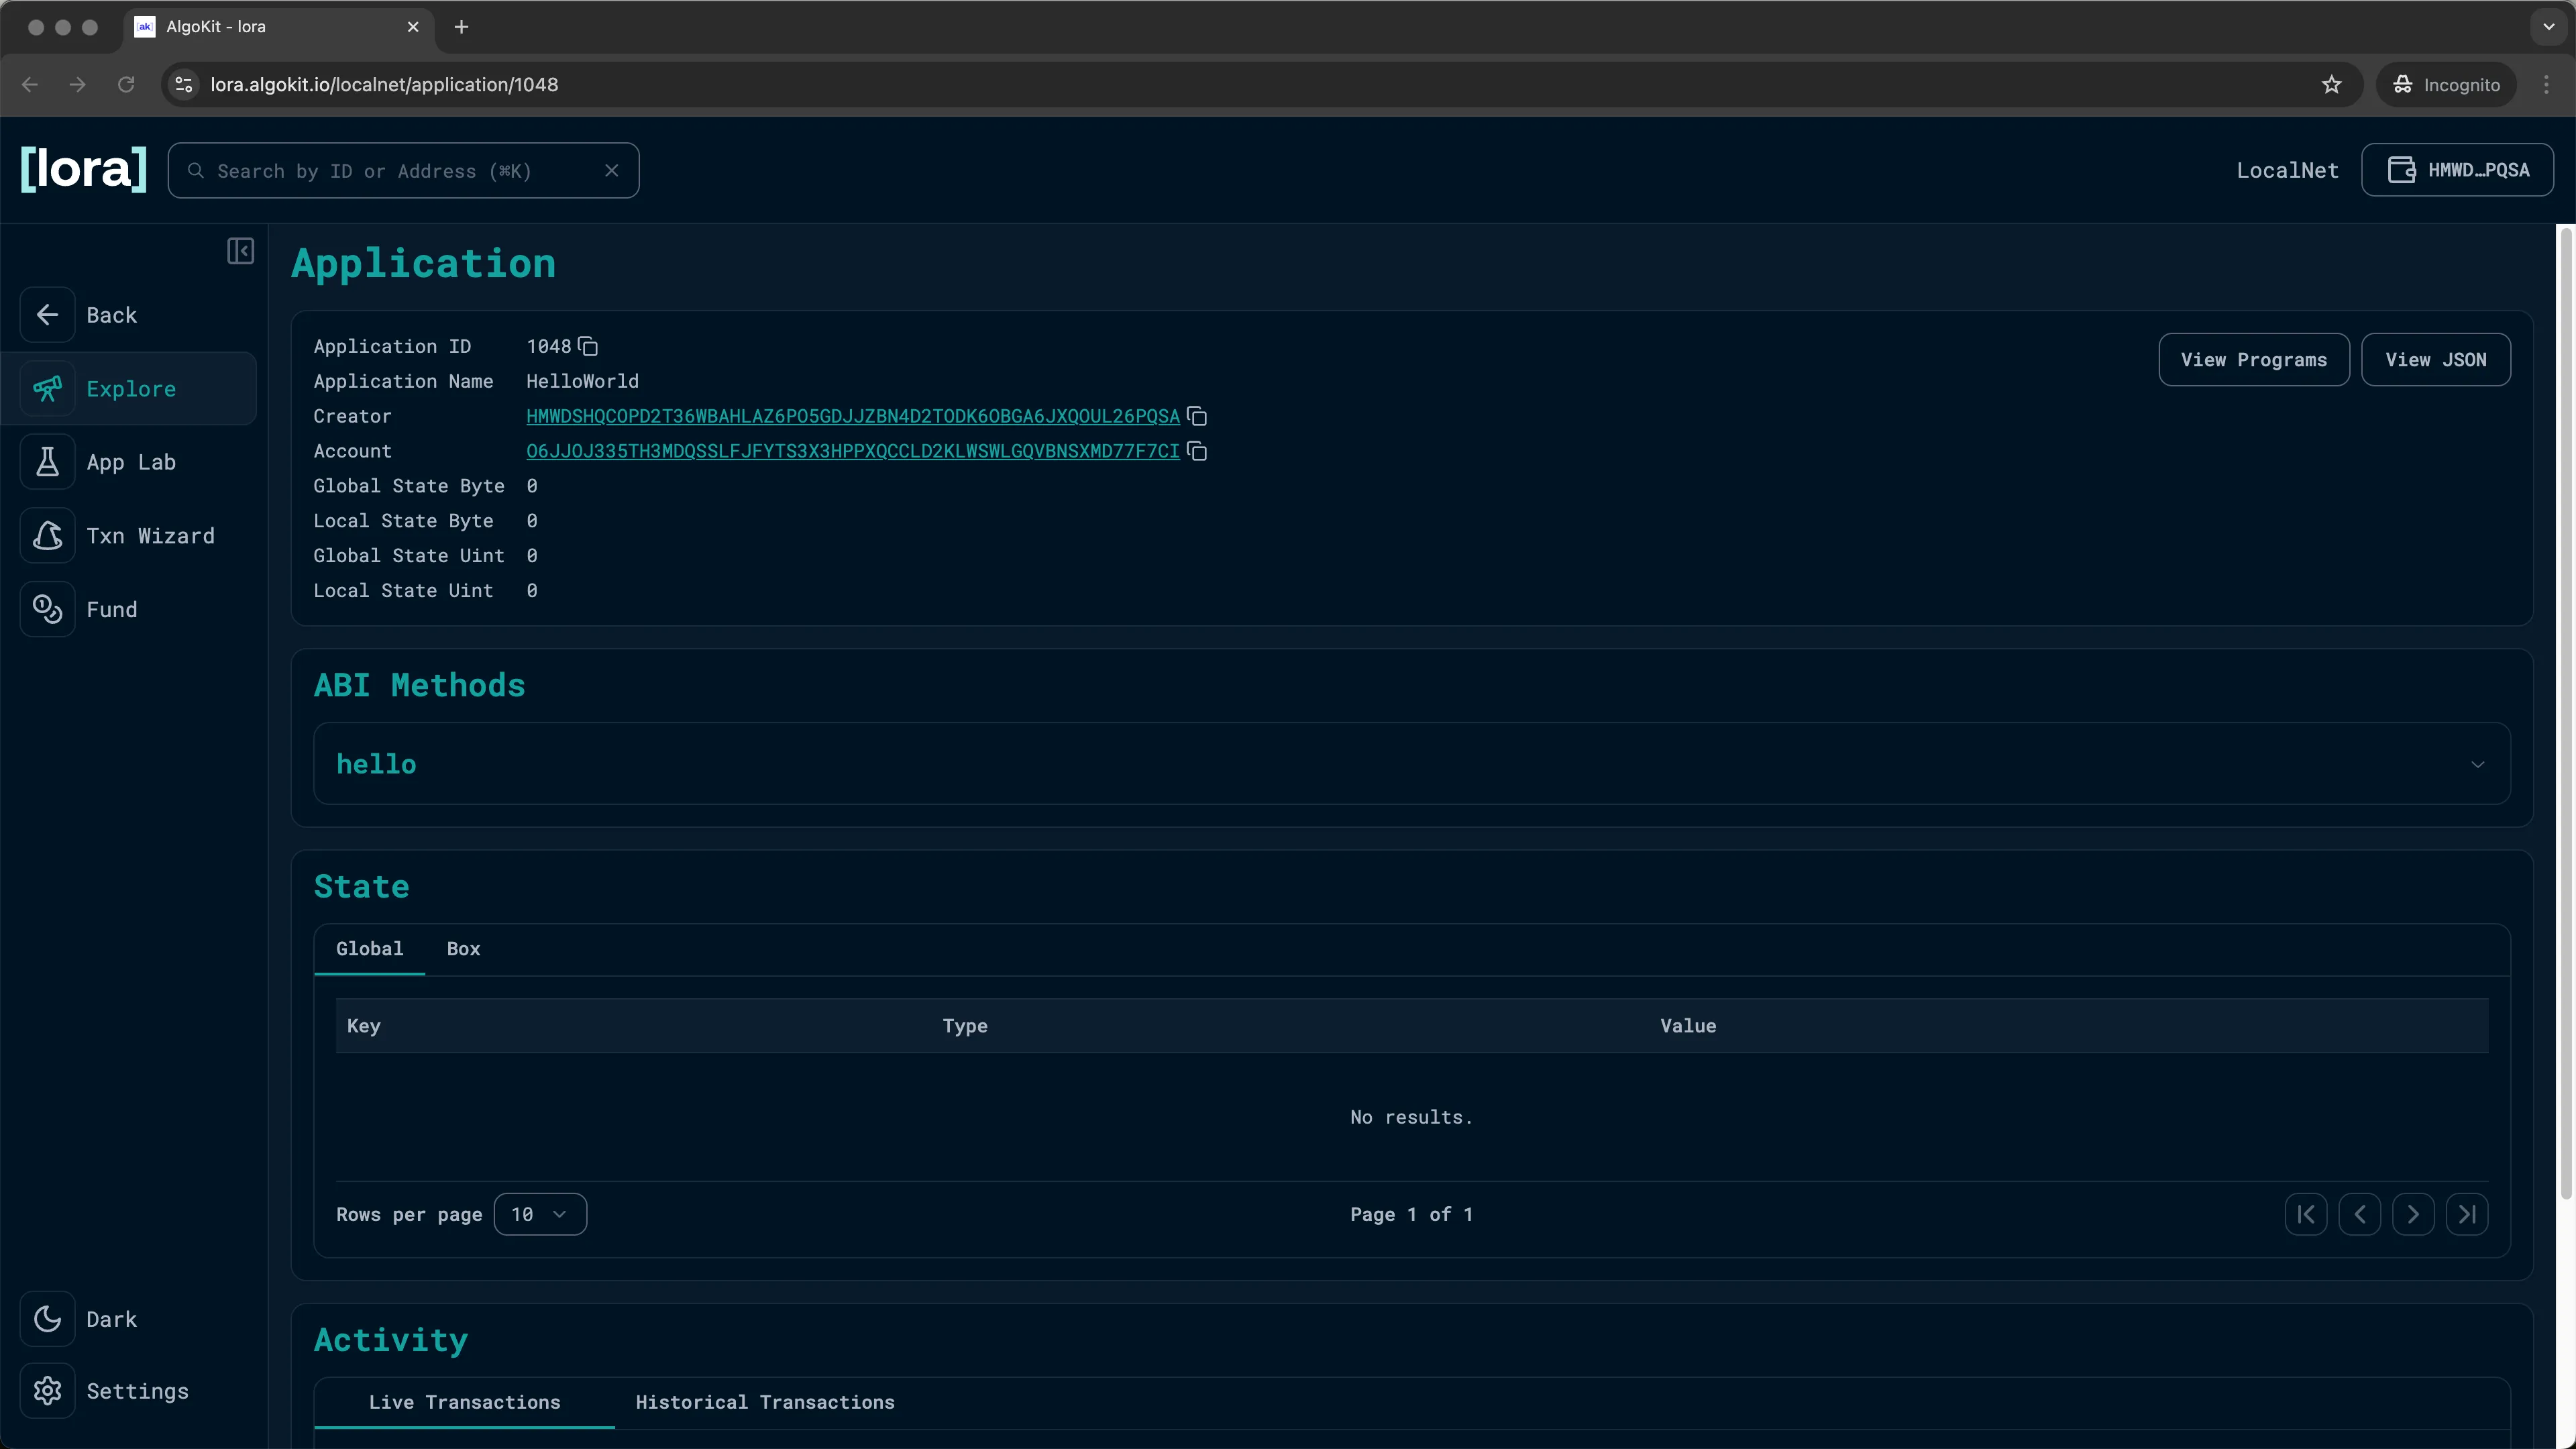
Lora: Inspecting your on-chain app -
Inside the
ABI Methodssection, you should see thehellomethod. Click on the drop down and theCallbutton. You will be prompted with a popup allowing you to enter the parameter for thehellomethod and call it.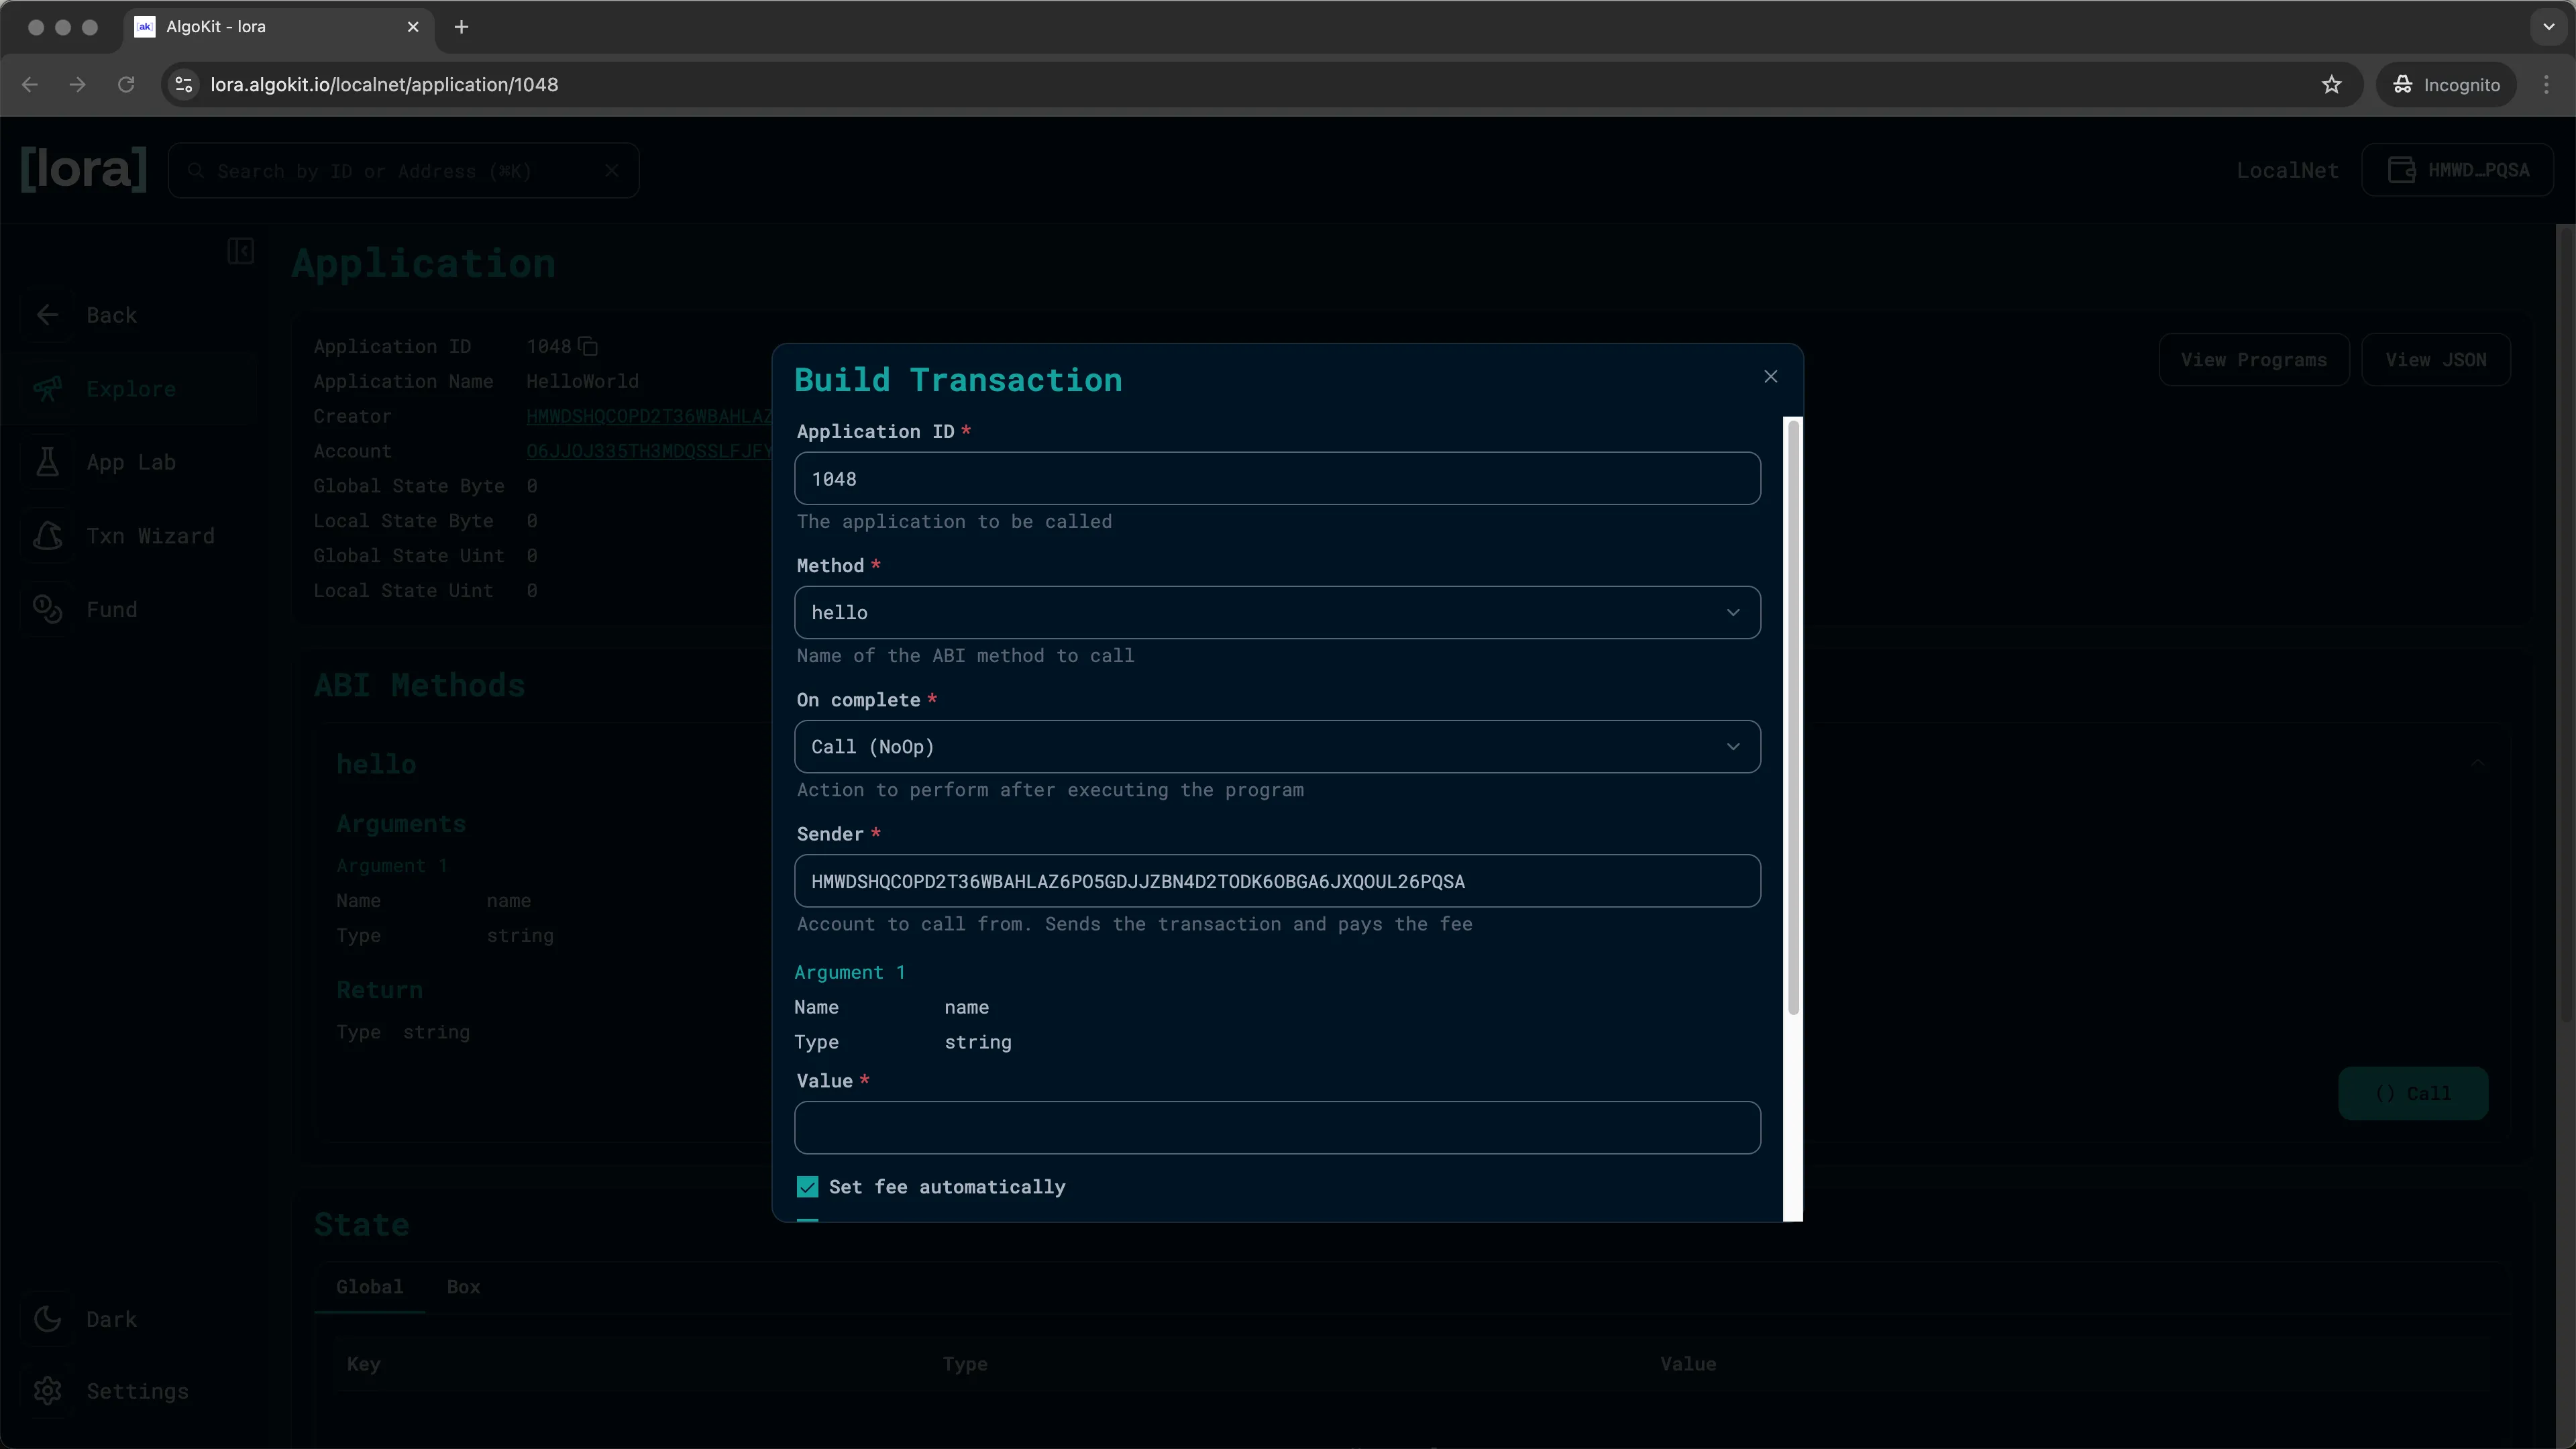
Lora: ABI methods -
Enter a string in the
valueinput and click onAdd.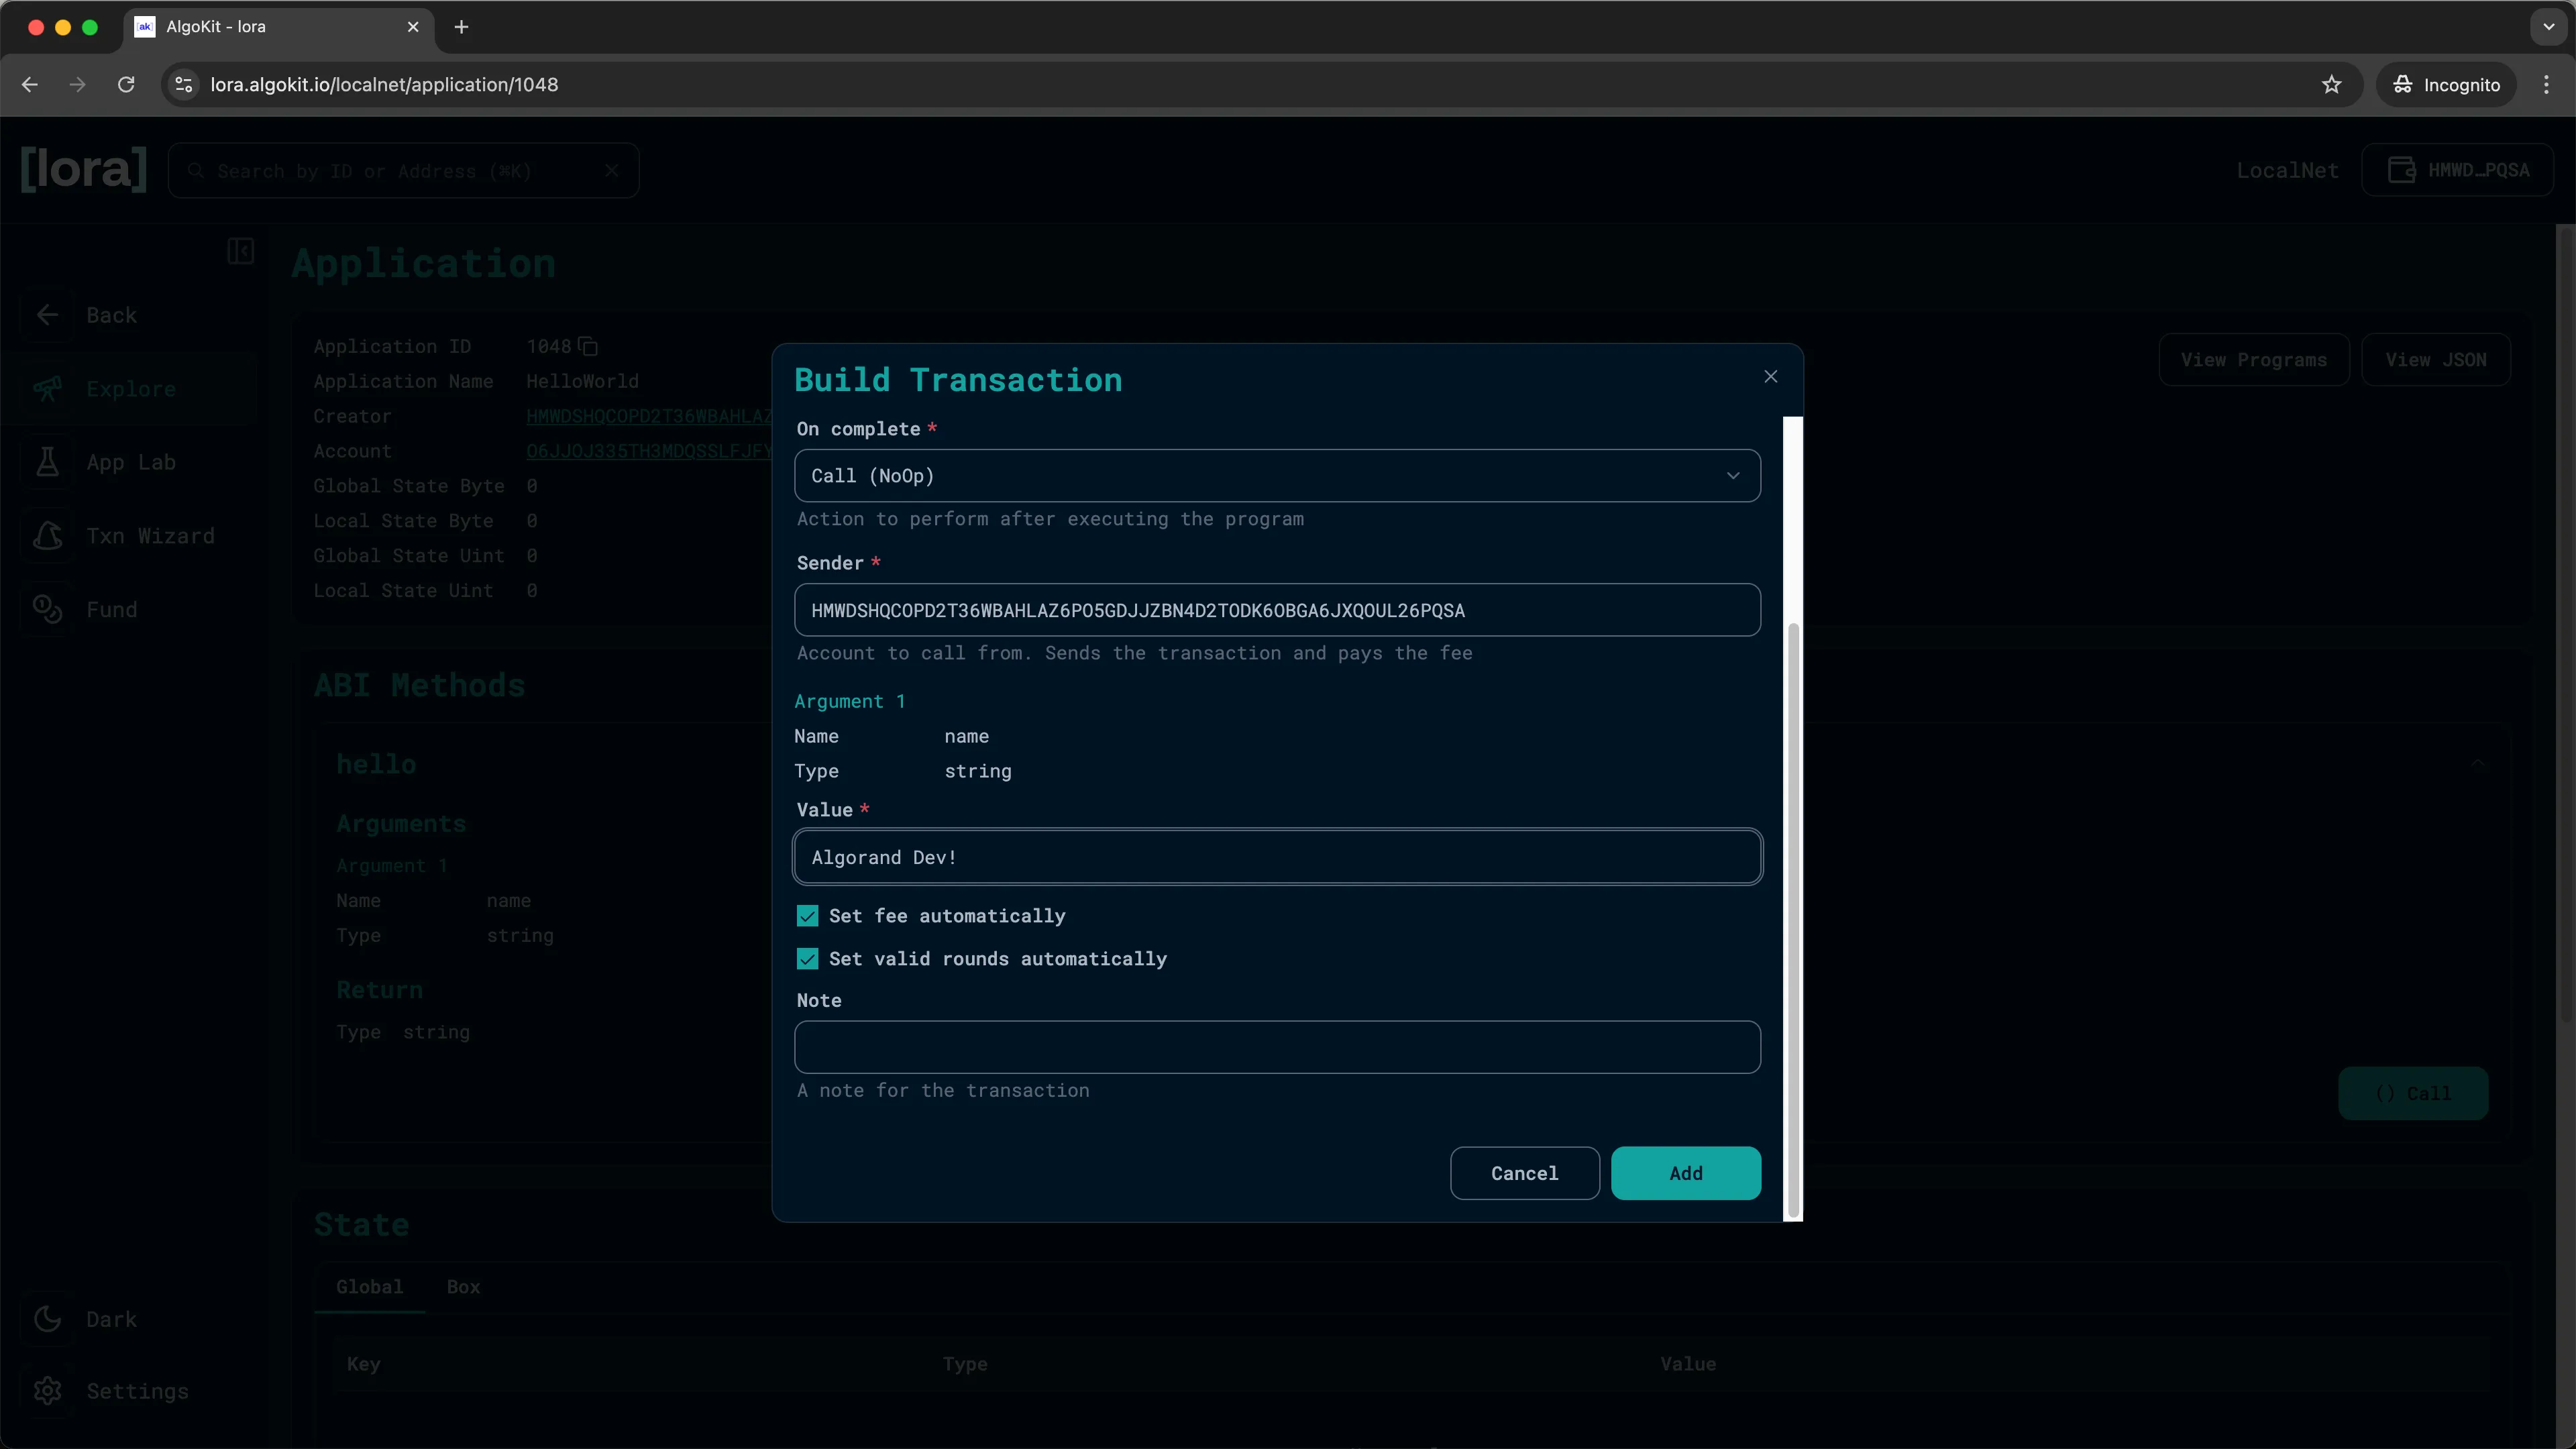
Lora: Method arguments -
You should now see the transaction you just built on the
Applicationpage. ClickSendand sign the transaction with your KMD wallet to execute the transaction.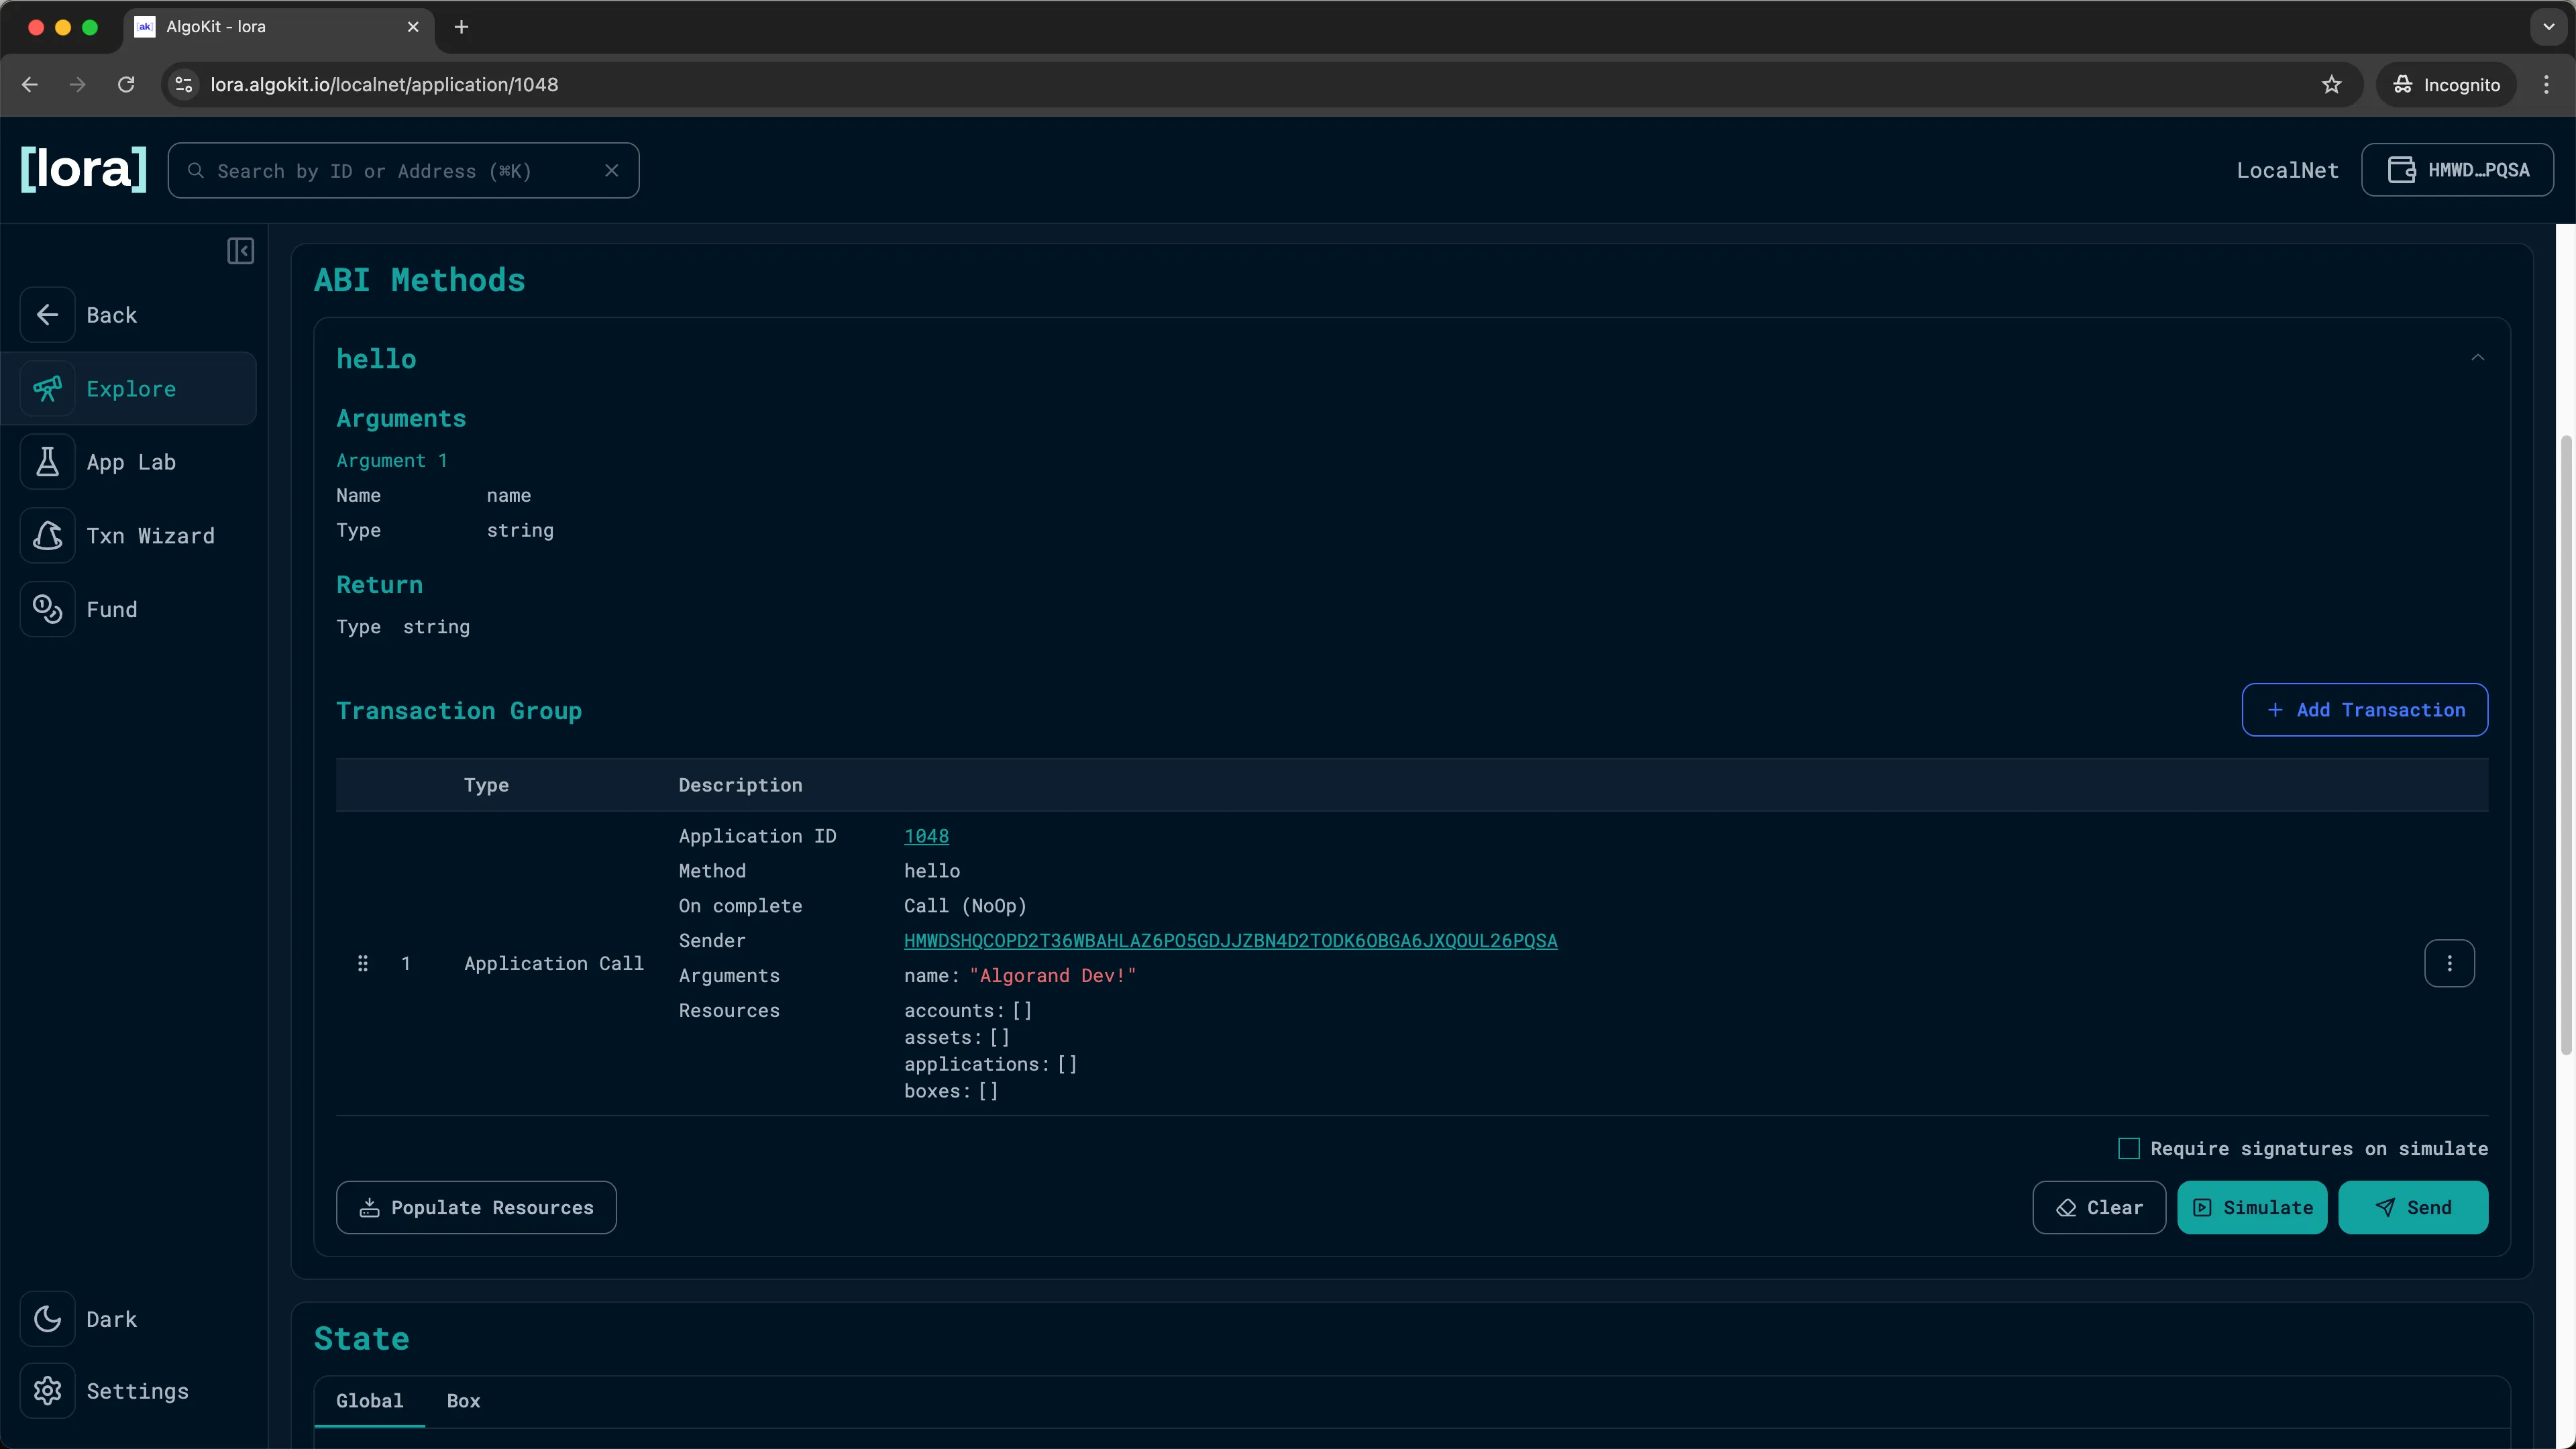
Lora: Sending the transaction -
You should now see the
Send Resultshowing you the details about the transaction you just executed!
Lora: Transaction results -
You can also click on
Transaction IDto go to theTransactionpage and see the full detail of the transaction.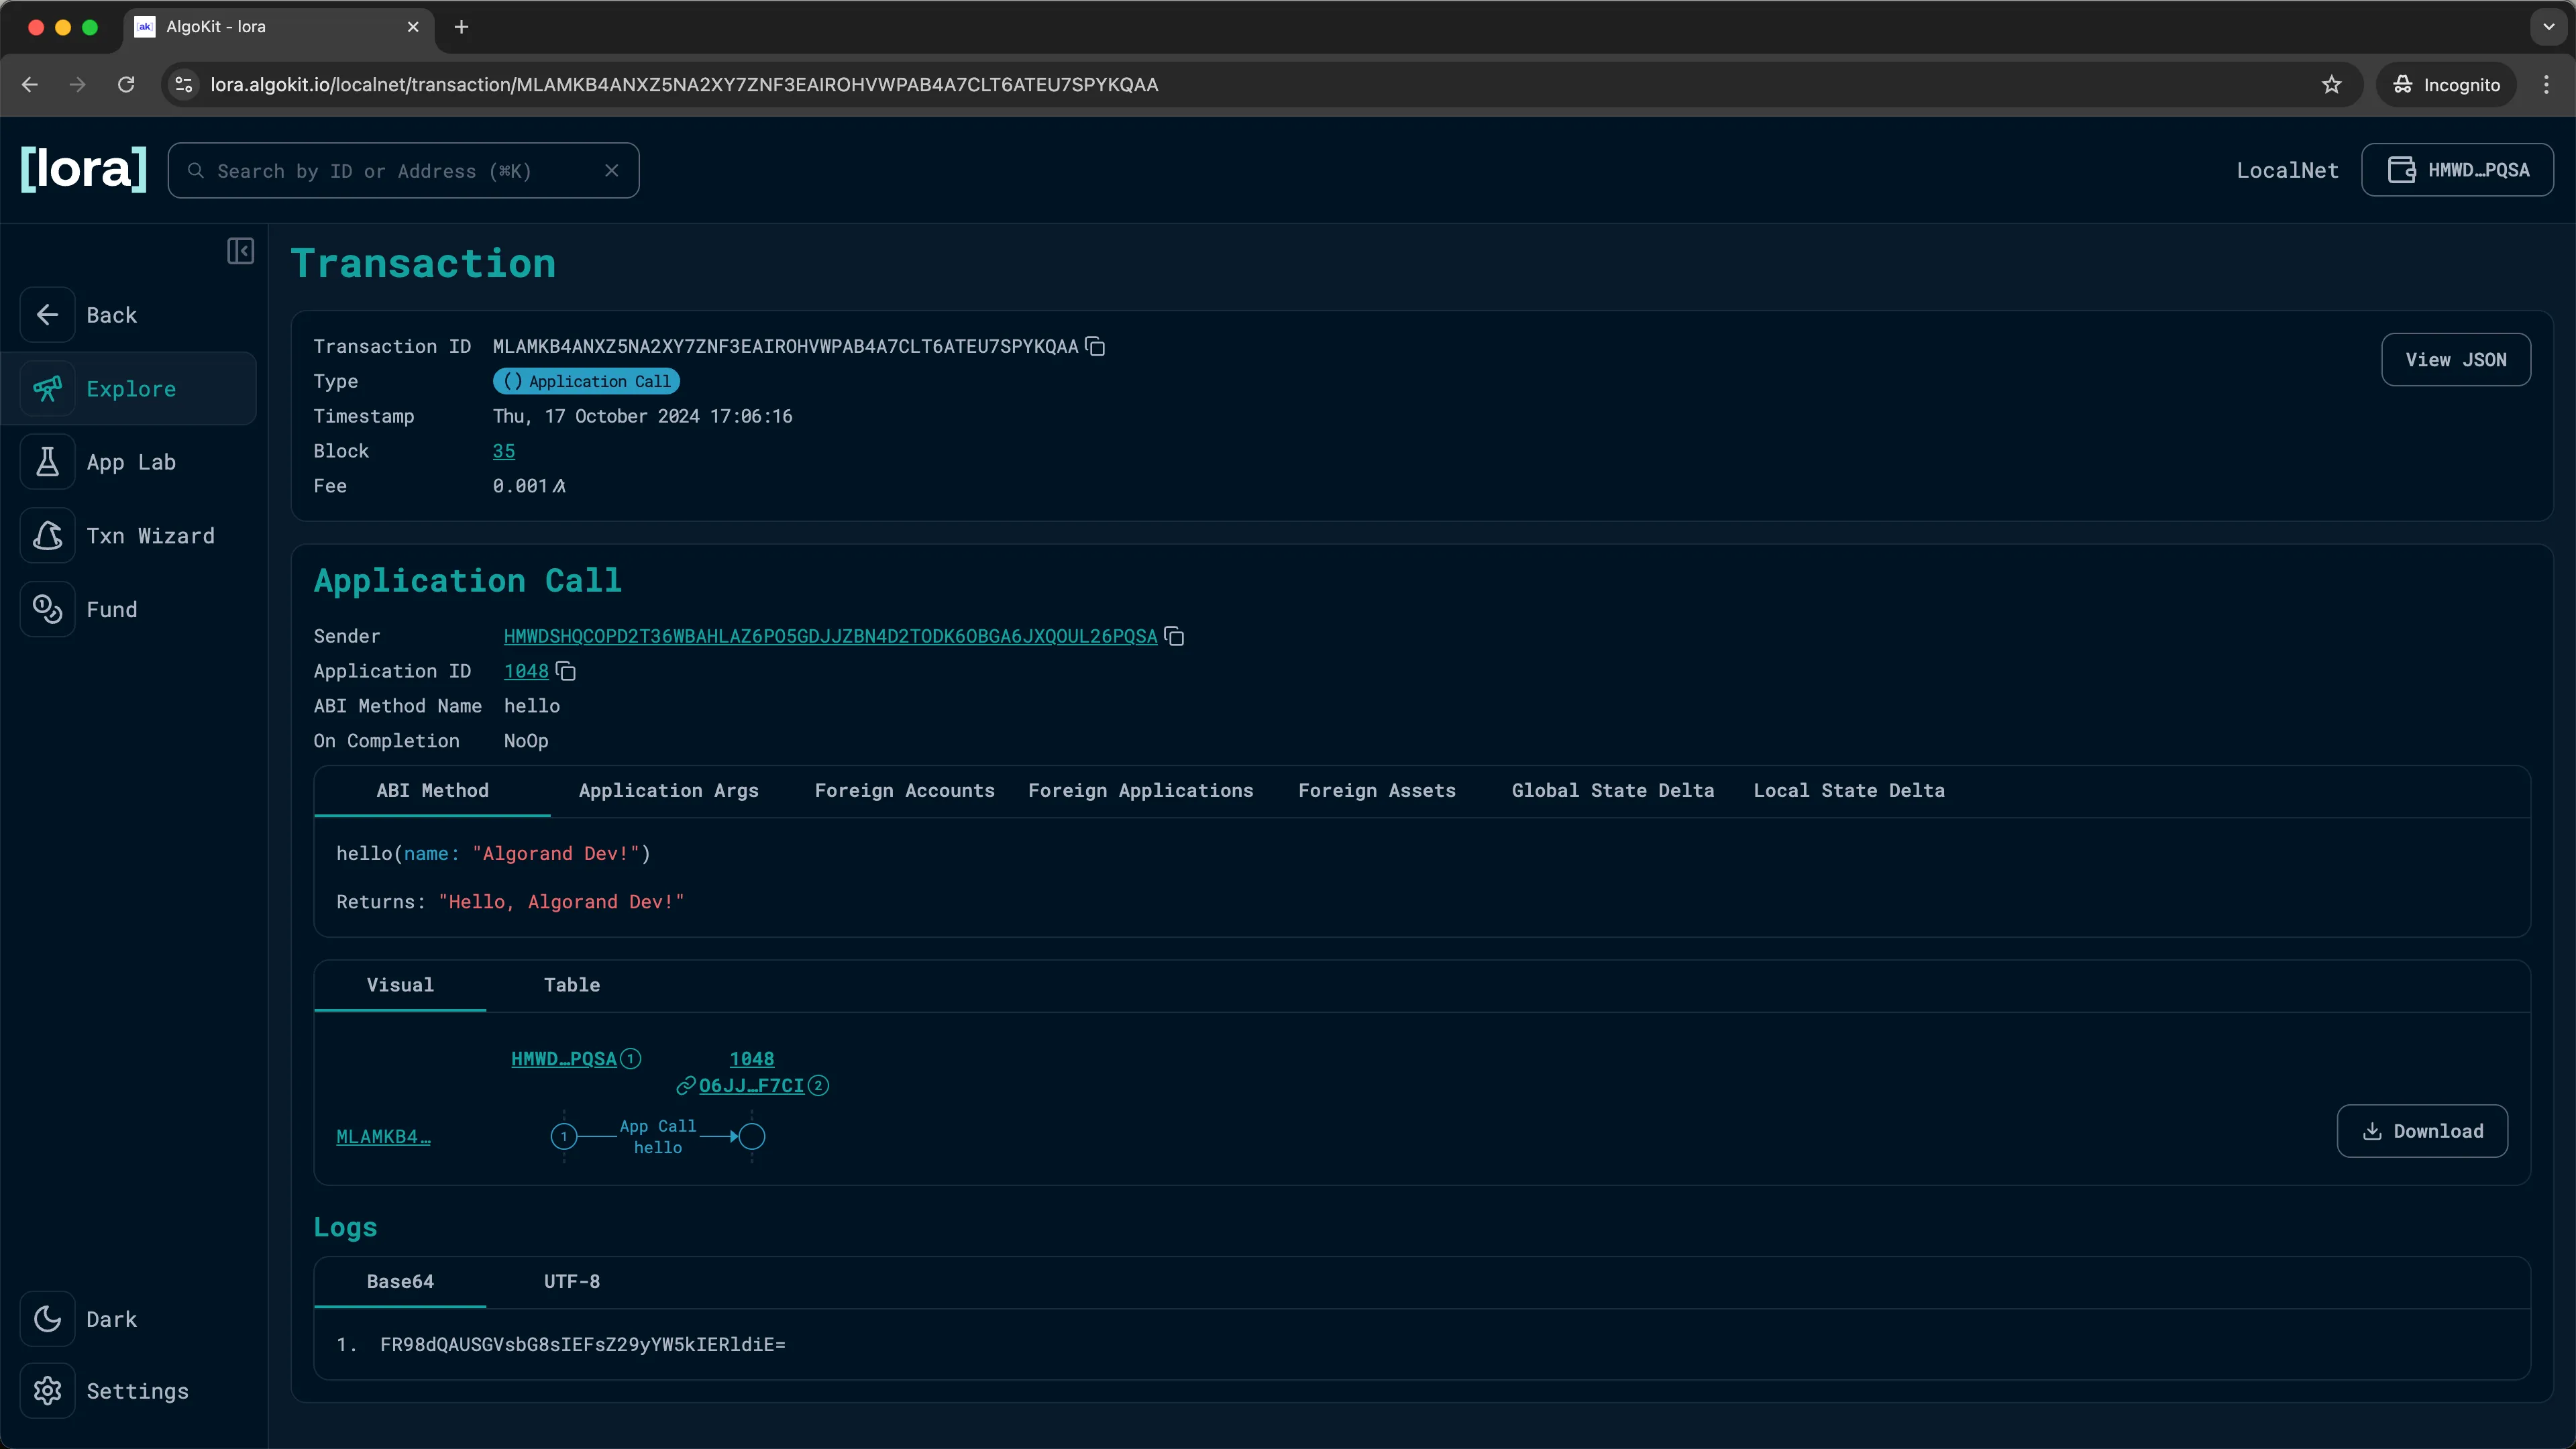
Lora: Inspect transaction details
You have now successfully deployed and executed a smart contract method call using Lora!
Congratulations and great job completing this guide!
If you have followed this guide, you now have deployed a simple contract to an Algorand network and called it successfully! You are now ready to start building your own decentralized applications on the Algorand blockchain.
Next steps
Section titled “Next steps”Learn about general Algorand concepts:
Learn more about AlgoKit: